Everything You Need to Know To Bind Your Quilt (and then some)
Unfortunately, there is only so much room in a quilt pattern, and detailed instruction on binding a quilt don’t often make the cut. For this reason, I have compiled instructions on basically everything you need to know for you to bind your quilt. I have also given you, not just one, but three options to choose from. All three ways use the same methods of creating your binding, and they are pretty similar with regards to attaching it to your quilt, but depending on the amount of time, patience, and tools you have, one method may work better for you. This is by no means an exhaustive list of ways to create and attach binding, but they are the most likely ways you will find me binding a quilt.
There is a lot of information here, so I have created this “Table of Contents”, so to speak. Should you choose to jump to certain instructions instead of reading through all of them, be my guest.
How to Make Your Own Binding
First: Cut Your Binding Strips
“How Many Strips?” Math
Second: Create Your Binding Tape
Attaching the Binding - General Overview
Starting Off
Mitering the Corners
Joining the Ends
Sewing it Down on the Other Side
My Three Favorite Methods
By Hand
By Machine - Traditional
By Machine - Stitch in the Ditch
“How Wide Do I Make My Binding” Math
How to Make Your Own Binding
Creating your own binding (or binding tape) is the exact same for any of three methods mentioned later. It’s the length and width of your binding that may differ. The length you your binding will change based on the size of your quilt, but essentially, the bigger the quilt, the more strips you will need to create a longer binding. I have the instructions for figuring out that math in the next section, if it’s not given to you in a pattern. The width of your binding strips will vary on personal preference, and how much wiggle room you need for error. More details on that will be described in the different methods, but for the instruction so how to create binding, we will be using 2.5” width strips, mainly because that is most commonly seen.
But let’s go through the basics steps to create your binding that, which are all the same. The method below is for creating straight-grain binding for a quilt with a typical square or rectangular shape. I used to make all of my binding on the bias (diagonal with the grain of fabric) because I thought I had to. Now, I only make bias binding if my quilt has a curved edge or corner that is not a 90 degree angle. Otherwise, I cut my binding straight with the grain. I think straight-grain binding is easier to do math for, easier to work with, and is a more conservative use of my fabric, leaving me with less waste.
First: Cut Your Binding Strips
As I said earlier, we are assuming a 2.5” width of strip for binding for these instructions. The length of your strip will be based on the size of your quilt which will determine the number of strips you need to cut, and that can be figured out using the steps below:
“How Many Strips” Math
1. Add up the length of all four sides of your quilt in inches. This is your perimeter. (Example: My Mazant quilt is a 60 inches square throw. The four sides are each 60 inches. 4 x 60 = 240. It’s perimeter 240 inches.)
2. Decide the width of your binding strips and subtract this number from the width of your binding fabric (I like to use 42” for this number as it is pretty accurate, but is also on the conservative side). This number is the length each of your strips will be after it’s sewn using a diagonal seam. If you are using 2.5” wide binding strips, and your fabric is 42” , then this number is 39.5 (42 - 2.5 = 39.5)
3. Divide your perimeter, by the length of each strip to find out how many strips you need. (Going with my Mazant example, 240 divided by 39.5 equals 6.08. 6.00 (an even whole six strips) isn’t quite enough because I need 6.08 at minimum, so I will need to round up to 7 strips to bind my Mazant quilt. Rounding up inherently gives me overage. If the math is too exact, I add an extra strip so that I have wiggle room with the tails of my binding when it comes to joining them later on.)
4. BONUS STEP. To find out how much fabric I will need, I take the number of strips I need from the previous step, (My example is 7) and I multiply that by the width of each strip. Continuing with my example: 7 x 2.5’ = 17.5”. At minimum, I would need 17.5”, which can easily be rounded up to a half-yard, or 18 inches. I might get closer to 5/8ths for some wiggle room in case of errors.
Second: Create Your Binding Tape
Step 1
Trim off the selvedge.
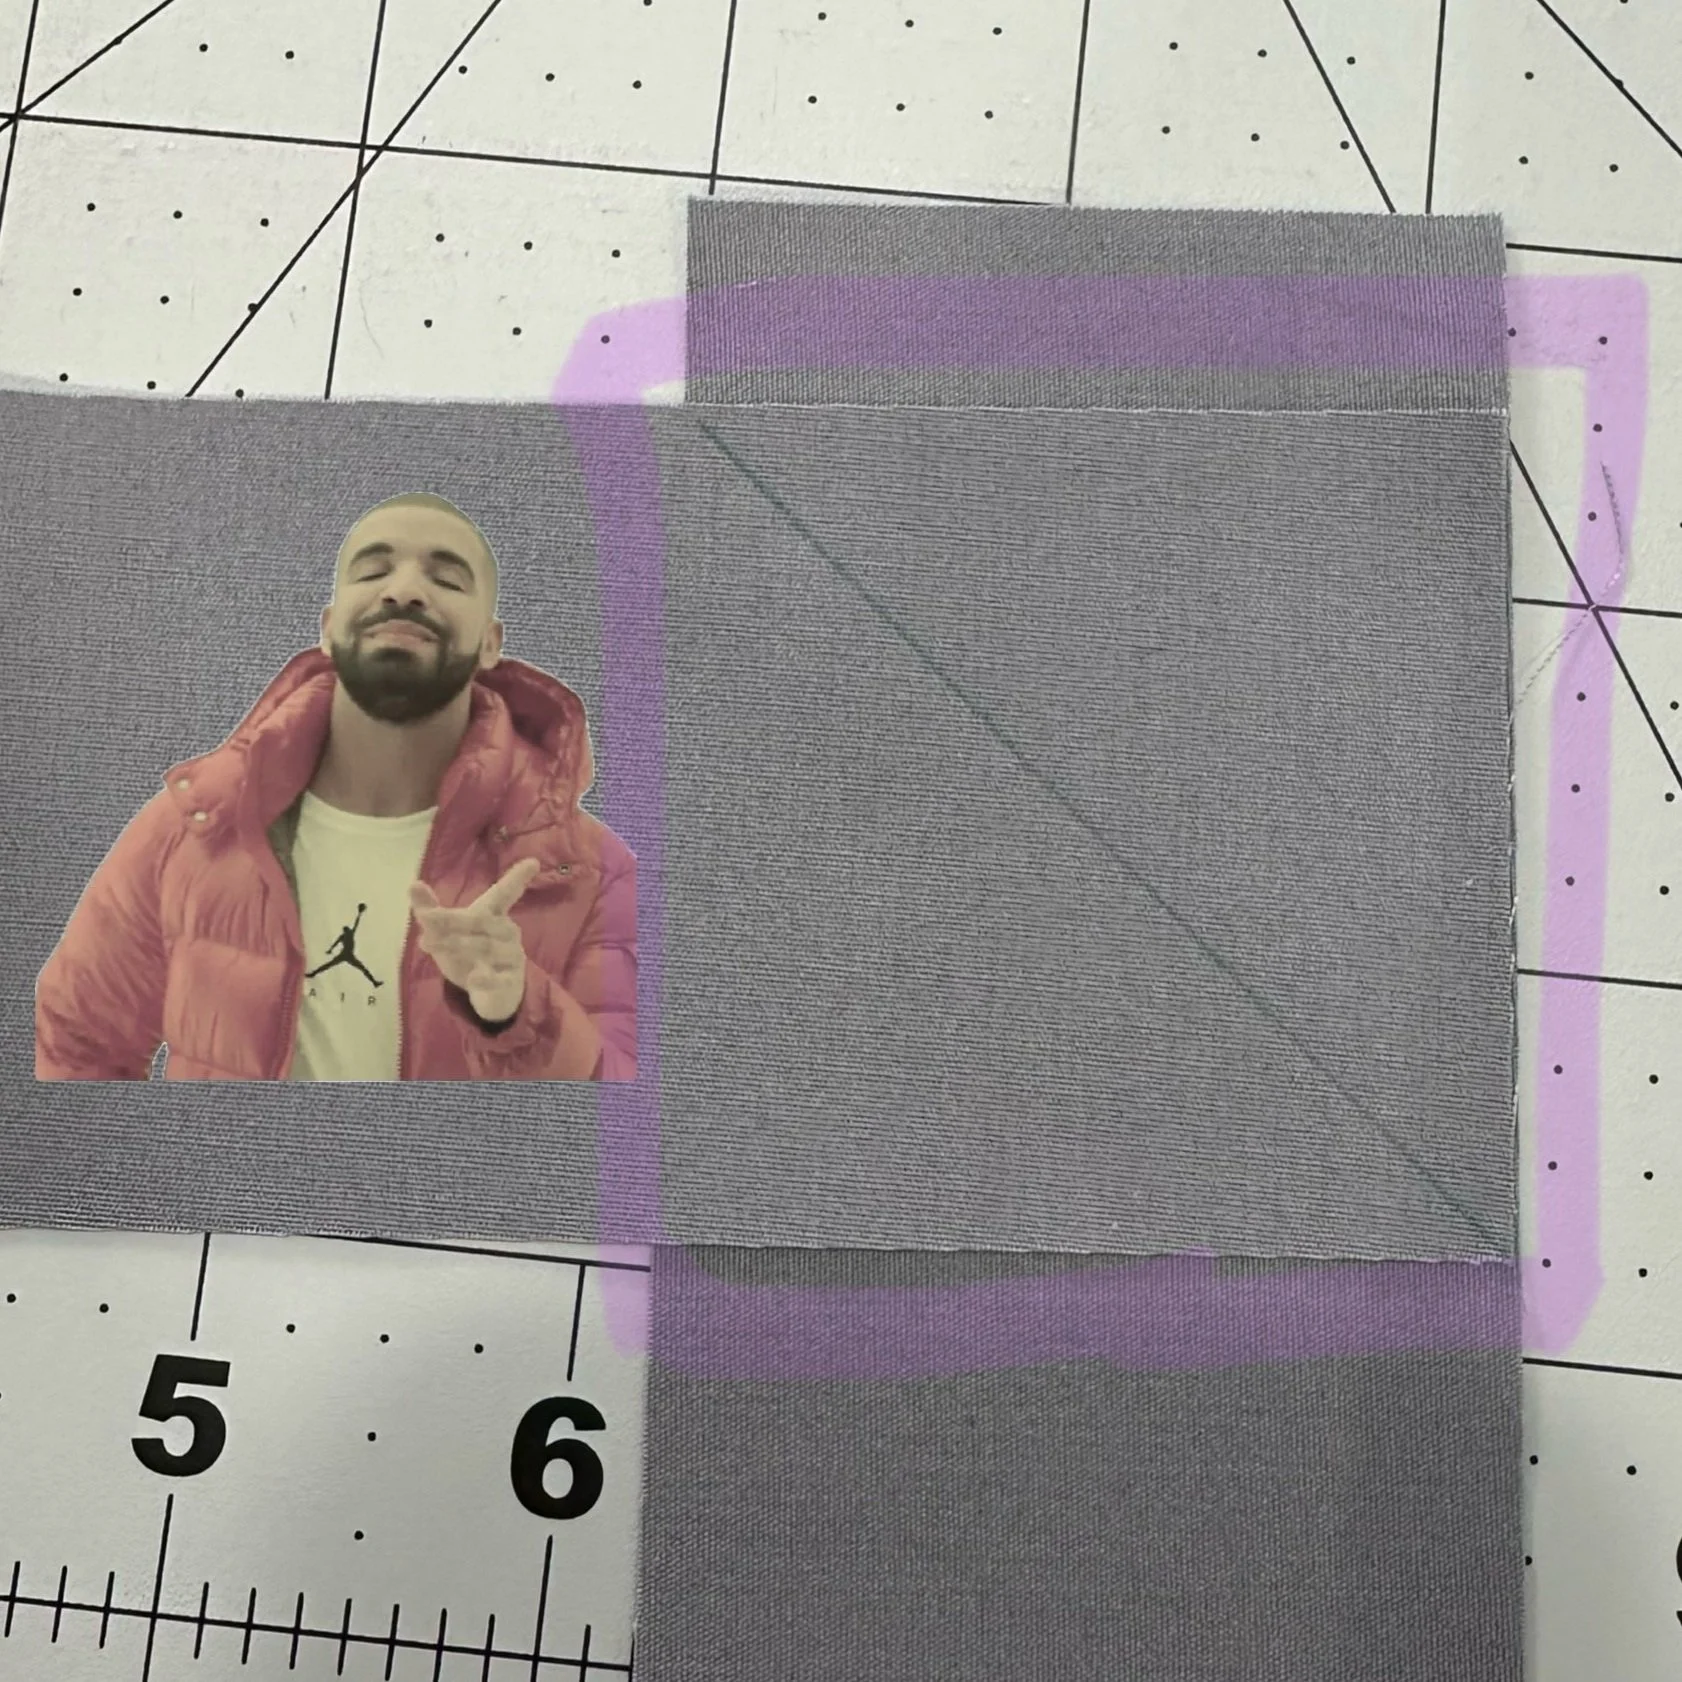
Place two strips right sides together, aligning each short edge of one strip to the long edge of the other. This creates an L shape with the strips and a square where the two strips overlap.
See the picture with the square overlapping area highlighted in blue.
Step 2
Drawn a line with a fabric marker from corner to corner of the overlapping “square”. You want the majority of both strips on the same side of your drawn line.
(*My new favorite way I saw this explained, is that if the two strips are “legs”, you want to drawn your line along the waste, not through the crotch")
Happy Drake is indicating the correct direction of the drawn line, Sad Drake is indicating the incorrect direction.
Step 3
Join the two strips together by sewing along the diagonal line. (The diagonal seam is used because it helps spread the bulk of the seam out when when we fold our tape on it’s self multiple times.) Trim 1/4” way from the seam so that you are removing the excess. (In analogy above, if we sewed along the waste and not through the crotch, we are trimming above the waste to remove what’s above. We don’t want to trim below and cut off our legs)
Step 4
Step 5
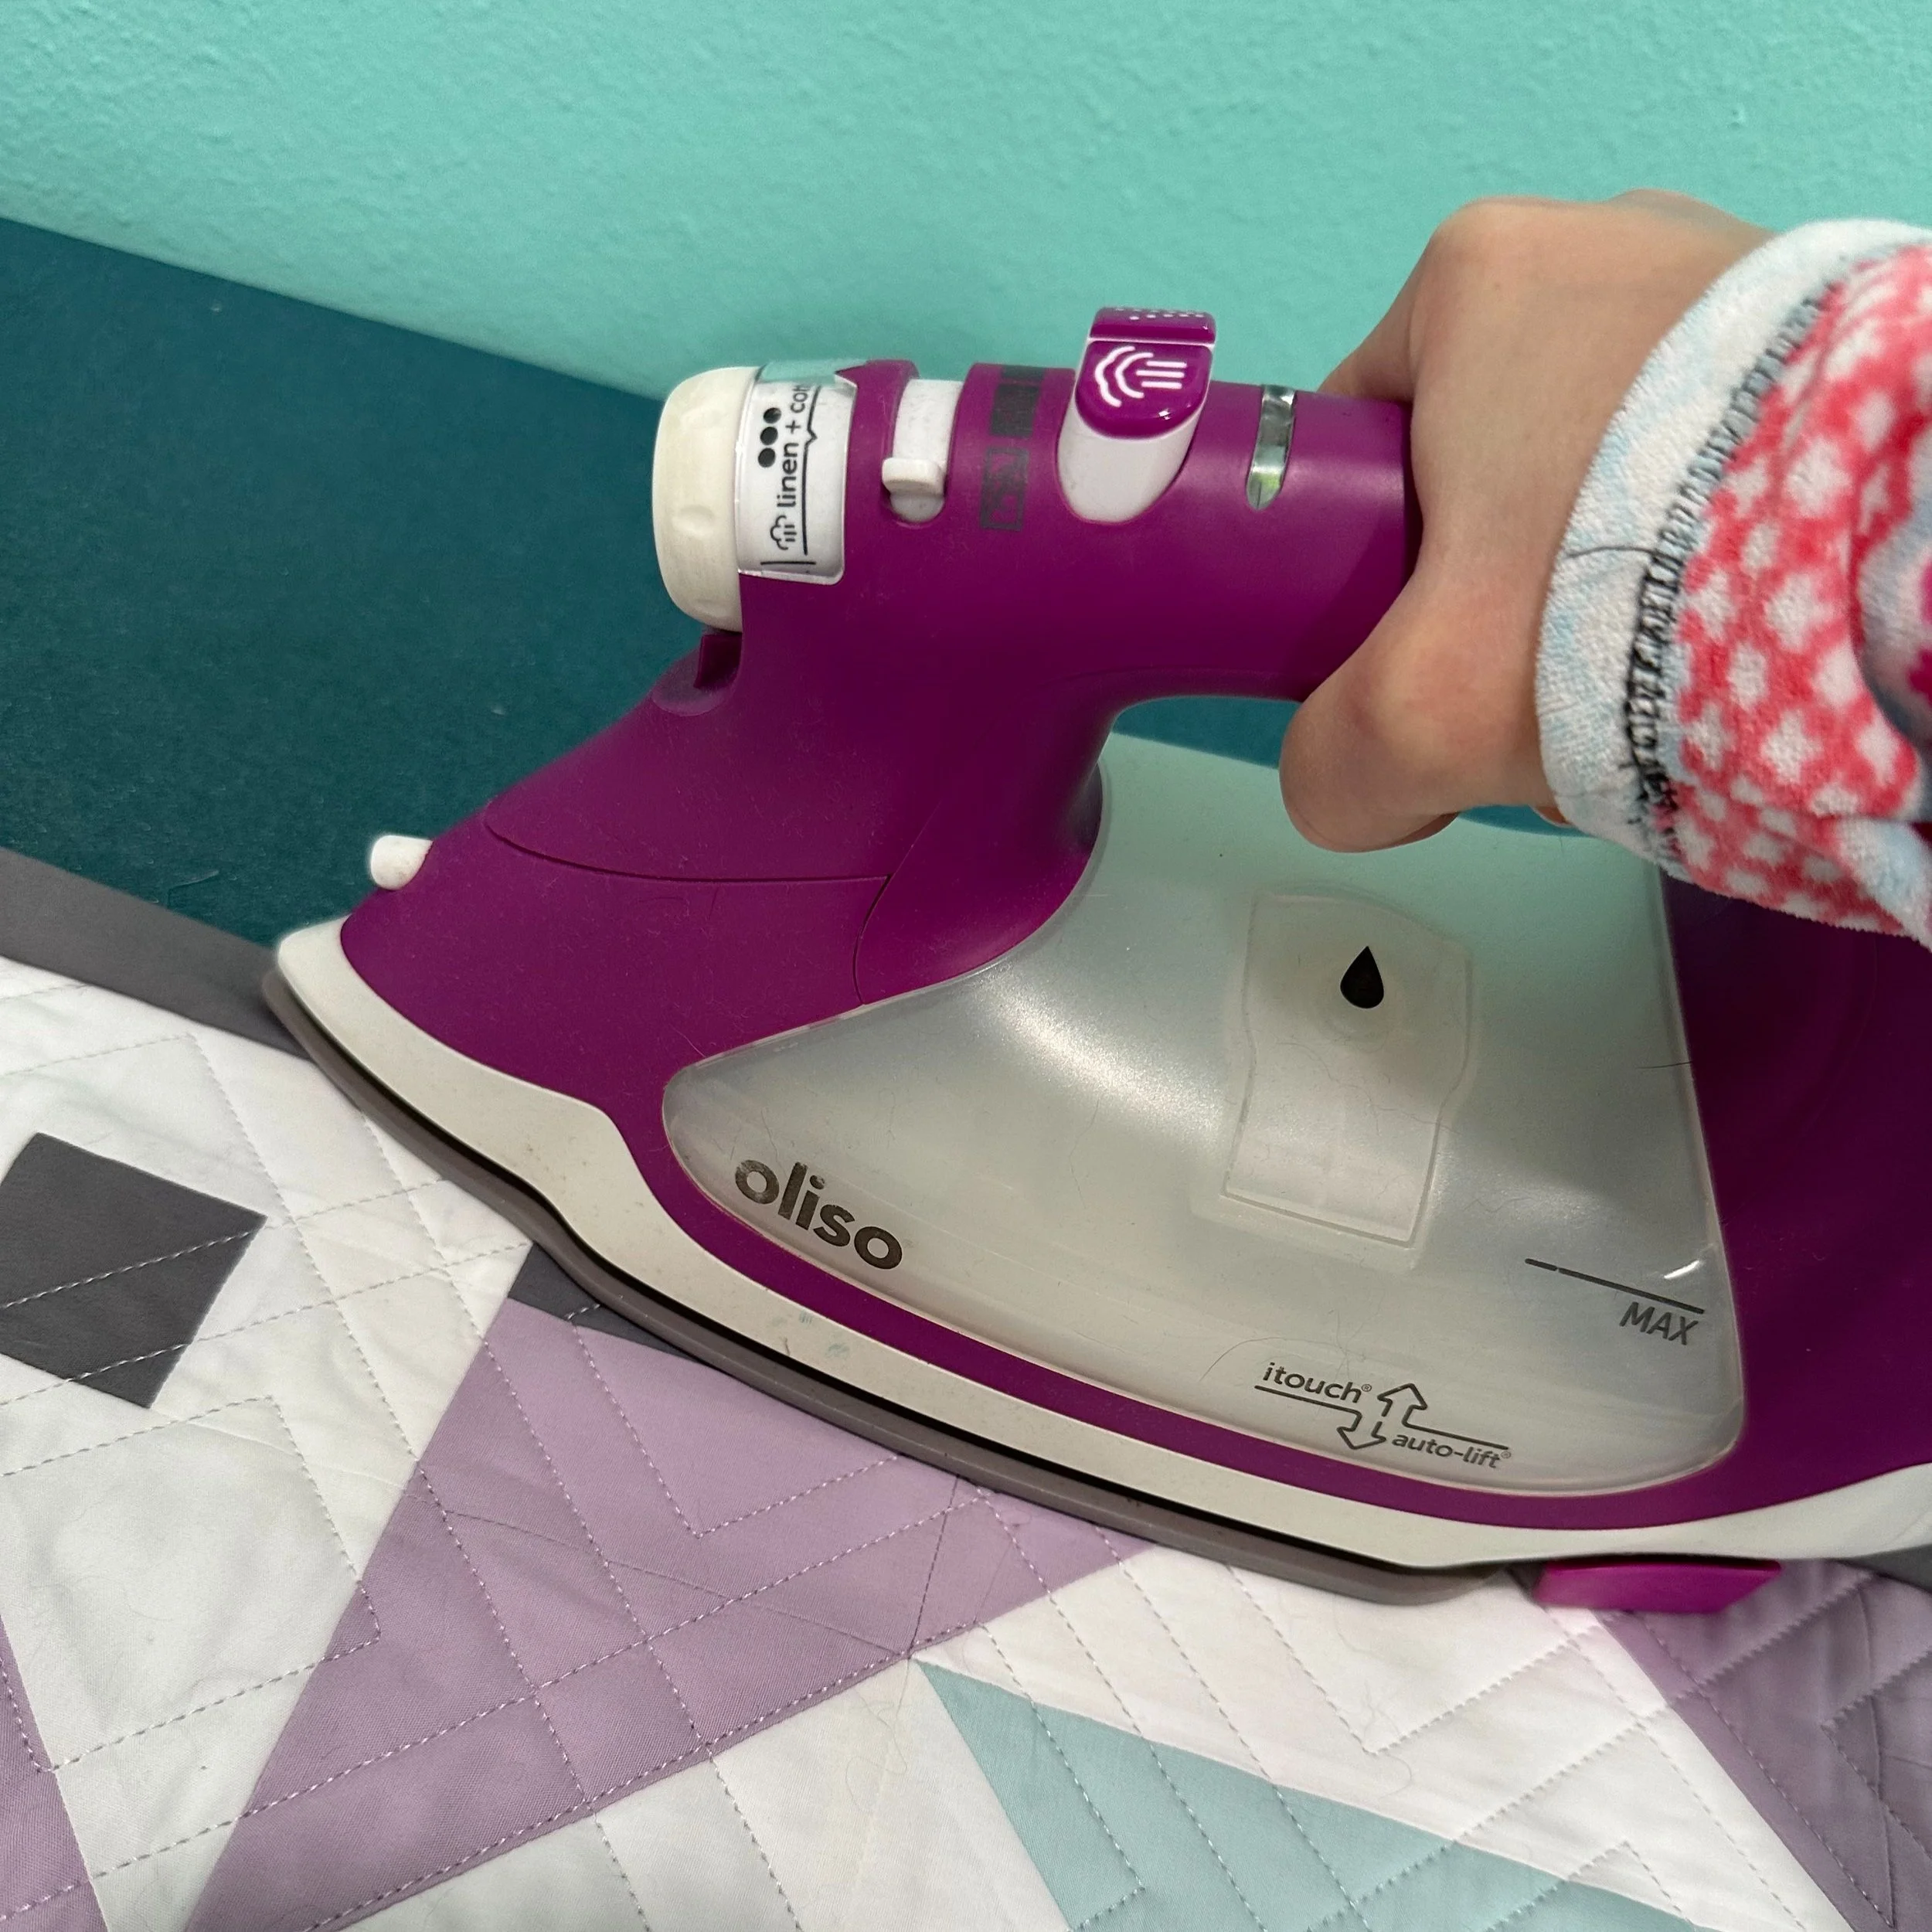
Press seams open.
Step 6
Repeat until all strips are joined in one continuous length
Step 7
Press the tape in half, wrong sides together so that both long raw edges are together.
Attaching the Binding - General Overview
The following are general instructions for how to attach your binding to a quilt. The function of how it hides the exposed the raw edges of your quilt are the same in all three methods of binding mentioned later. The instructions are purposefully vague on which side to attach the binding to because that will change depending on which method of binding your choose.
Starting Off
Pick where you want your binding to begin and end. I like to pick an inconspicuous part of your quilt in case there is some puckering or pleating. I like it to be on the bottom edge of the bottom of one of the sides, but I like to start at least 6” away from a corner.
Align the raw edges of your binding with the raw edges of your quilt (whether it’s on the front or back is determined by which method you choose).
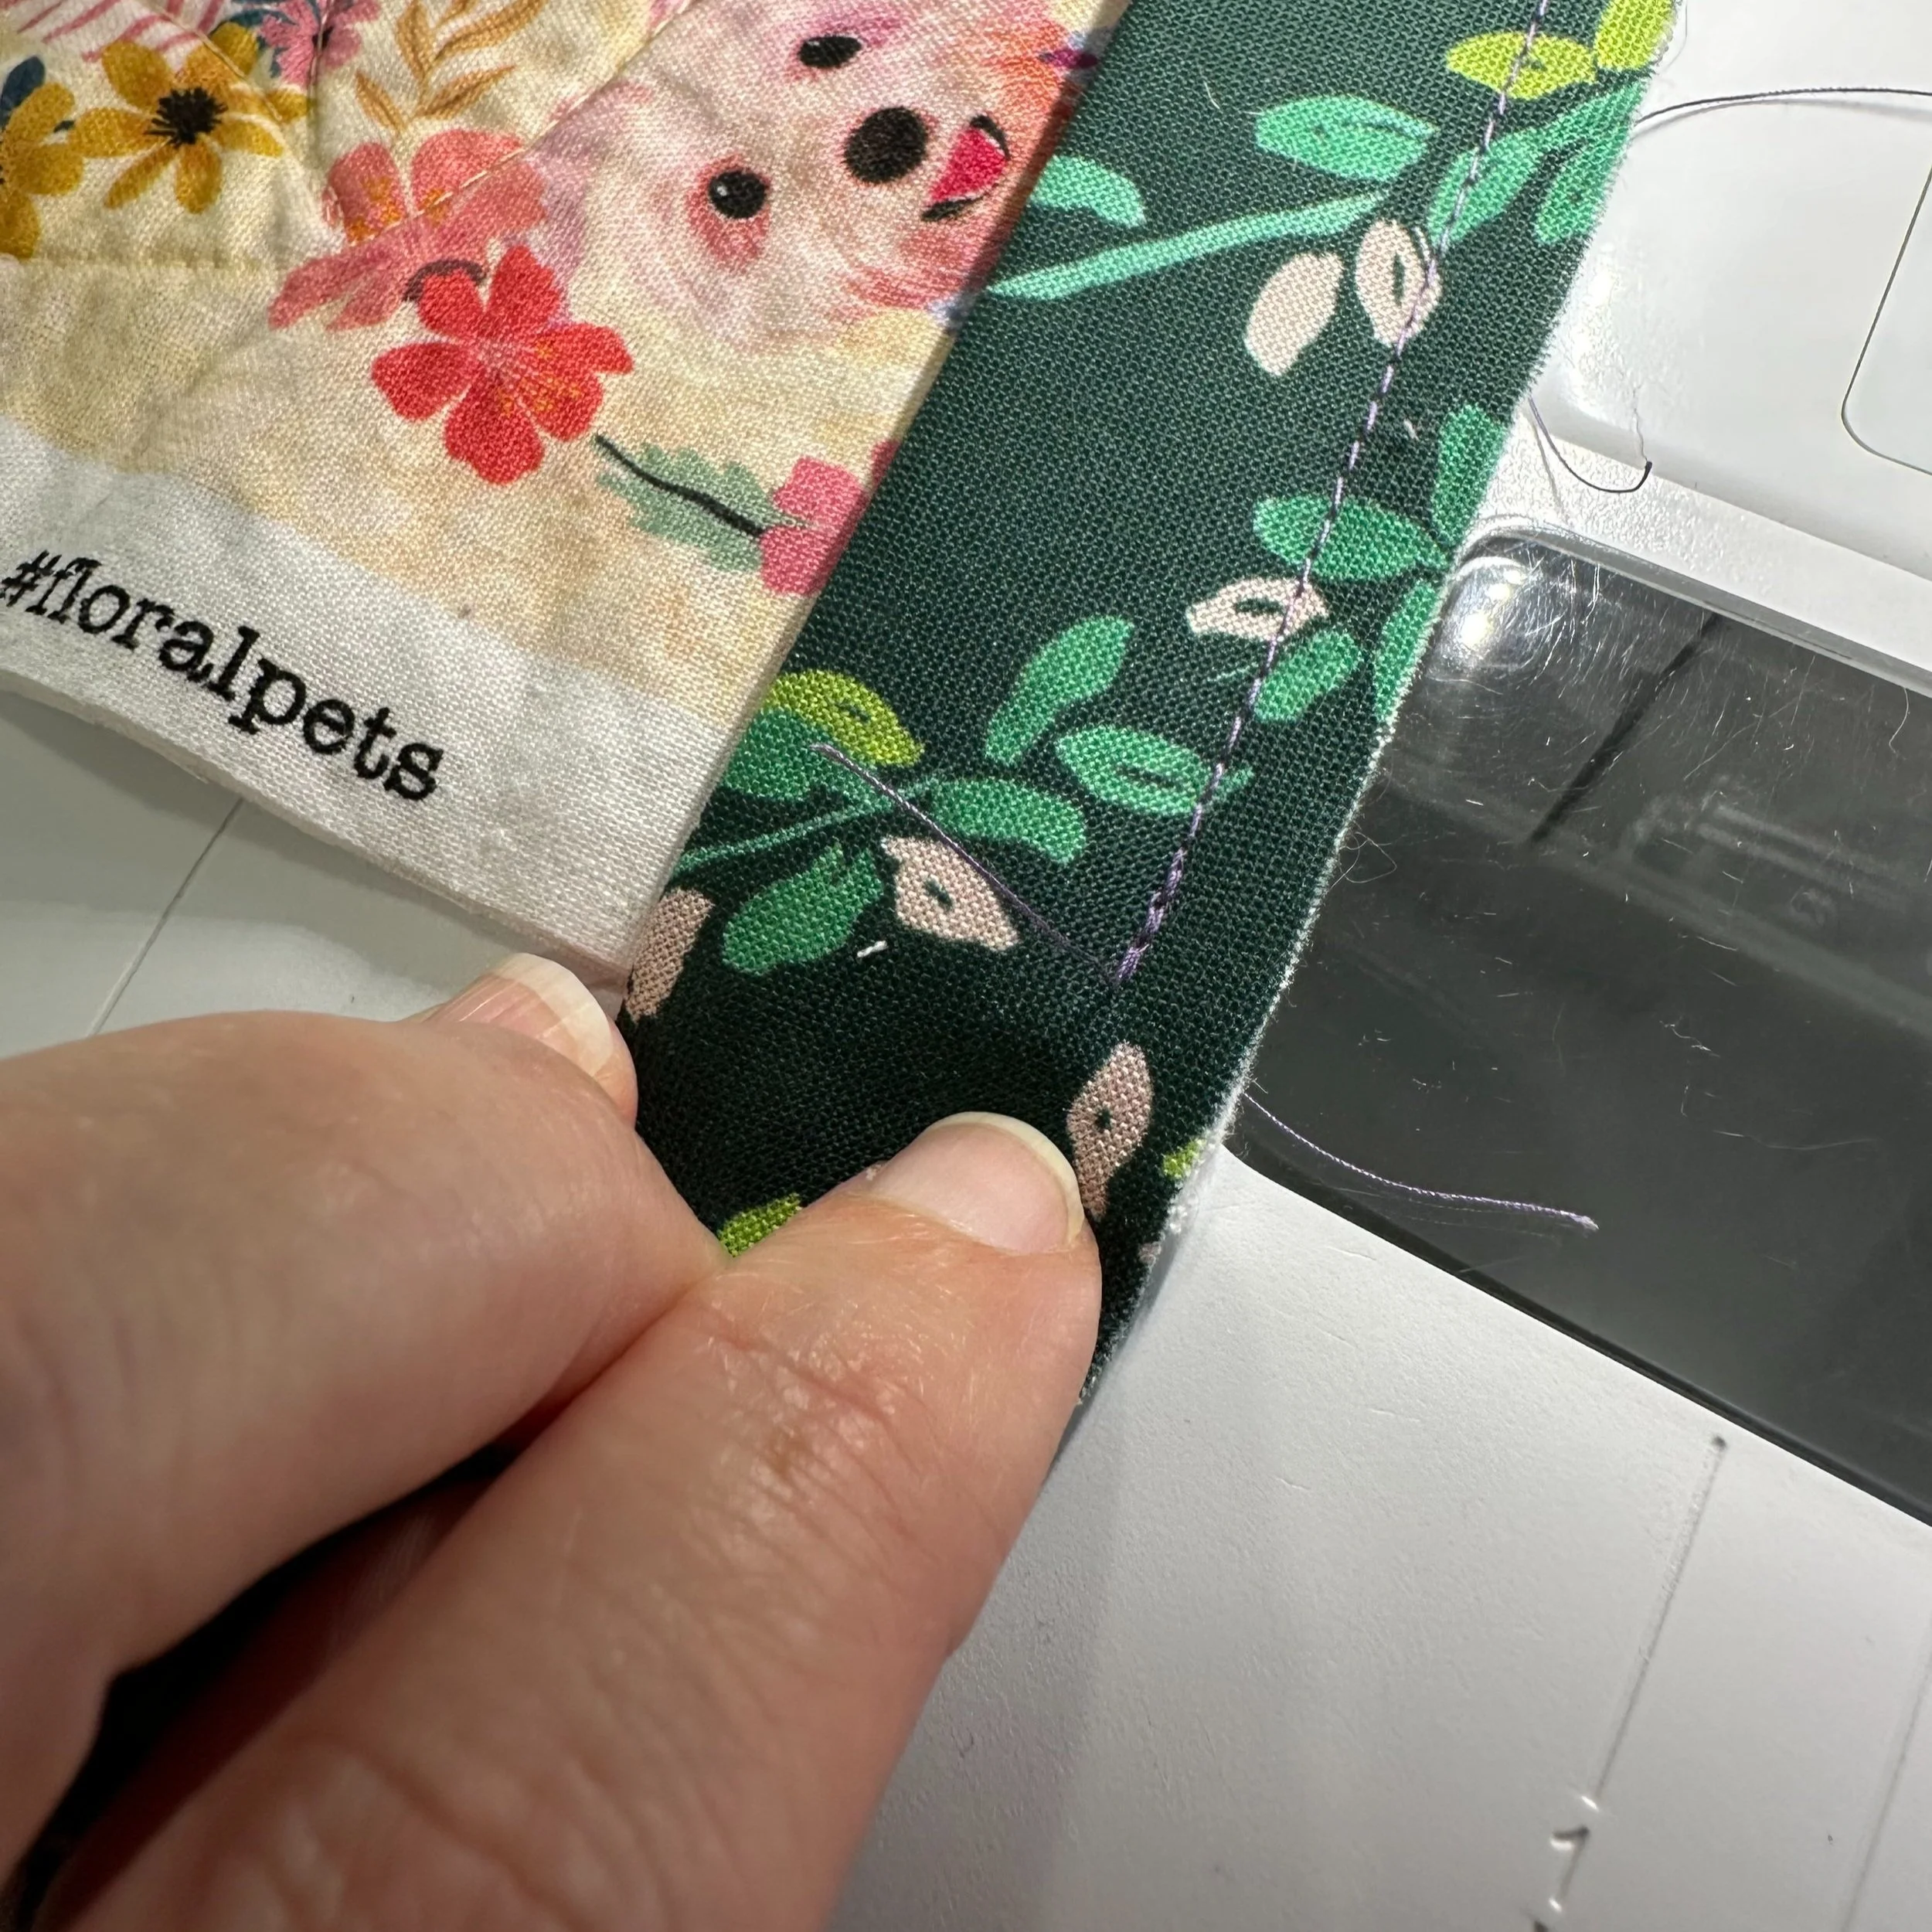
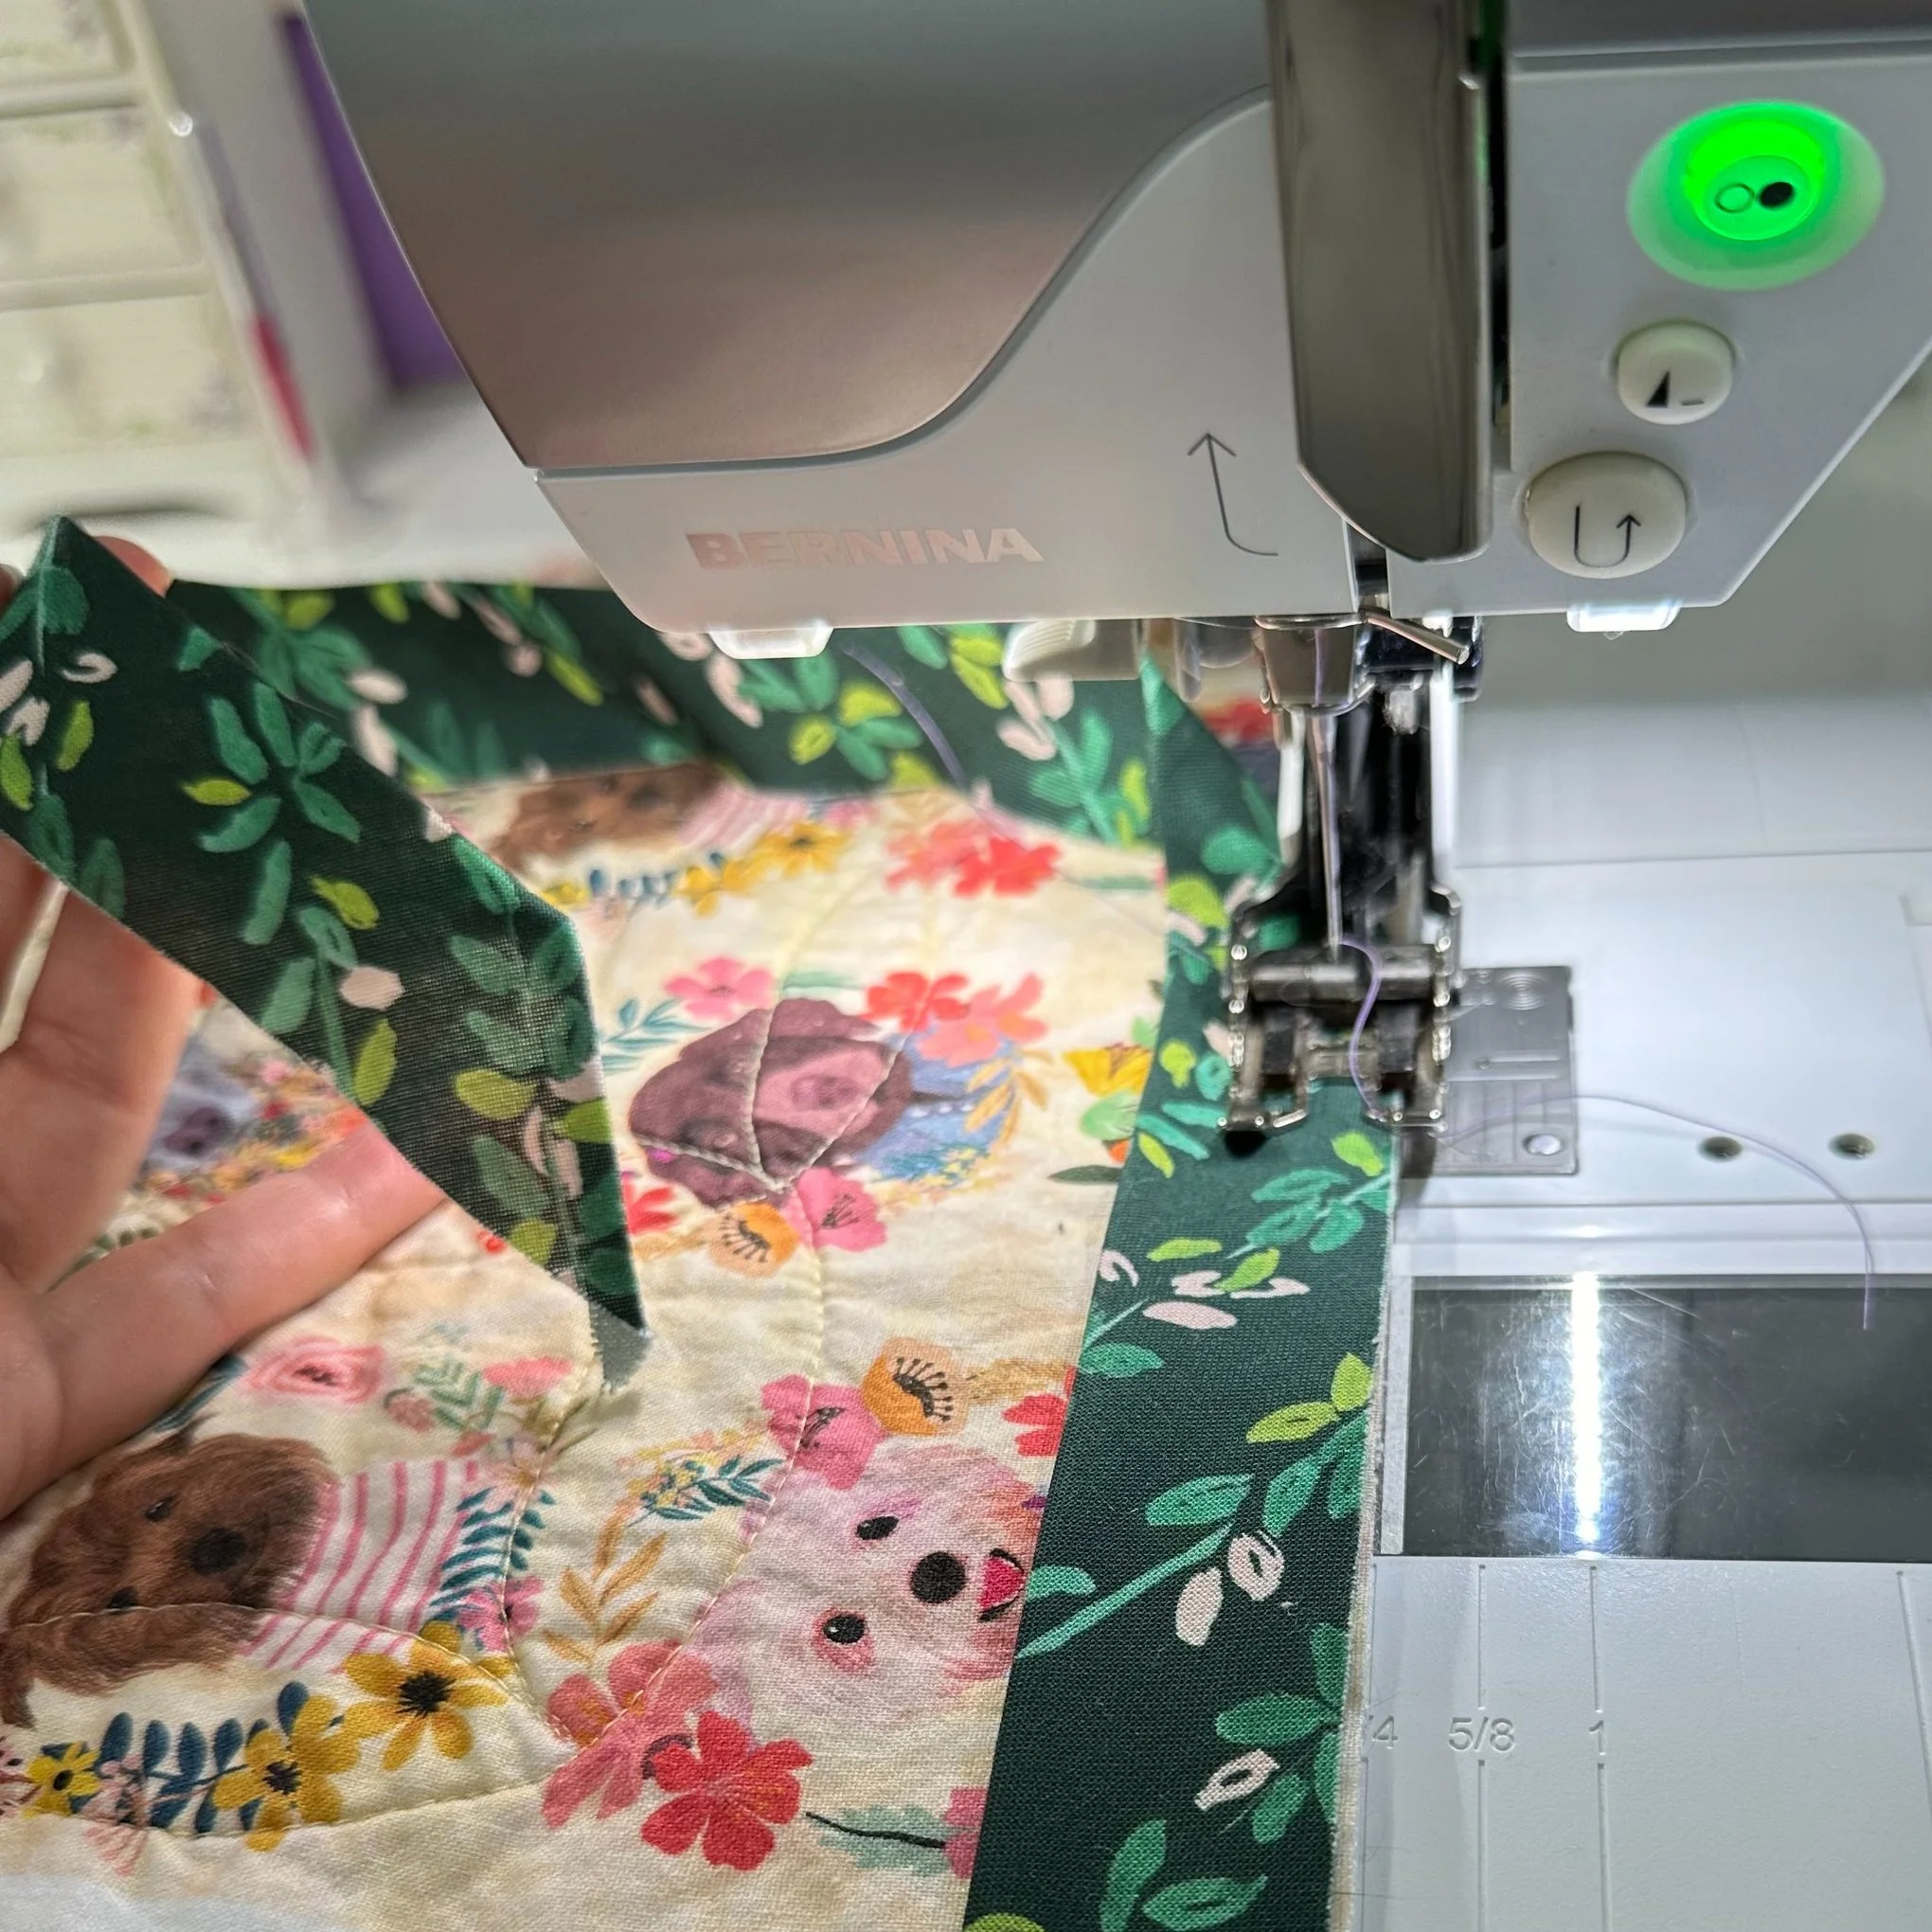
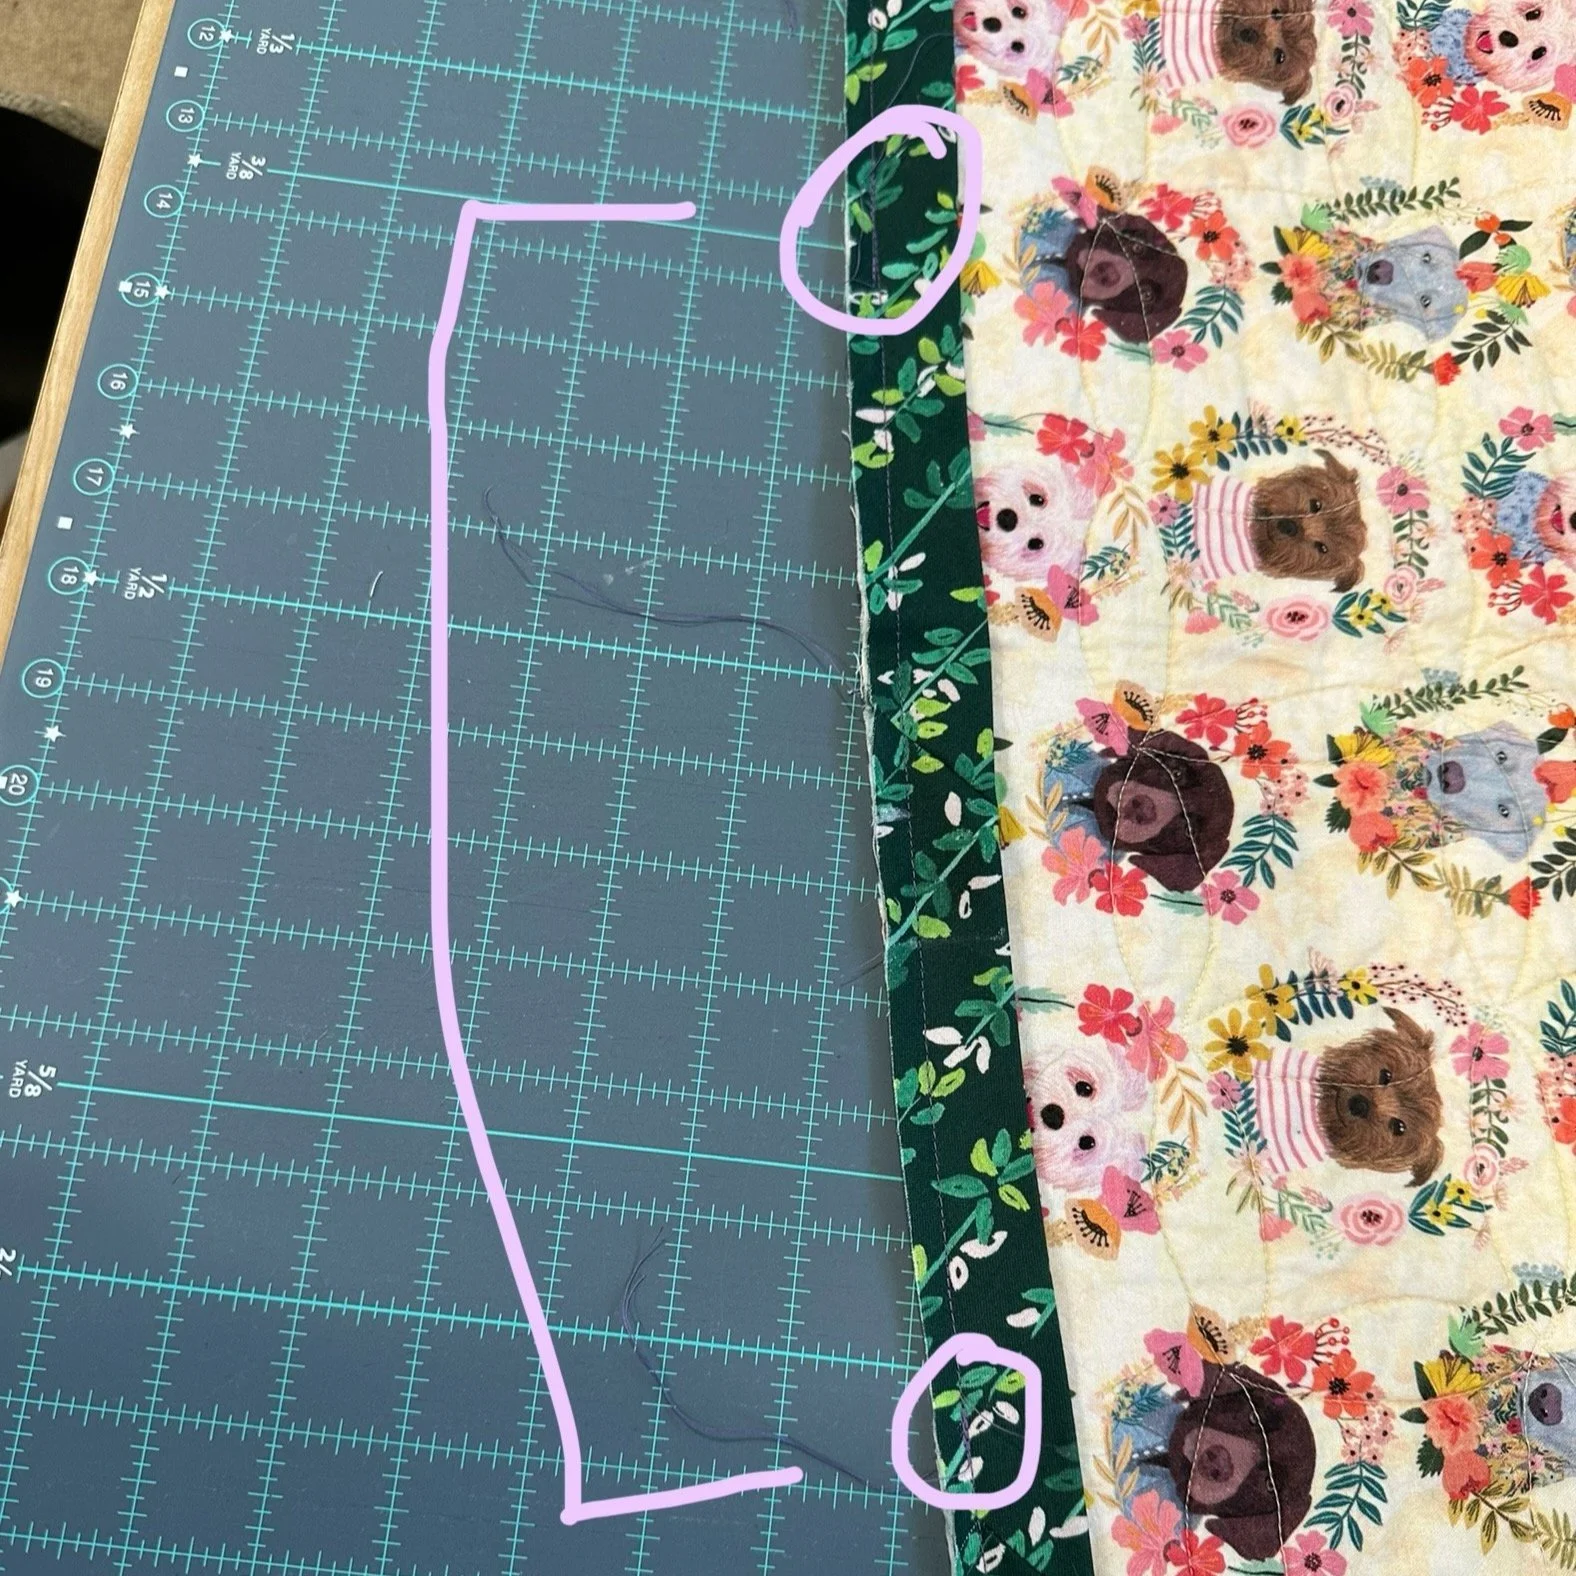
Starting at least 10” into your binding strip, sew your binding to your quilt using a 1/4” to 3/8” seam allowance. You can see in the pictures that the raw edges of my binding are lines up with the raw edges of the quilt, and I am starting further into my binding. I have several inches of “tail” of green binding in the picture to the right.
Mitering the Corners
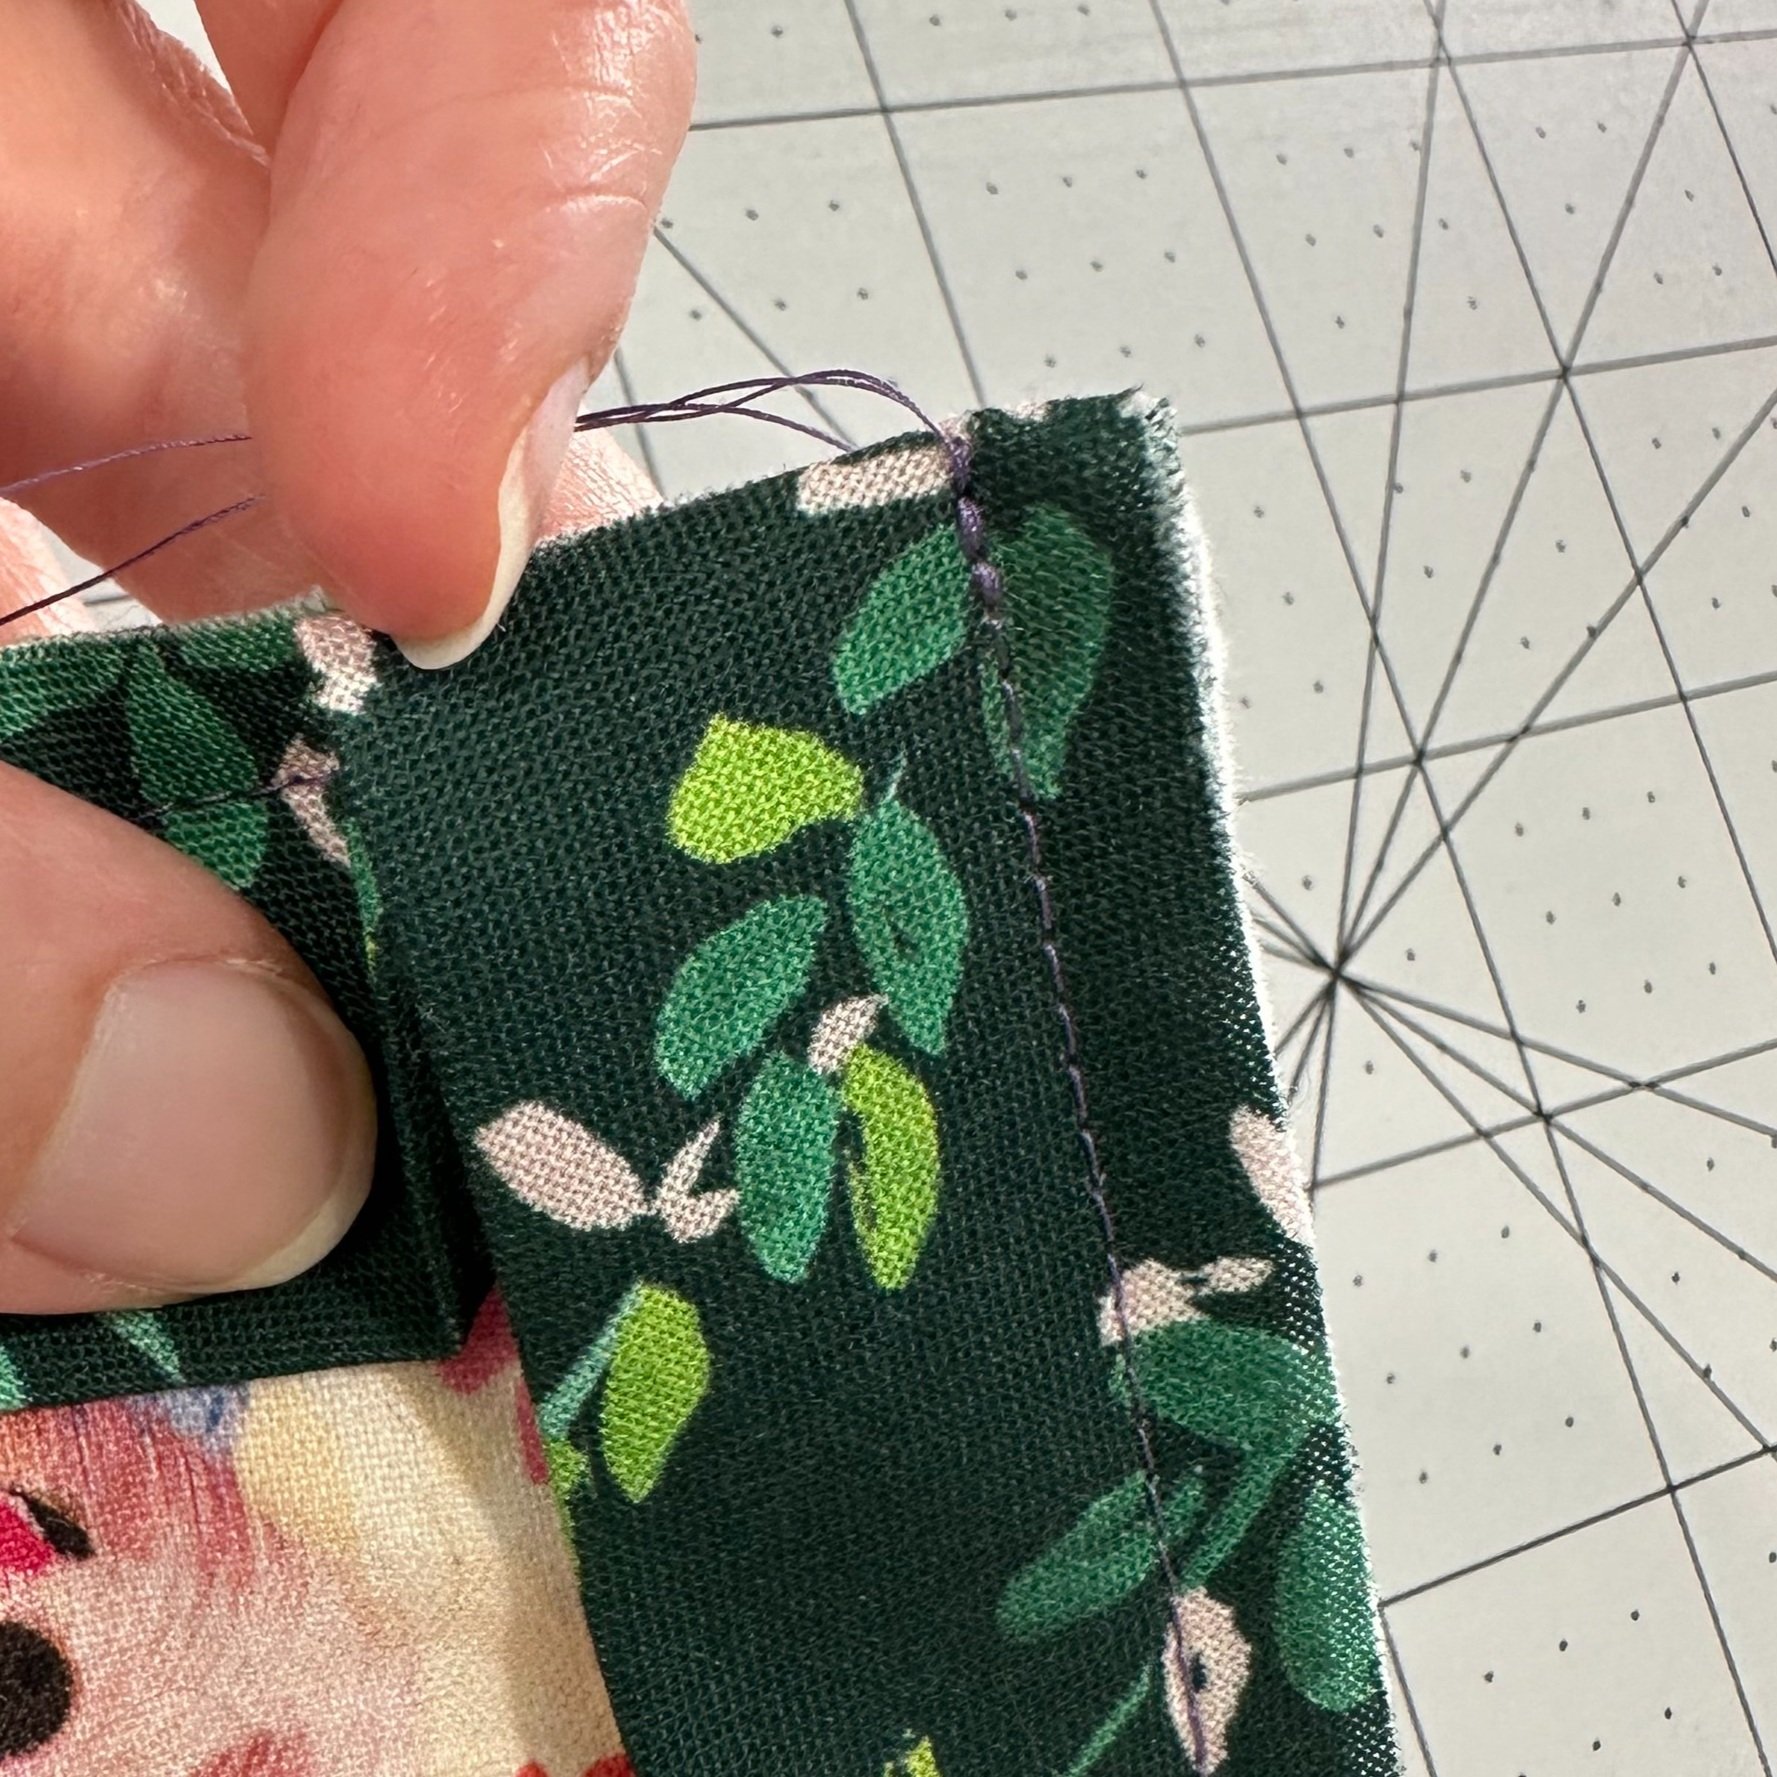
Either back stitch, making sure not to sew into the seam allowance area for our next side, (picture on the right) or sew off the edge of your quilt at a 45 degree angle, straight towards your corner (pictured on the left).
Cut your threads.
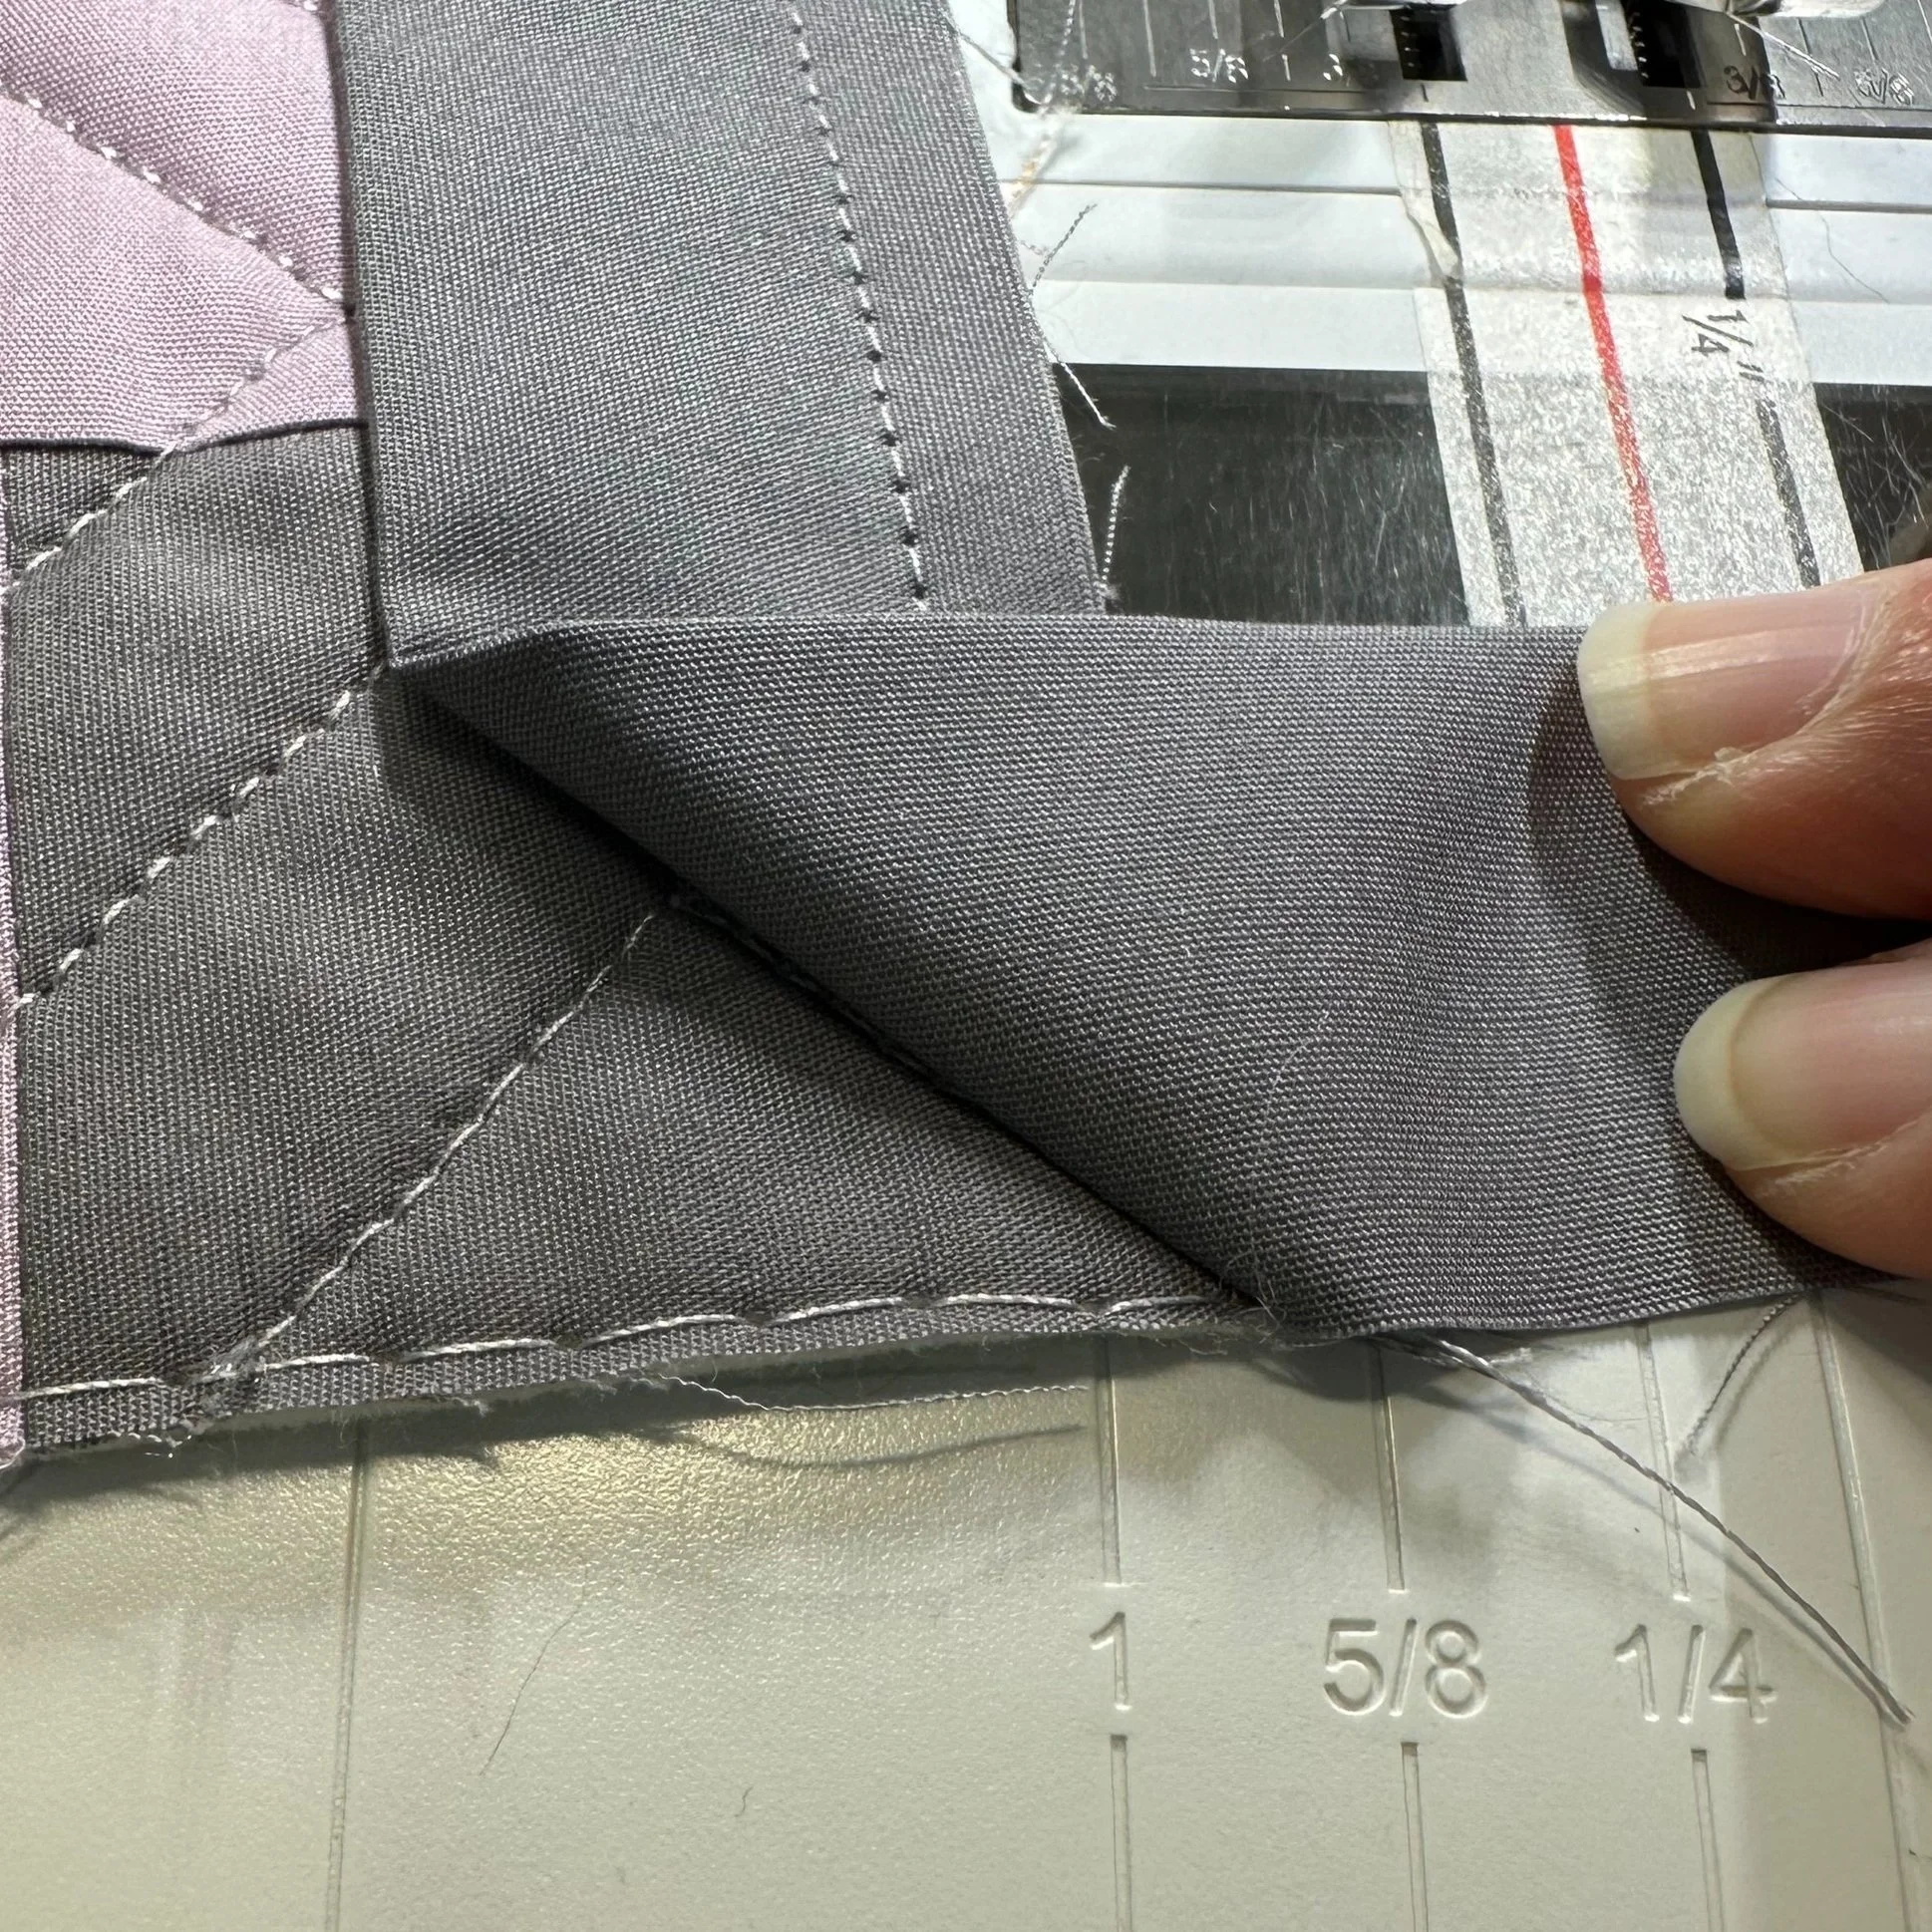
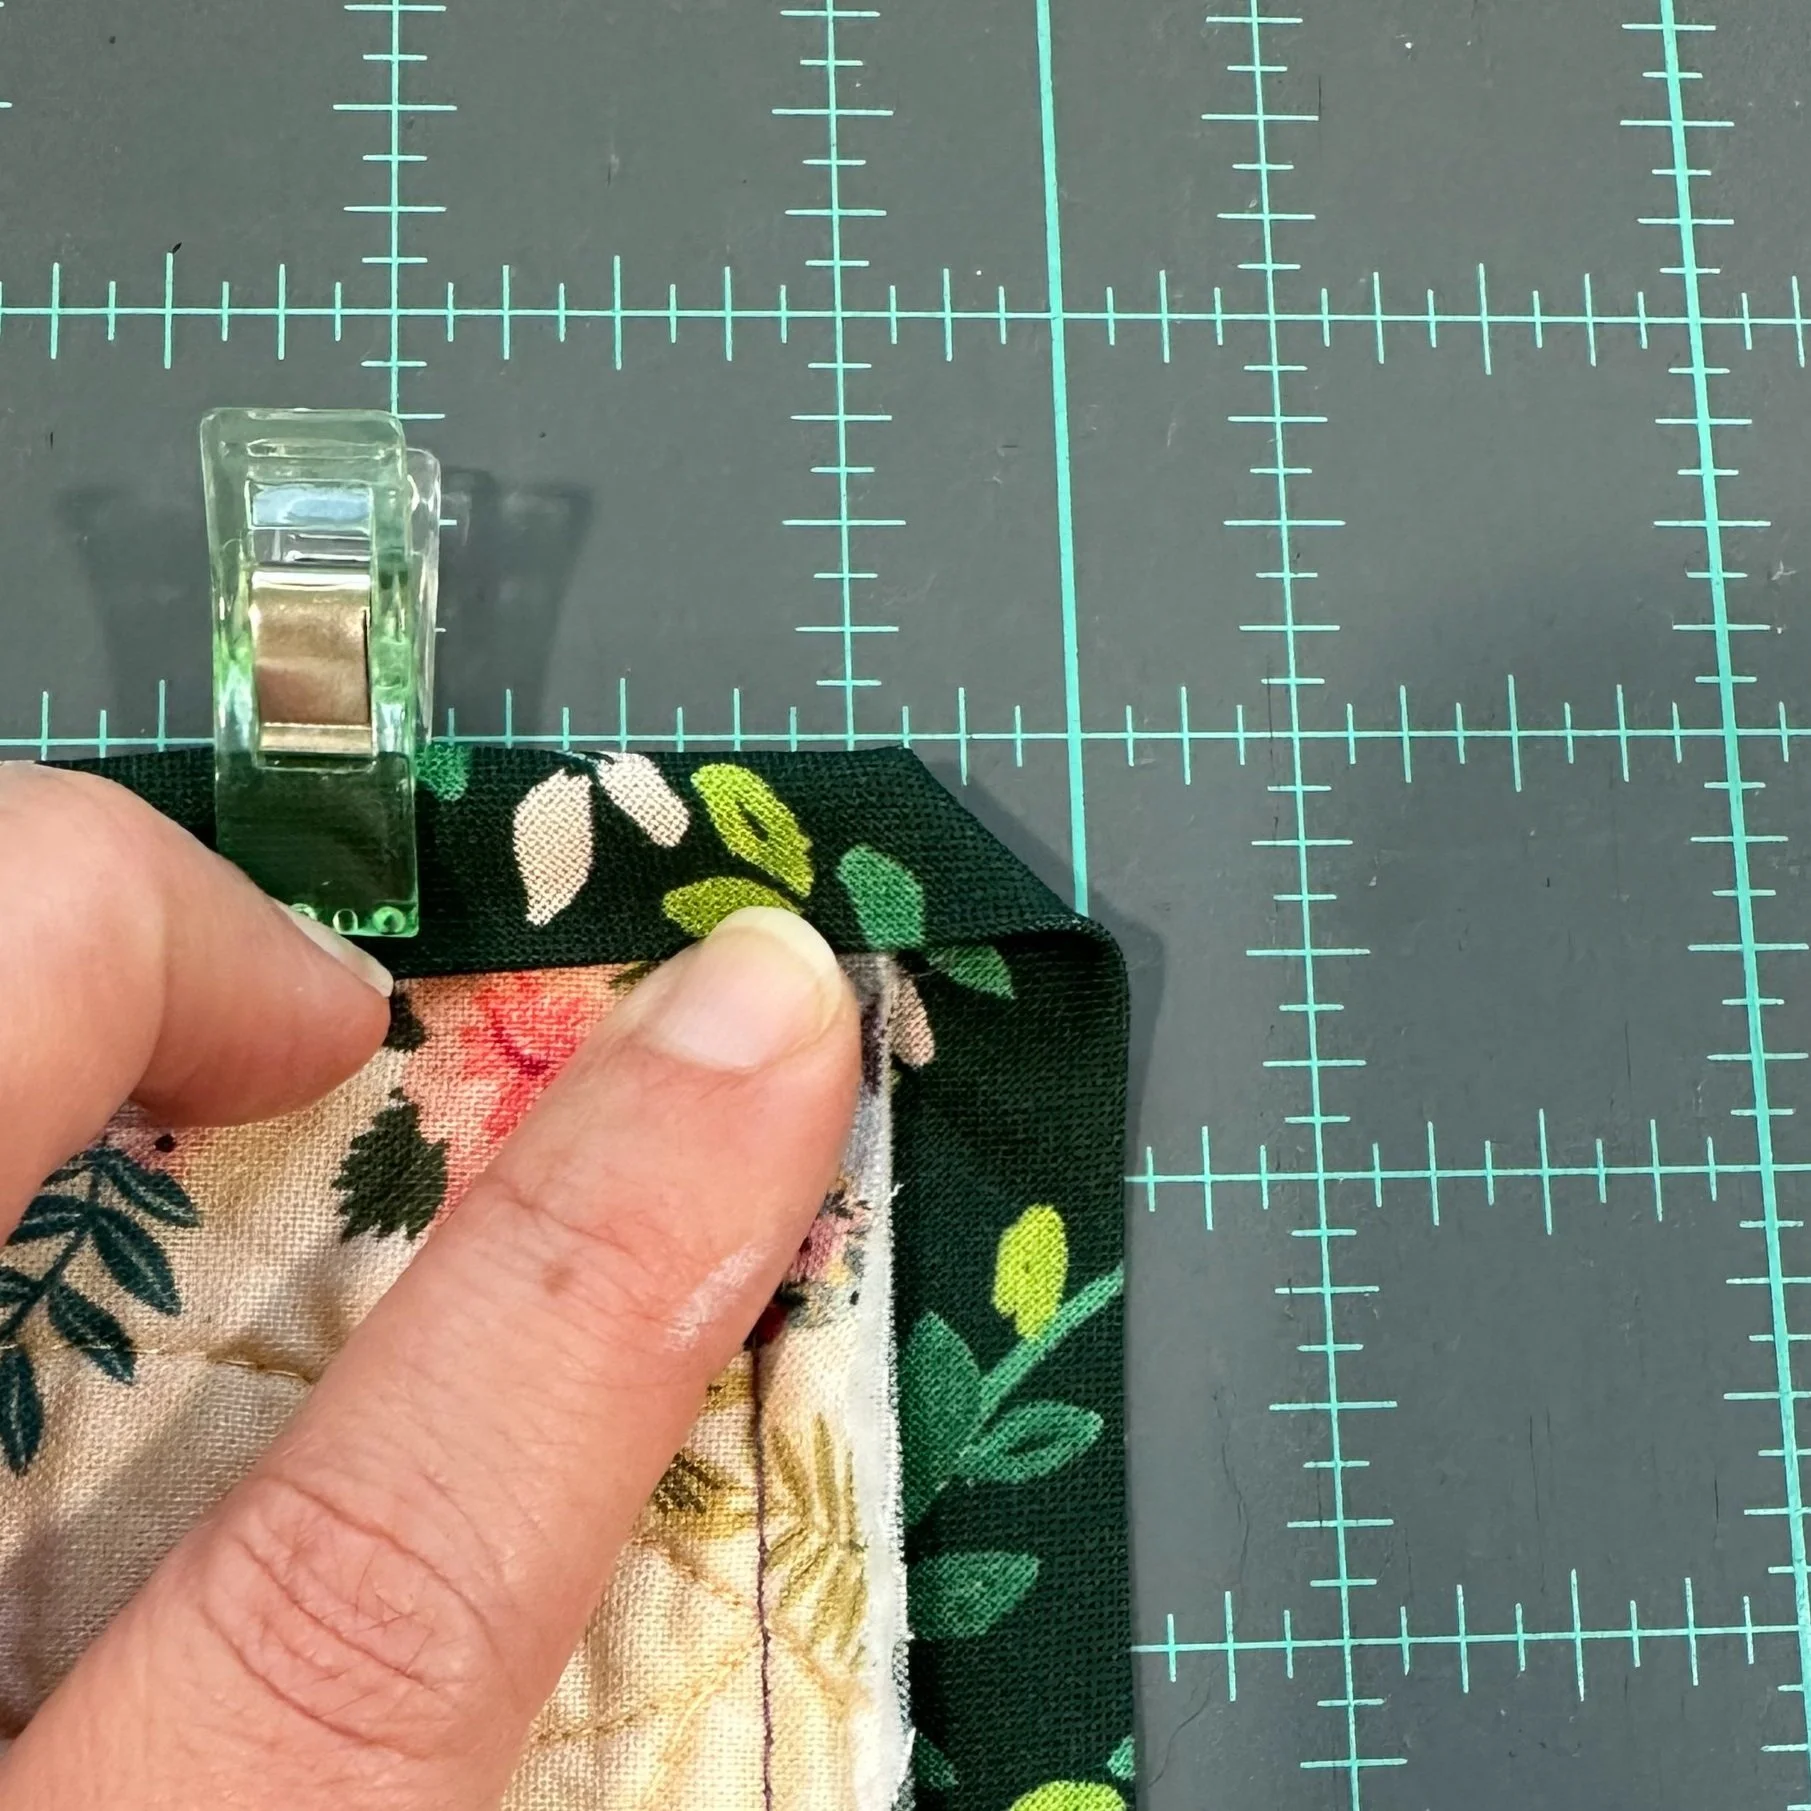
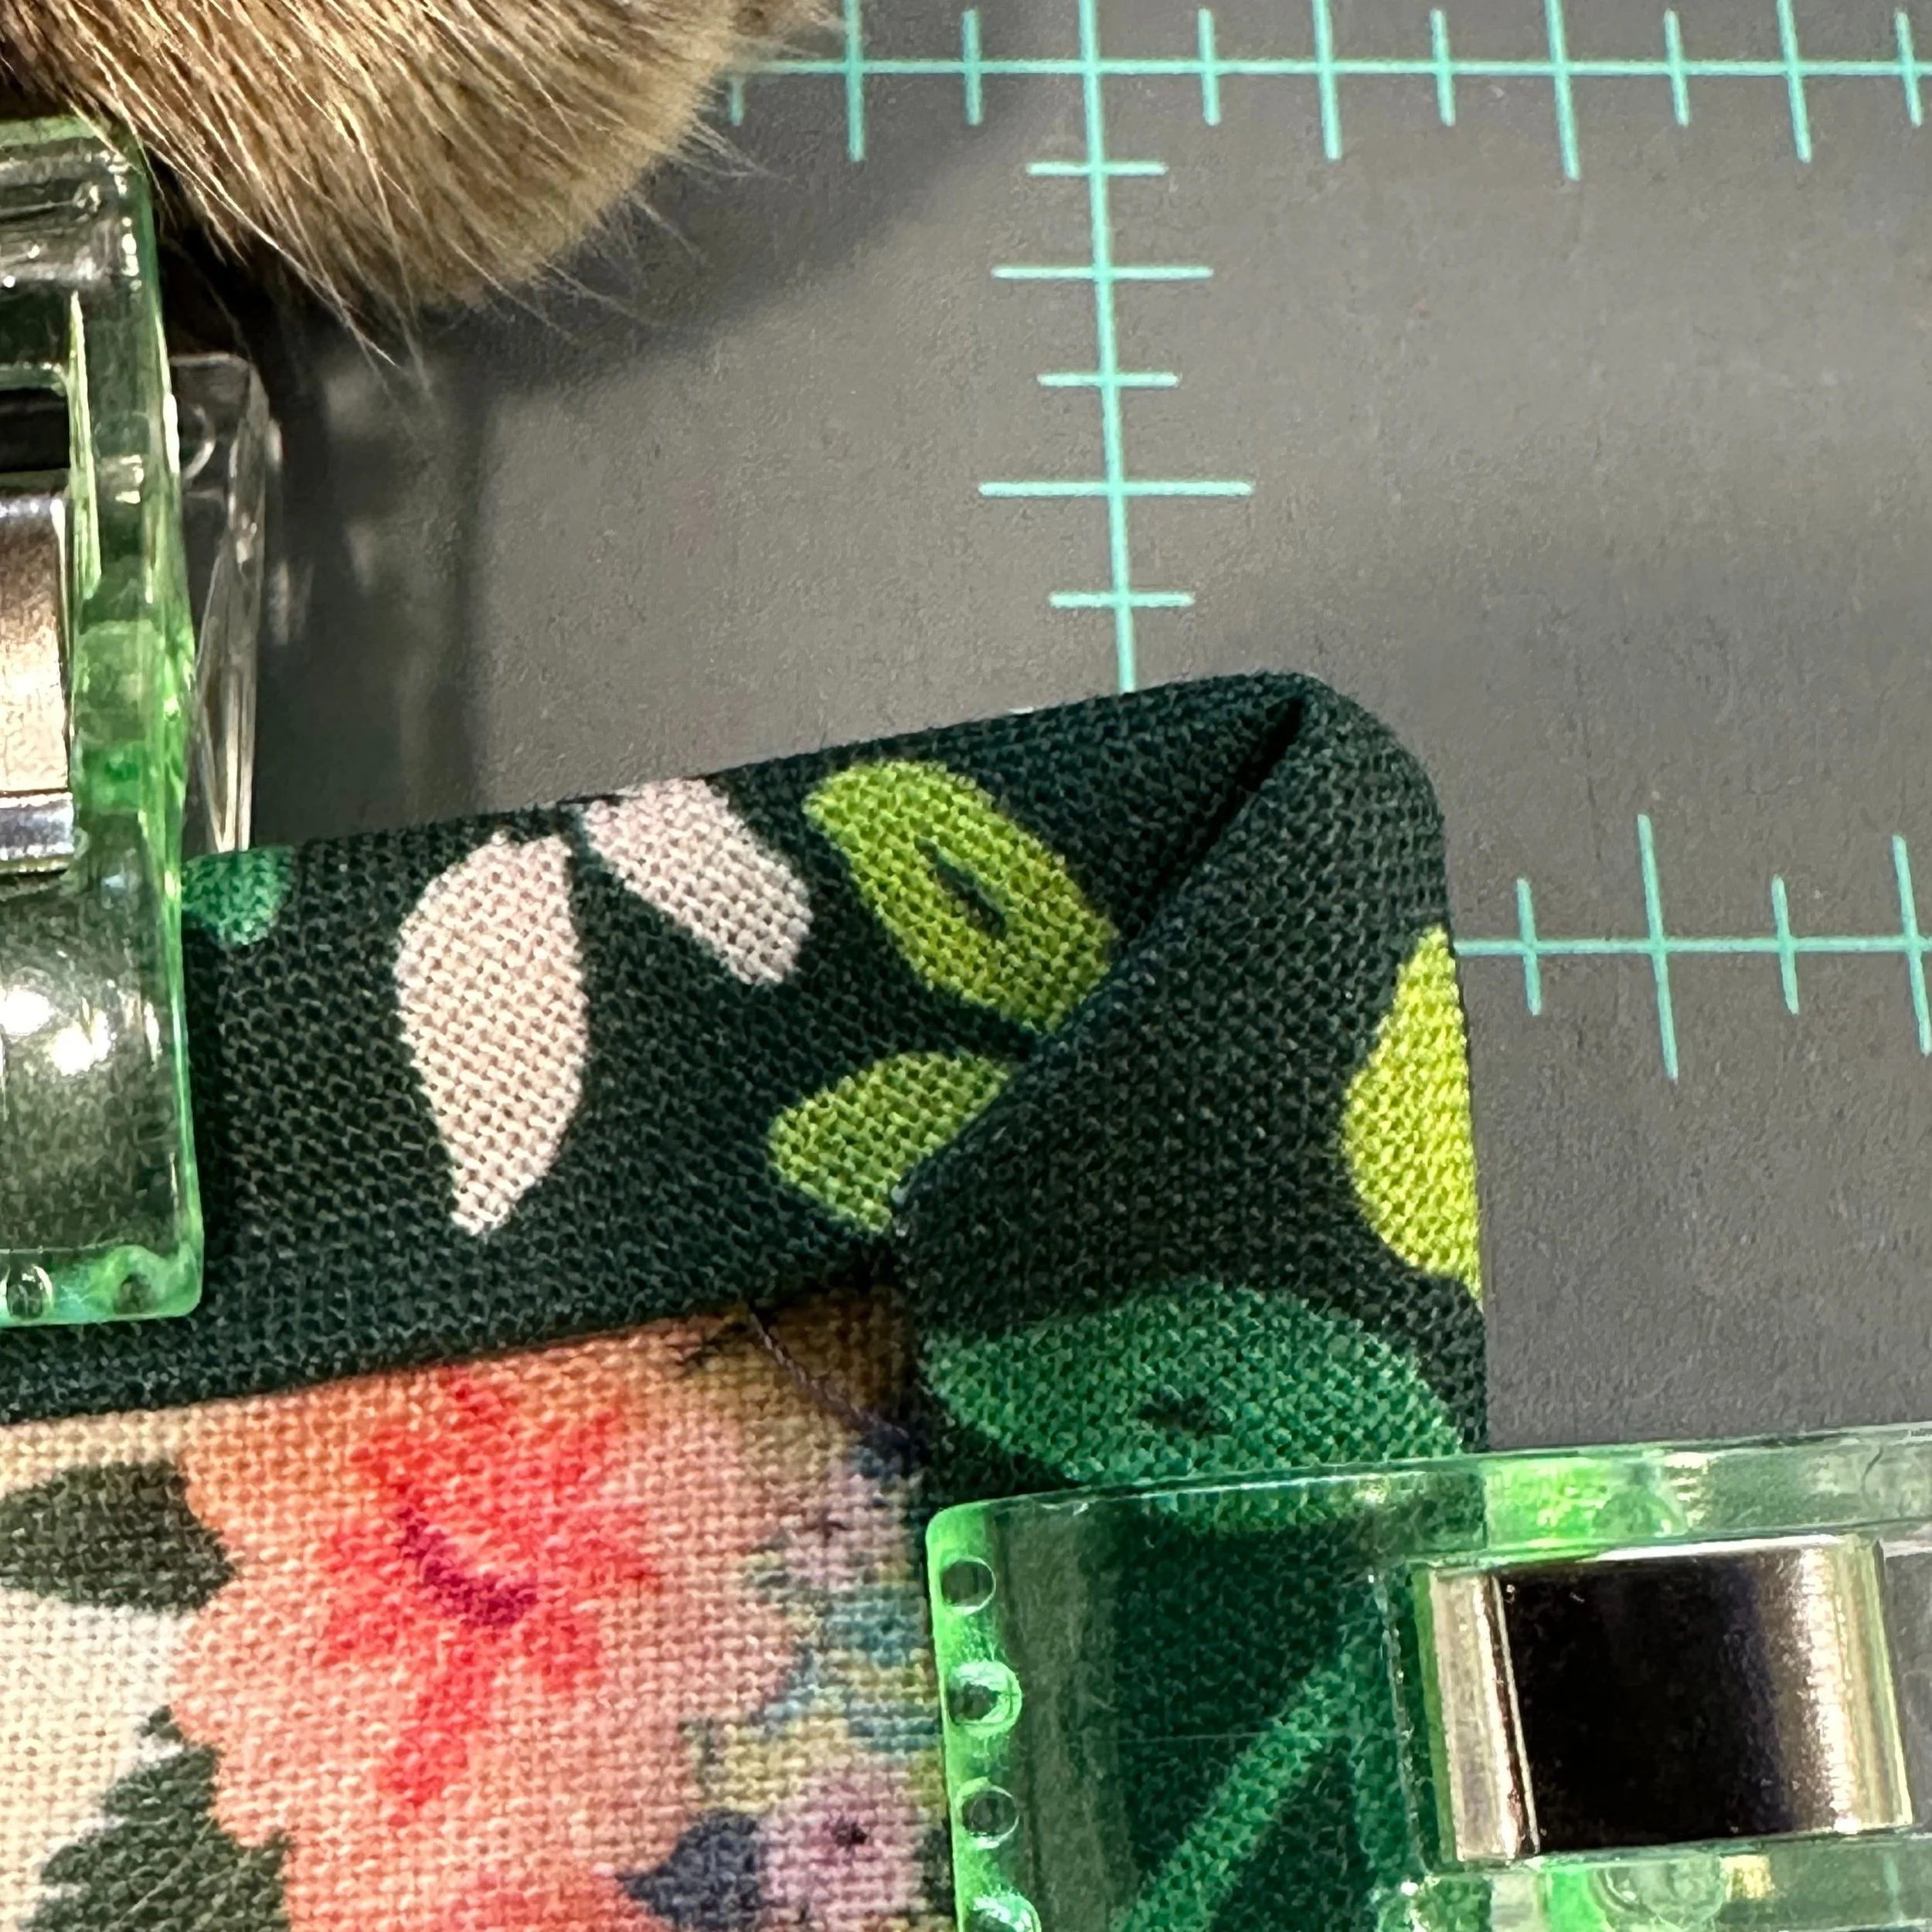
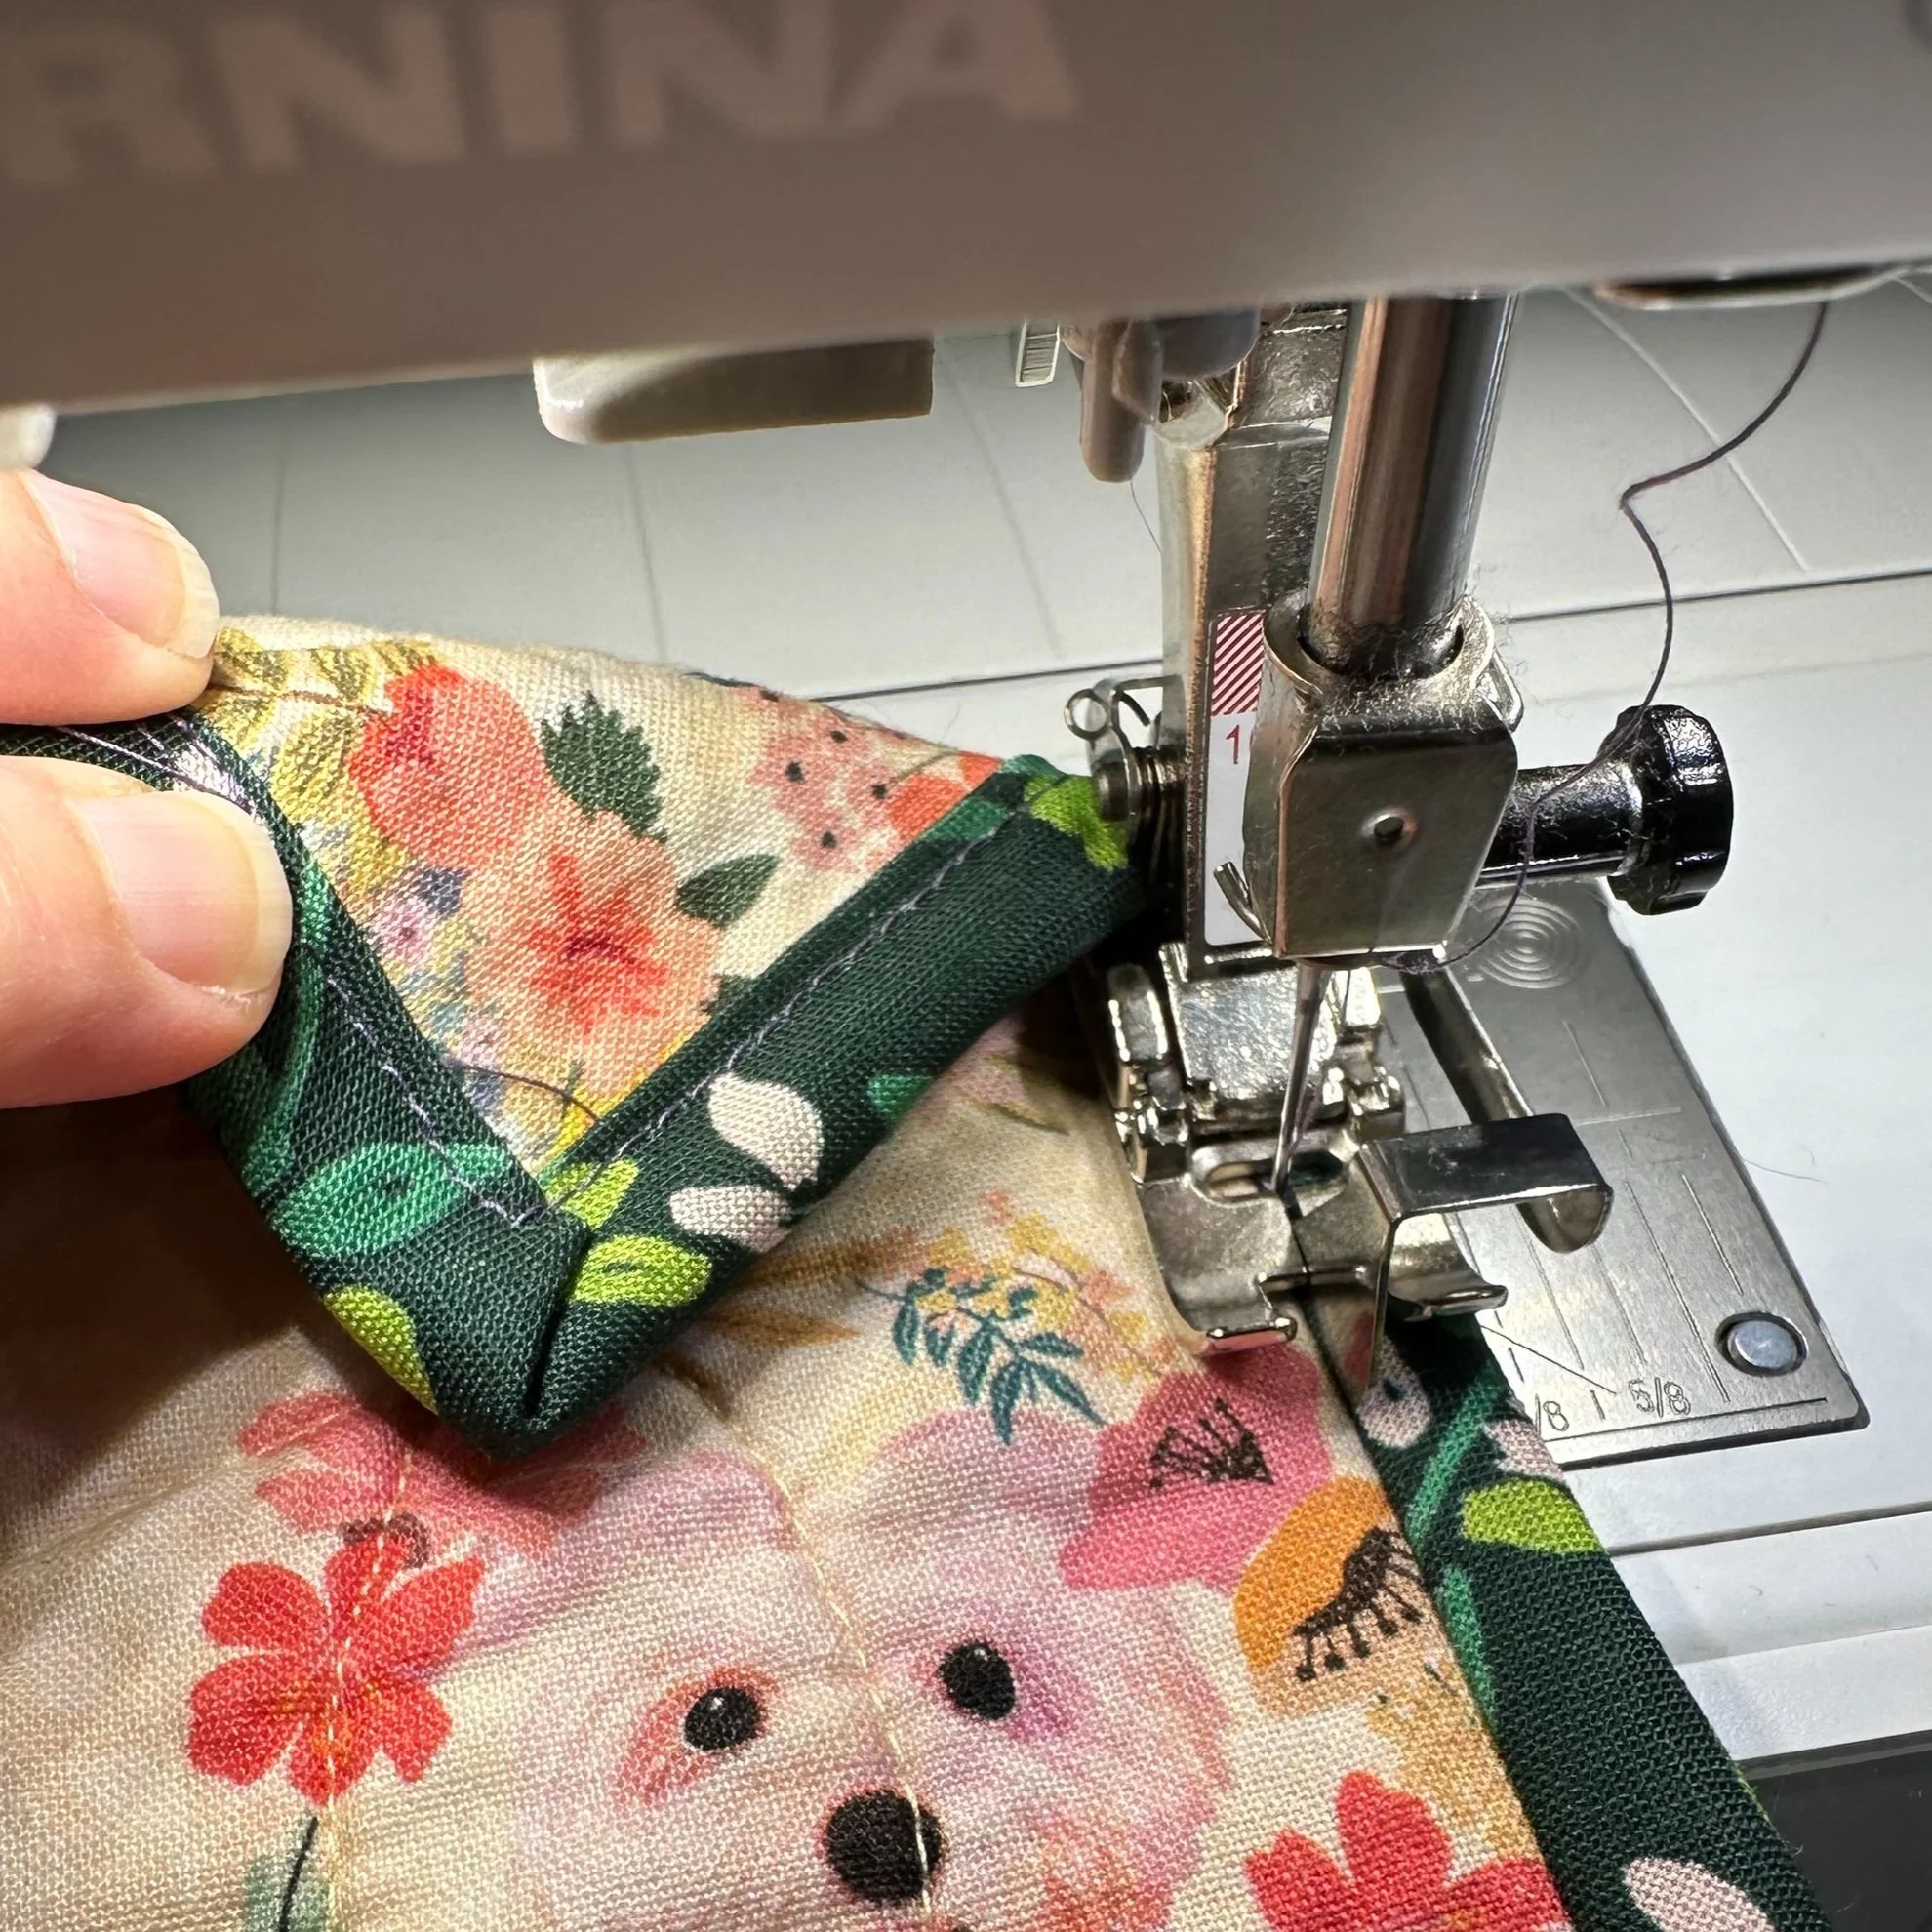
Fold your binding at a 90 degree angle away from the side you just stitched. It should be going in the opposite direction from the side you are about to stitch. (See picture) This will create a a 45 degree angle in the corner of your binding, leading straight into the corner. If you stopped your stitching at the correct distance (equal to your seam allowance), the raw edges of your binding should be even with the next edge of you quilt that you will be attaching your biding to.
Creating a Corner
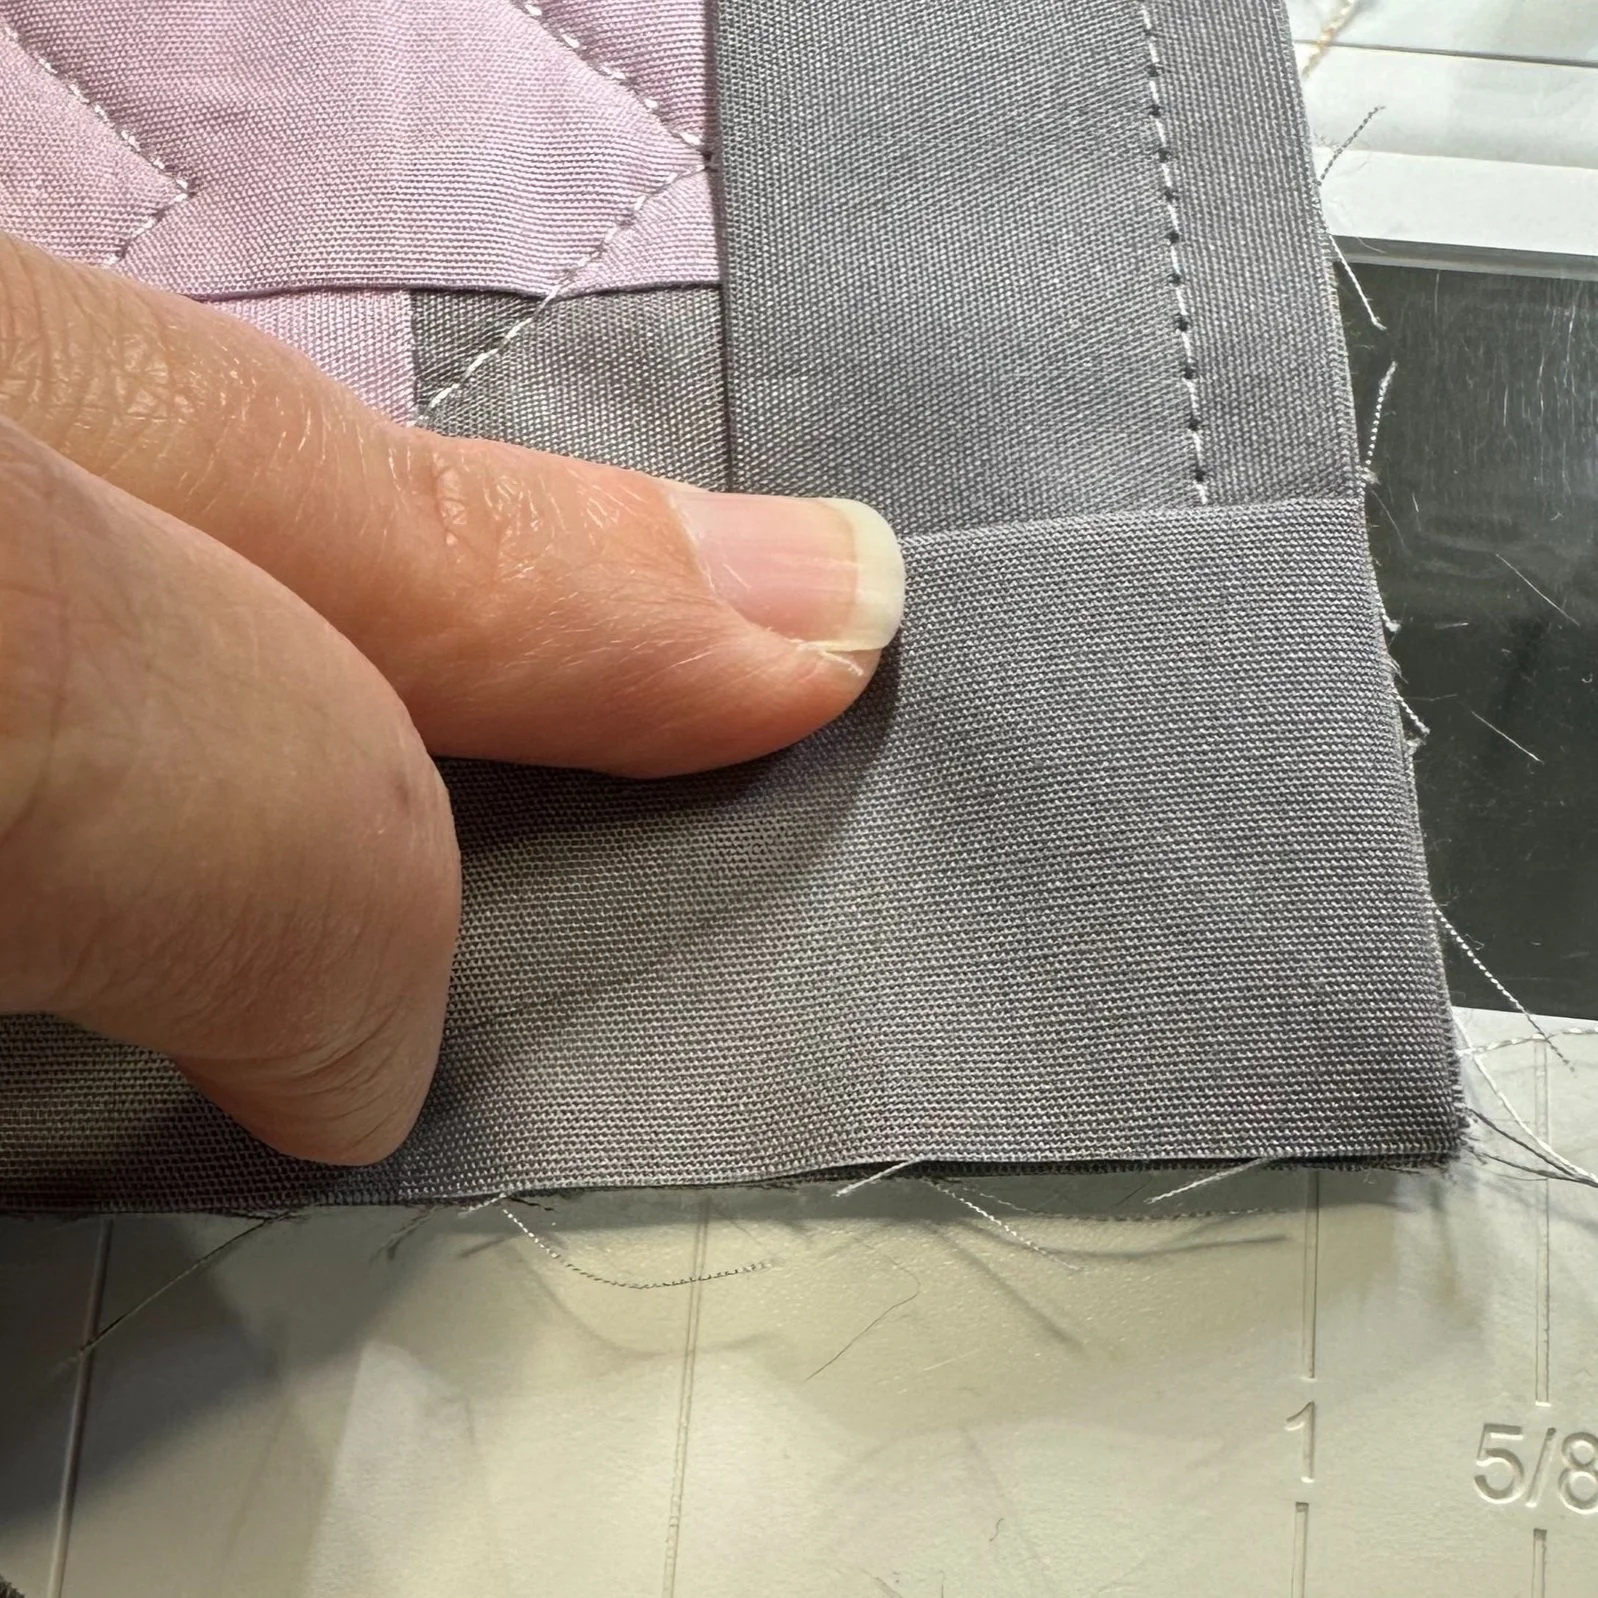
Fold your binding where it is even with the edge of the quilt you just sewed, aligning the next section of binding even with the next edge of your quilt, yet to be sewn. This should preserve the 45 degree angle of your binding underneath this new fold. Pin or clip in place if necessary. (This preserved angle is what gives you a nice, beautiful mitered corner.)
When you come to your first corner, you want to stop your stitching the same distance for your corner as your seam allowance. For example, if I am using a 1/4” seam allowance, I want to stop my stitches 1/4” from the corner of my quilt.
Ending the Seam on One Side
Continue to attach your binding using the same seam allowance you picked earlier, starting at the corner your just folded. In theory, you should not need to backstitch, but I still do just to be safe. Continue sewing a straight, even line until you come upon your next corner.
Repeat at all for corners. Your corners, once sewn should look like the green binding pictured on the right.
Beginning the Seam on the Next Side
Joining the Ends
When you are about 12” away from meeting up with where you originally started sewing, stop, and backstitch. You should now have binding attached to the perimeter of your quilt except for these 12 or so inches. There should be excess binding both where you started binding, and where you have just backstitched that I’m going to call “tails”. From here you will join the two tails so that it is the exactly enough binding left for what you need to fit your quilt.
Lay out your tails with the raw side even with the edge of your quilt, as though you would sew them down. They should overlap.
Step 1
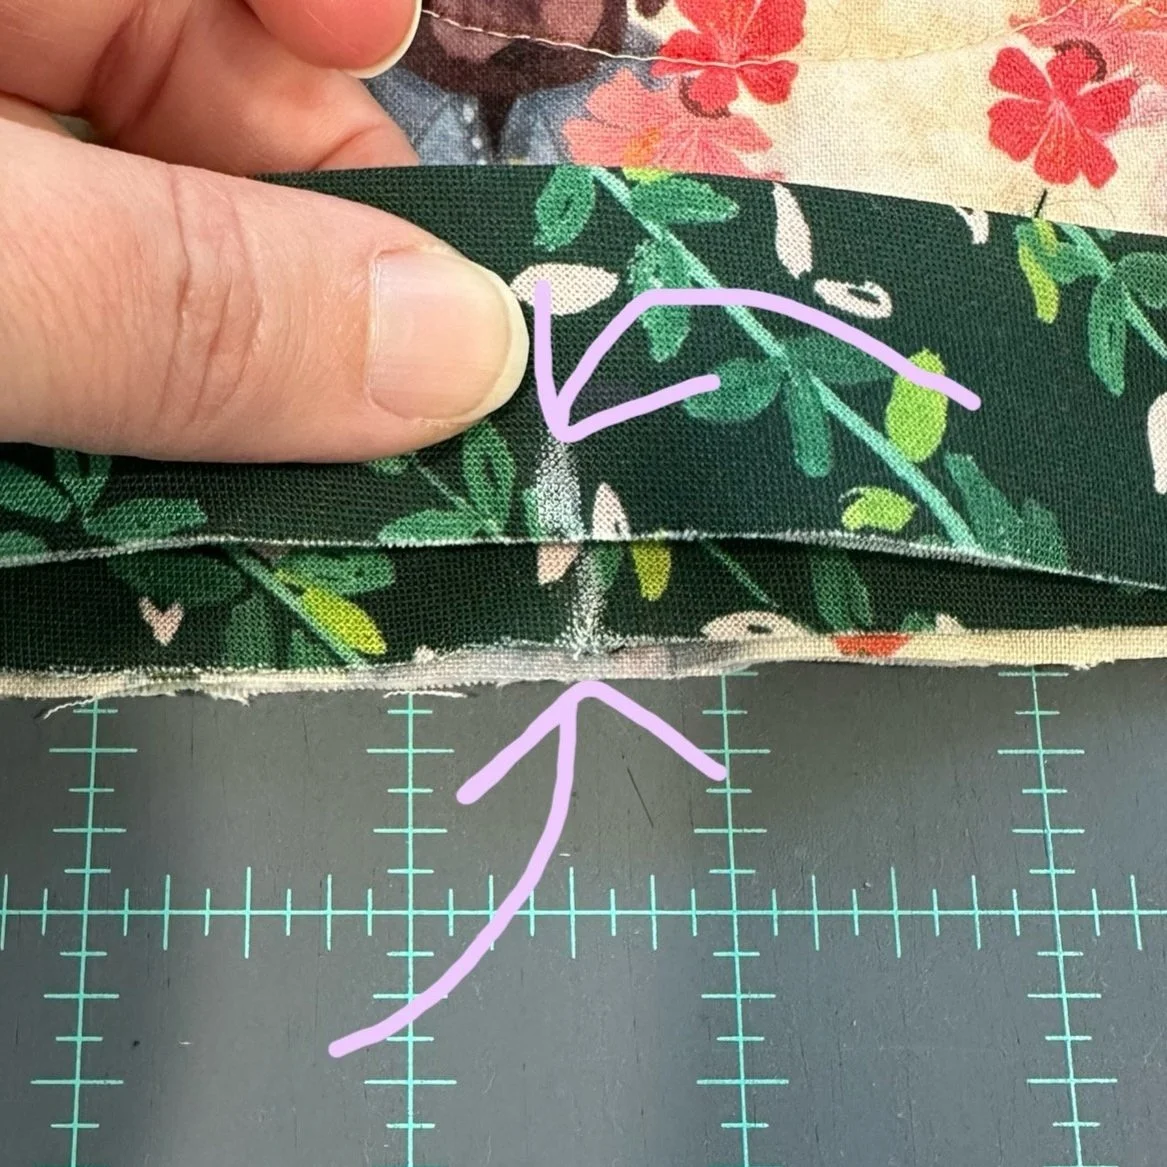
Pick a place roughly centered within the unsewn area and make a dot using a fabric pen on each tail of excess binding that is directly on top of the other. I used white tailor’s chalk on the dark green fabric. The arrows are pointing towards these marks. When laid flat, these two marks are directly on top of one another, essentially in the same spot along the edge of the quilt.
Step 2
We want these tails to extend the same number of inches they are in width. Example, if you cut your binding strips at 2.5” wide, then you want these tails to overlap a total of 2.5”. That would mean each tail needs to be trimmed 1.25” from the dot in opposite directions. Draw a line at these desired locations on each tail. Ensure the distance between these lines (one line on each tail) is the same distance apart as your biding strip is wide. The arrows are pointing towards my original marks. The circles are indicating the lines drawn the extra 1.25” away, and where I will eventually cut.
Step 3
Trim along these lines. Your tails should now overlap the exact amount as your binding is wide.
Unfold the tails and place them right sides together at a 90 degree angle and sew at a diagonal, the same way we joined our biding strips in the earlier steps. This is easiser to do the more unsewn space your have. It also helps you clip your quilt together allow you more slack.
Step 4
Step 5
Trim 1/4” from the diagonal seam to reduce your excess.
Press the seam open. Refold your biding in half with the raw sides even. The remaining unsewn bit of binding tape should now be the exact length as the remaining unsewn section of your quilt top.
Step 6
Sew the remaining unsewn section of binding tape down, closing in the gap. Be sure to use the same seam allowance you used previously. Back stitch at the beginning and end. You’ll see in the pictures how I am starting at the back stitched area from the previous line of stitching. The pink lines indicate the two spots of backstitching where my unsewn section was. This section is now sewn closed.
Step 7
Sewing Down the Other Side
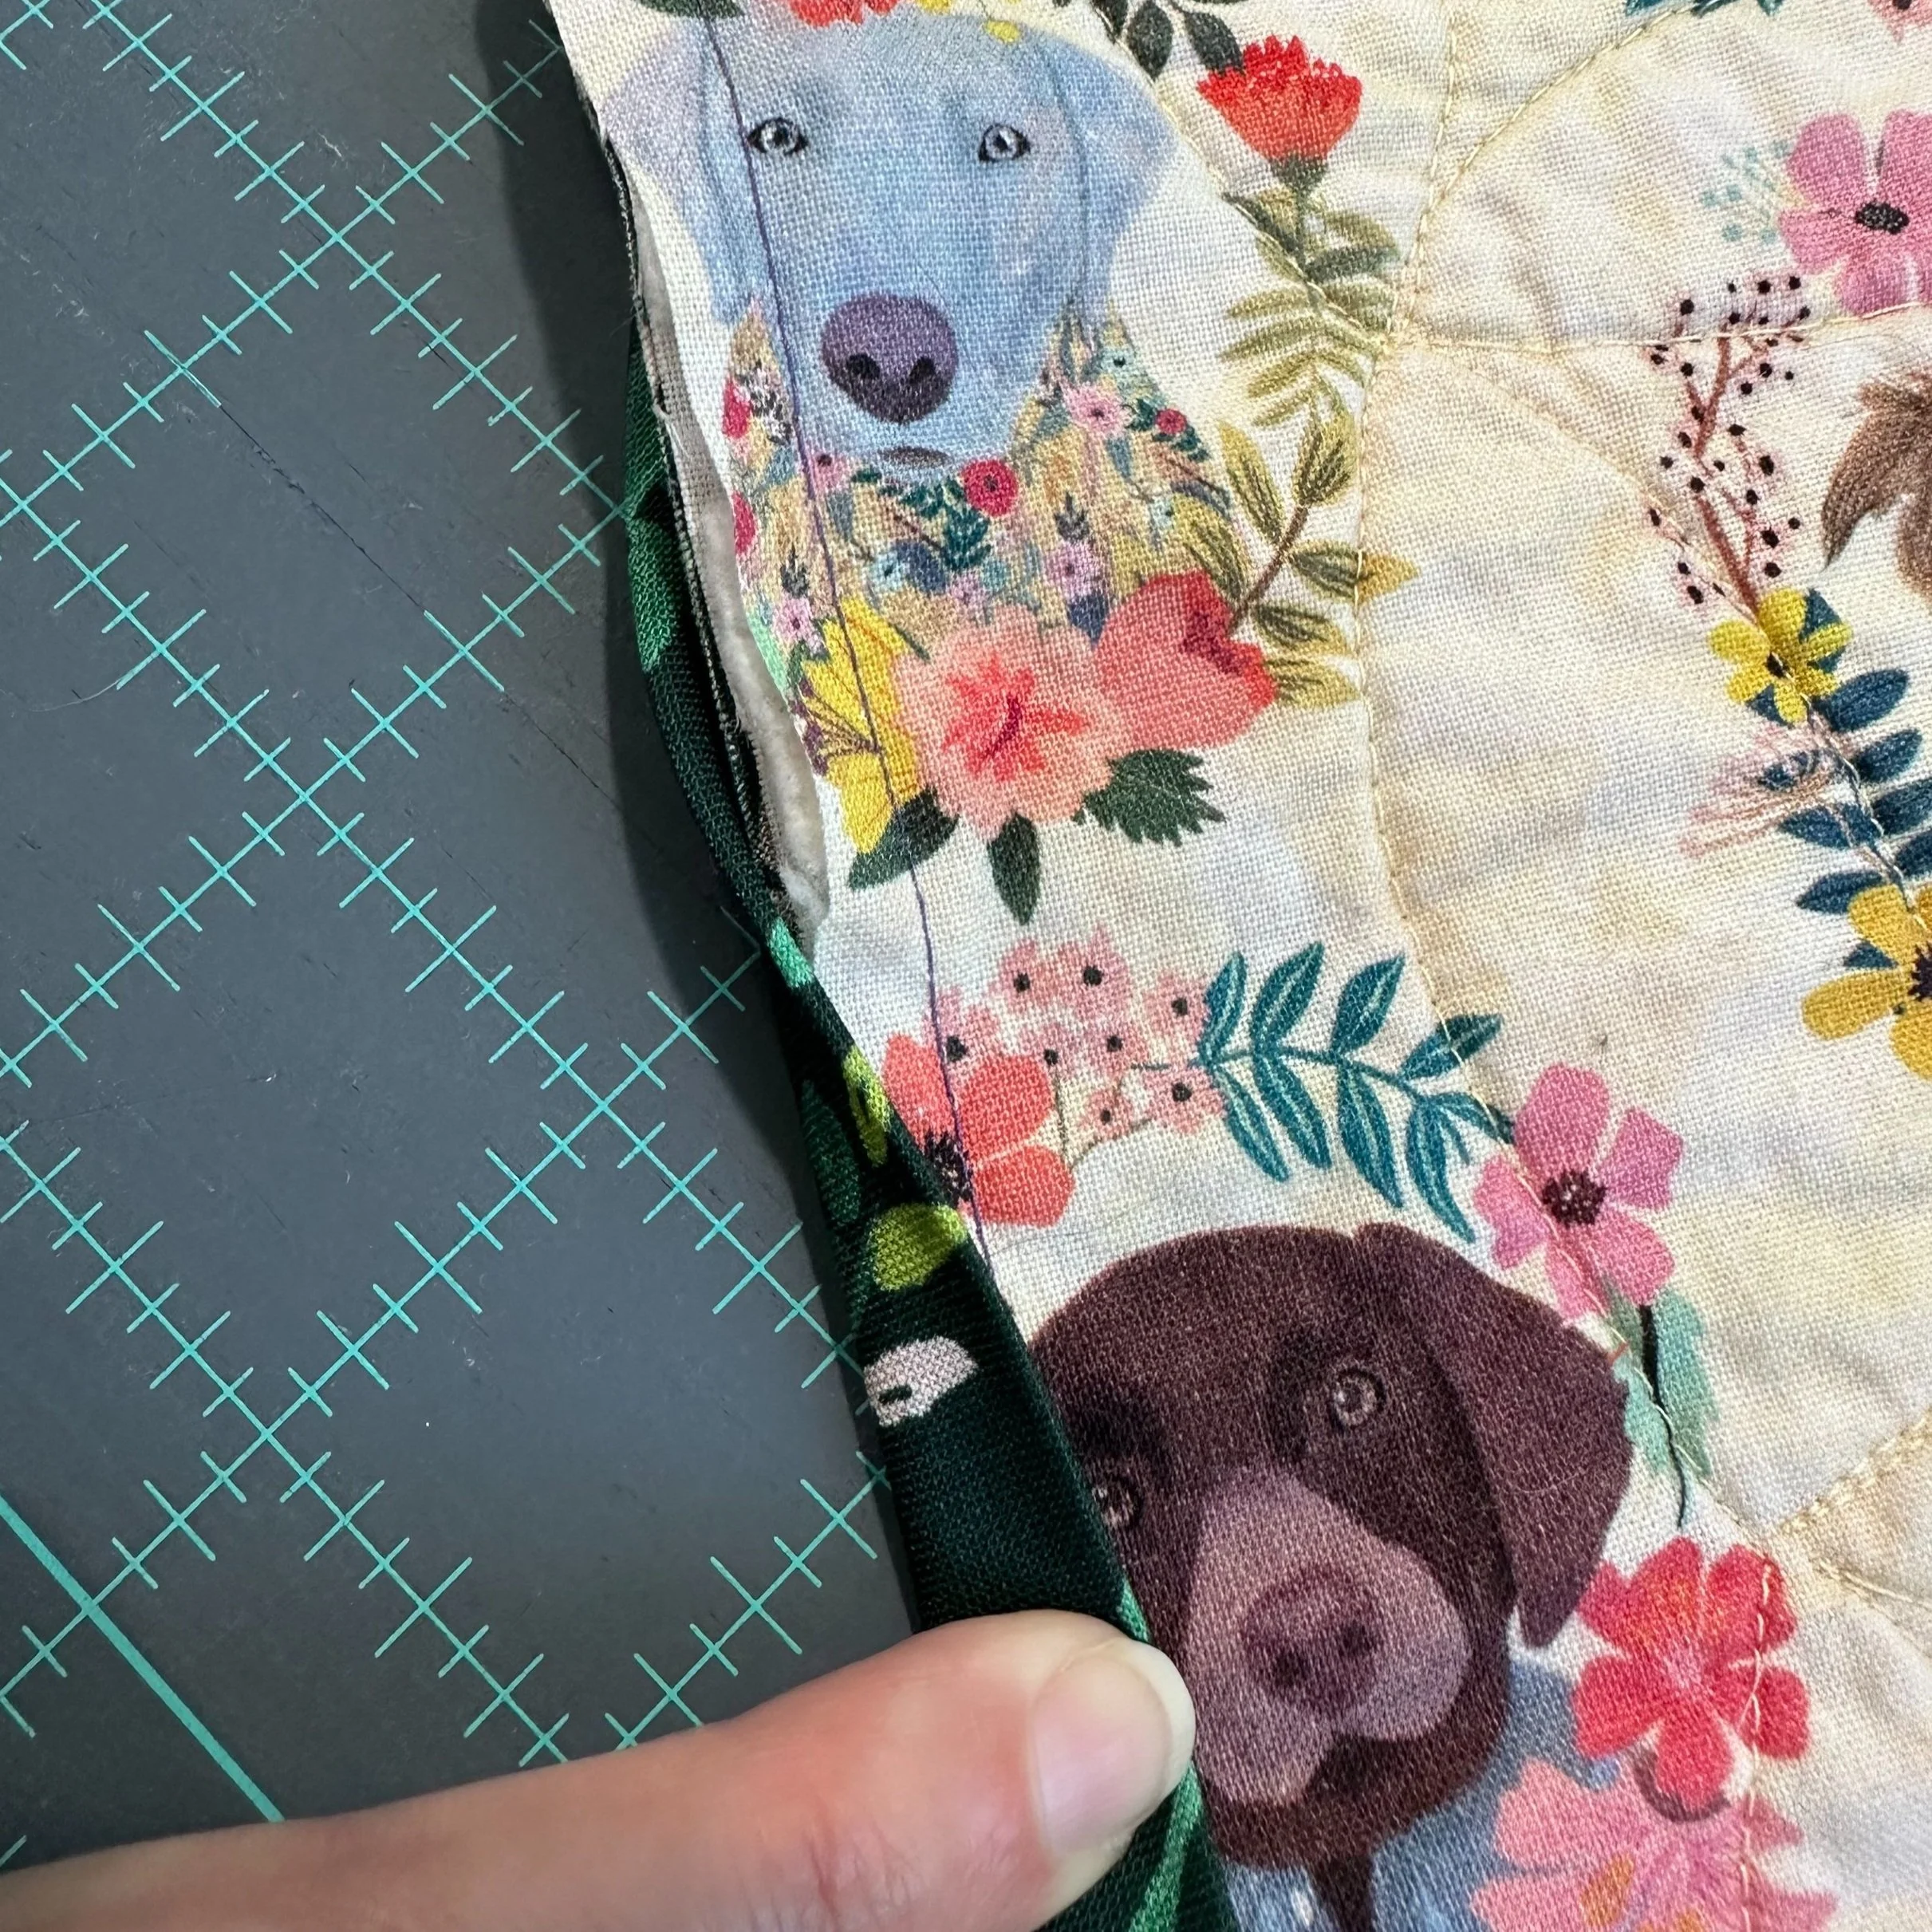
From here, wrap the folded side of your binding over the opposite side of your quilt. This is was encloses the raw edges of your quilt top, backing, and the exposed batting fluff in between them. If I feel I will need as much fabric as I can manage to wrap to the other side, I will press the binding away from the quilt. This will give you a little more width to work with you if need it. If you prefer, you can hold the binding in place with binding clips (or pins, or binder clips, or glue) so it does not shift on you while you sew it down.
For each corner, I start with one side and fold the binding over the edge of the quilt, which creates an angled fold on the corner. Do your best to keep that angled fold in place. Then I fold the adjacent side of the binding over the edge of the quilt. This should create a nice mitered corner on the back, as well. I like to pin this or glue baste this in place to prevent it from shifting until I can sew in down.
This is where the different methods of binding come in to play. Depending on the method you chose, you will either be hand sewing this final side in place so that the stitches do no appear on the other side, or you will be strategically stitching it down with your sewing machine.
My Three Favorite Methods
There are certainly more ways to bind a quilt than the ways mentioned below, but these are going to be my favorite ways. They all involves creating and attaching binding in aforementioned ways, but the size of the binding can sometimes change, as does which side of the quilt you first attach the binding to.
By Hand
The first method is “By Hand”. And again, I don’t mean doing the entire thing by hand but rather just the last bit of stitching done when securing the binding to the “other side” as mentioned above. You attach your binding to the quilt with a machine using your preferred seam allowance. Using this method, you first attach your binding to the front of your quilt top, fold it over, and hand-stitch your binding to the back of your quilt.
This is my preferred way to bind because I feel I have the most control with how the finished product looks. From the front of my quilt, I have the seam that was created using a machine, so my binding is nearly perfectly straight, and when hand stitching it down, I make sure my stitches do not come throw the other side, so there is not evidence of those stitches from my quilt top. I usually work with a more narrow binding because I do not need the back half of my binding to extend much further past the line of stitching used to secure it to the front of my quilt top. I cant sew it down exactly on top of that line of stitching, hiding it from view.
I typically do a whipstitch, which is pretty much invisible, mainly because that’s how I’ve always done it. I’ve seen some folks use big stitching to secure their biding down. It’s visible, cut it adds a lot of character, in my opinion. Maybe one day I’ll try it.
However, as with anything done by hand instead of by machine, it takes longer. Though it’s my favorite, I usually reserve this method for when I have plenty of time and it’s a very special quilt, usually a gift for a quilt-worthy loved one.
By Machine - Traditional
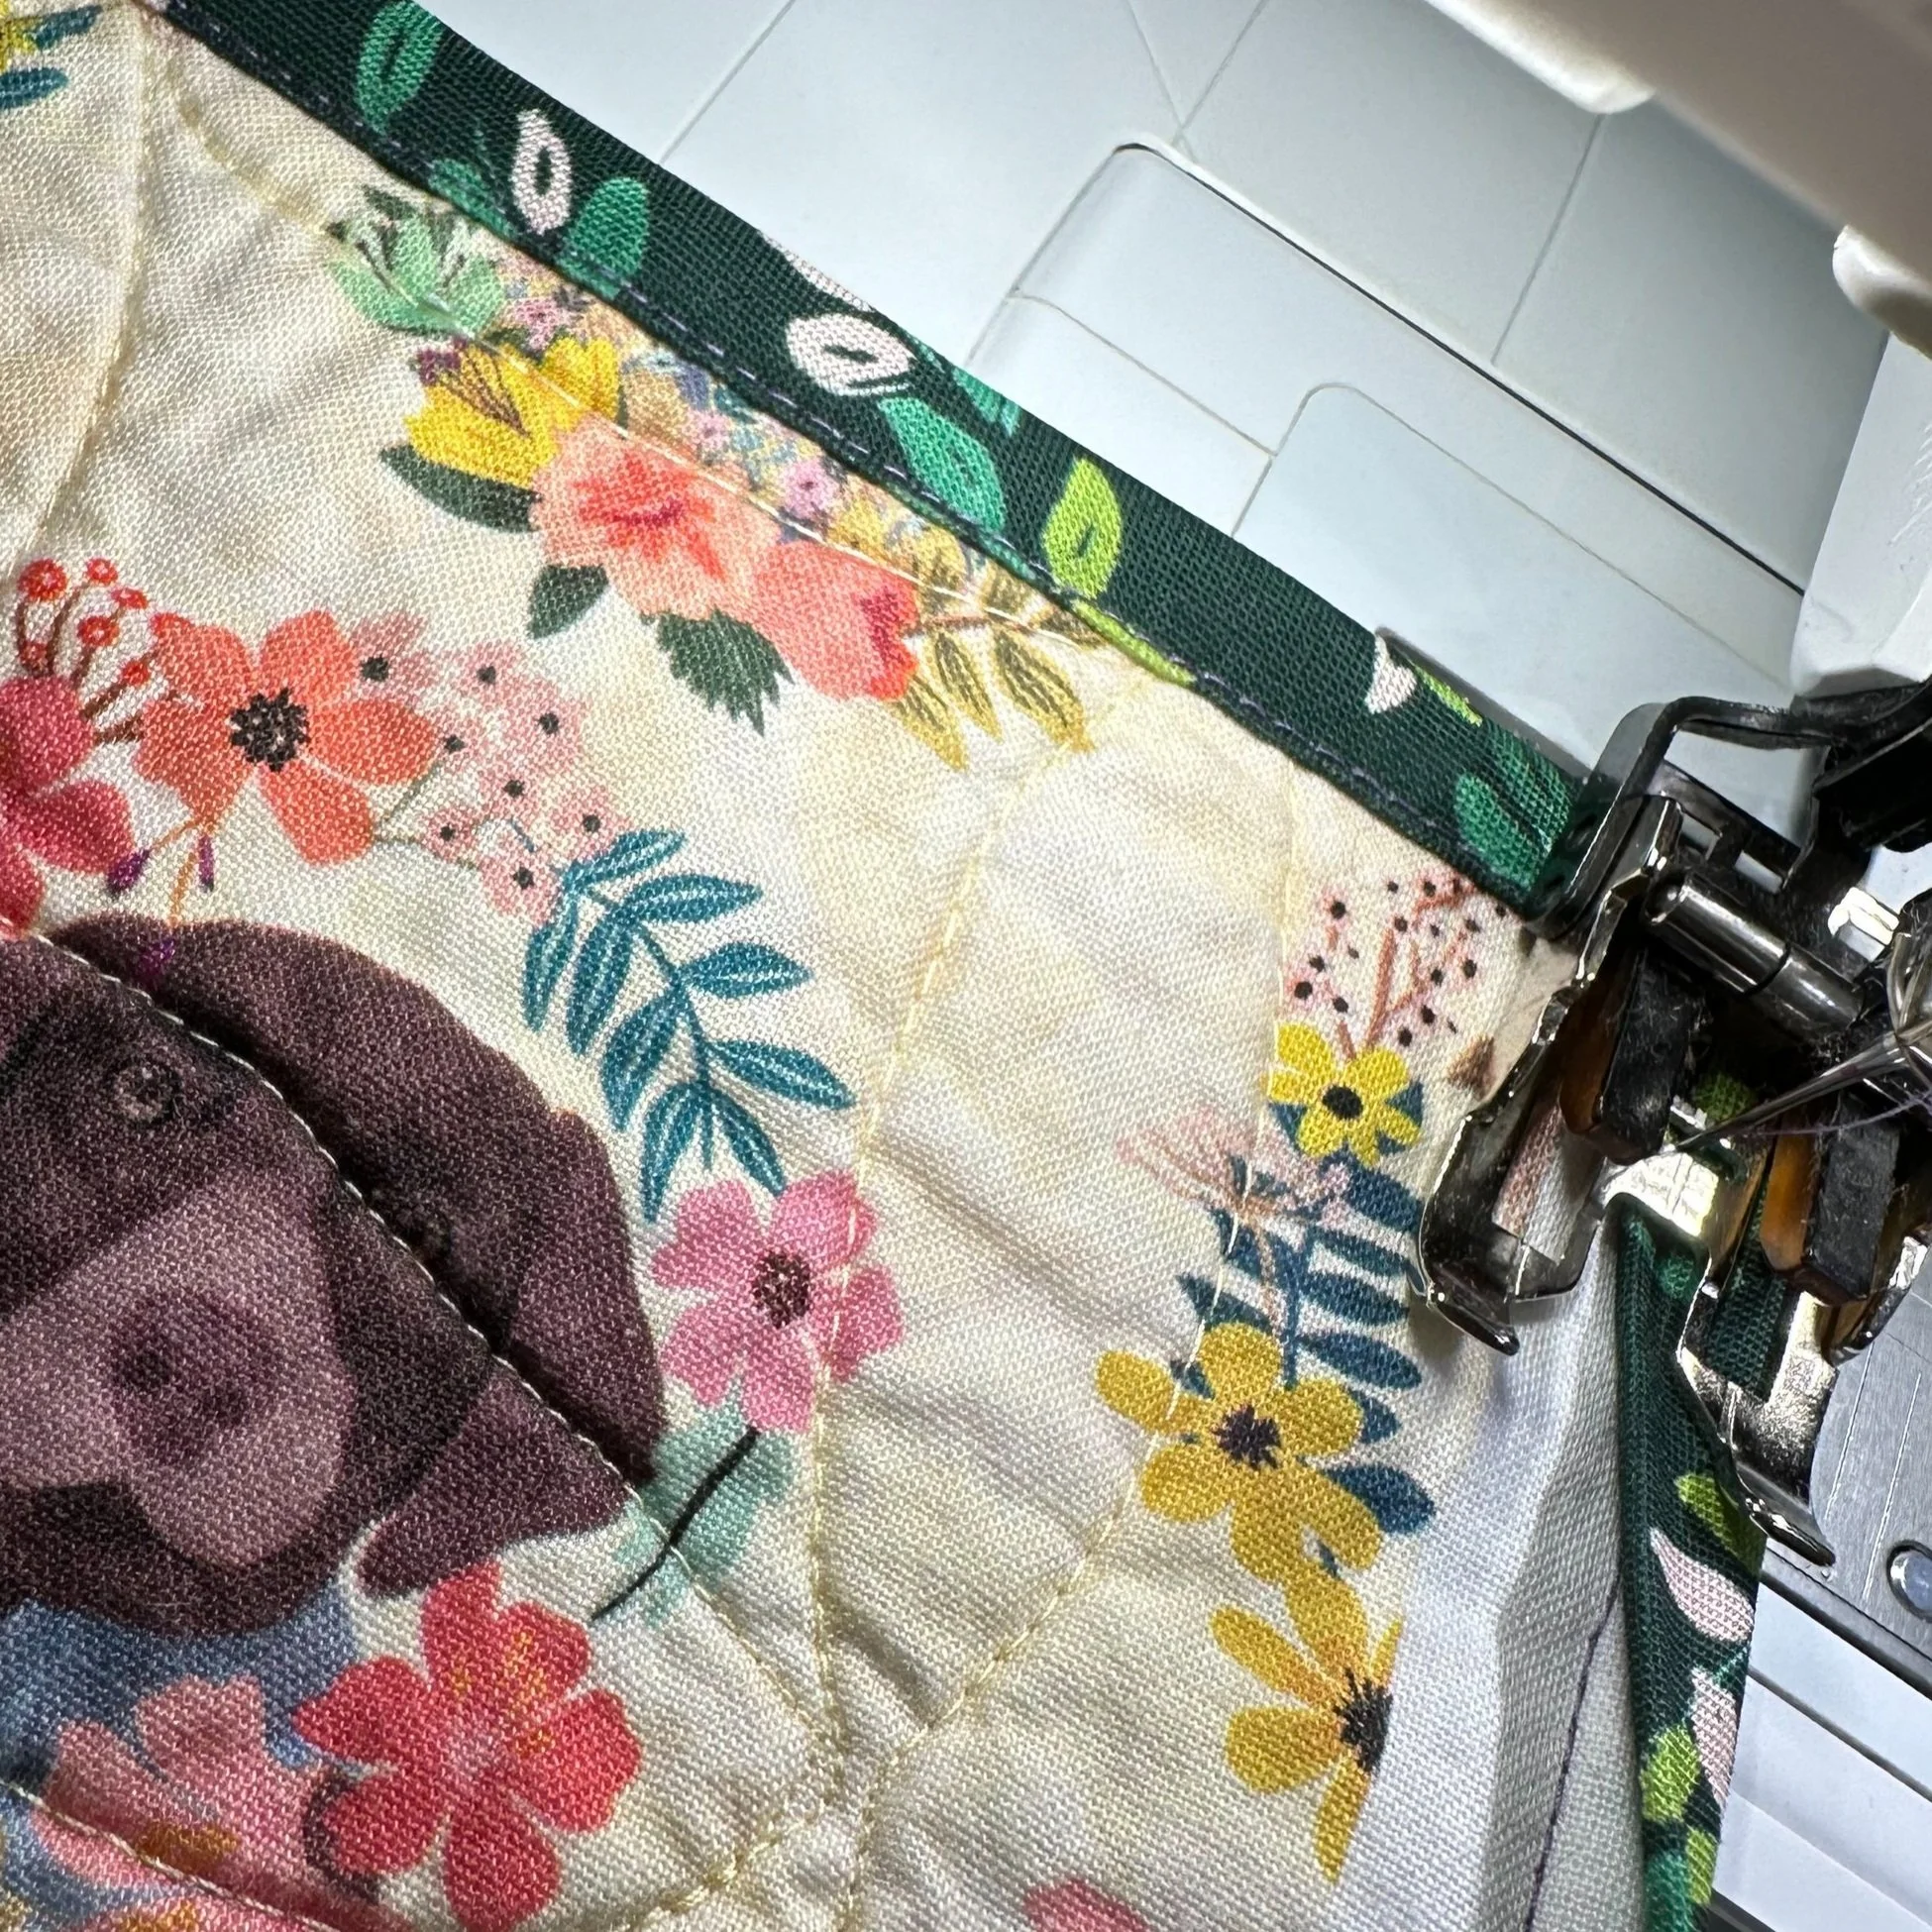
Method No. 2, I’m calling “By Machine-Traditional”. This is when you attach the binding entirely with your machine. With this method, you start by attaching it to the back of your quilt, fold over the binding, and finally stitch it down on the front, just inside the fold of the binding. When you come to a corner, you stop with your needle down into your mitered corner, raiser the presser foot only, and pivot your entire quilt 90 degrees so you can continue sewing down the next side of your quilt.
This method is by far the fastest and the easiest method. You’ll probably want to use a 2.5” width binding tape when using this method to make sure you cover up the line of stitching created when attaching your binding, that will otherwise be visible from the front of your quilt. Though fastest, in my opinion, there are two "cons” to this method.
For starters, the prettiest side of your binding ends up being on the back of your quilt. When you first attach it to your quilt with the machine, it creates a beautiful straight seam, but with this method, it’s on the back. The folded edge of your binding is on the front, and personally, I am never able to stitch this side down as straight. Blame it on my crooked cutting, or maybe it’s not perfectly aligned when I join my binding strips, but the folded edge for me tends to be a bit more wobbly, and this is the side that ends up being seen from the front of your quilt.
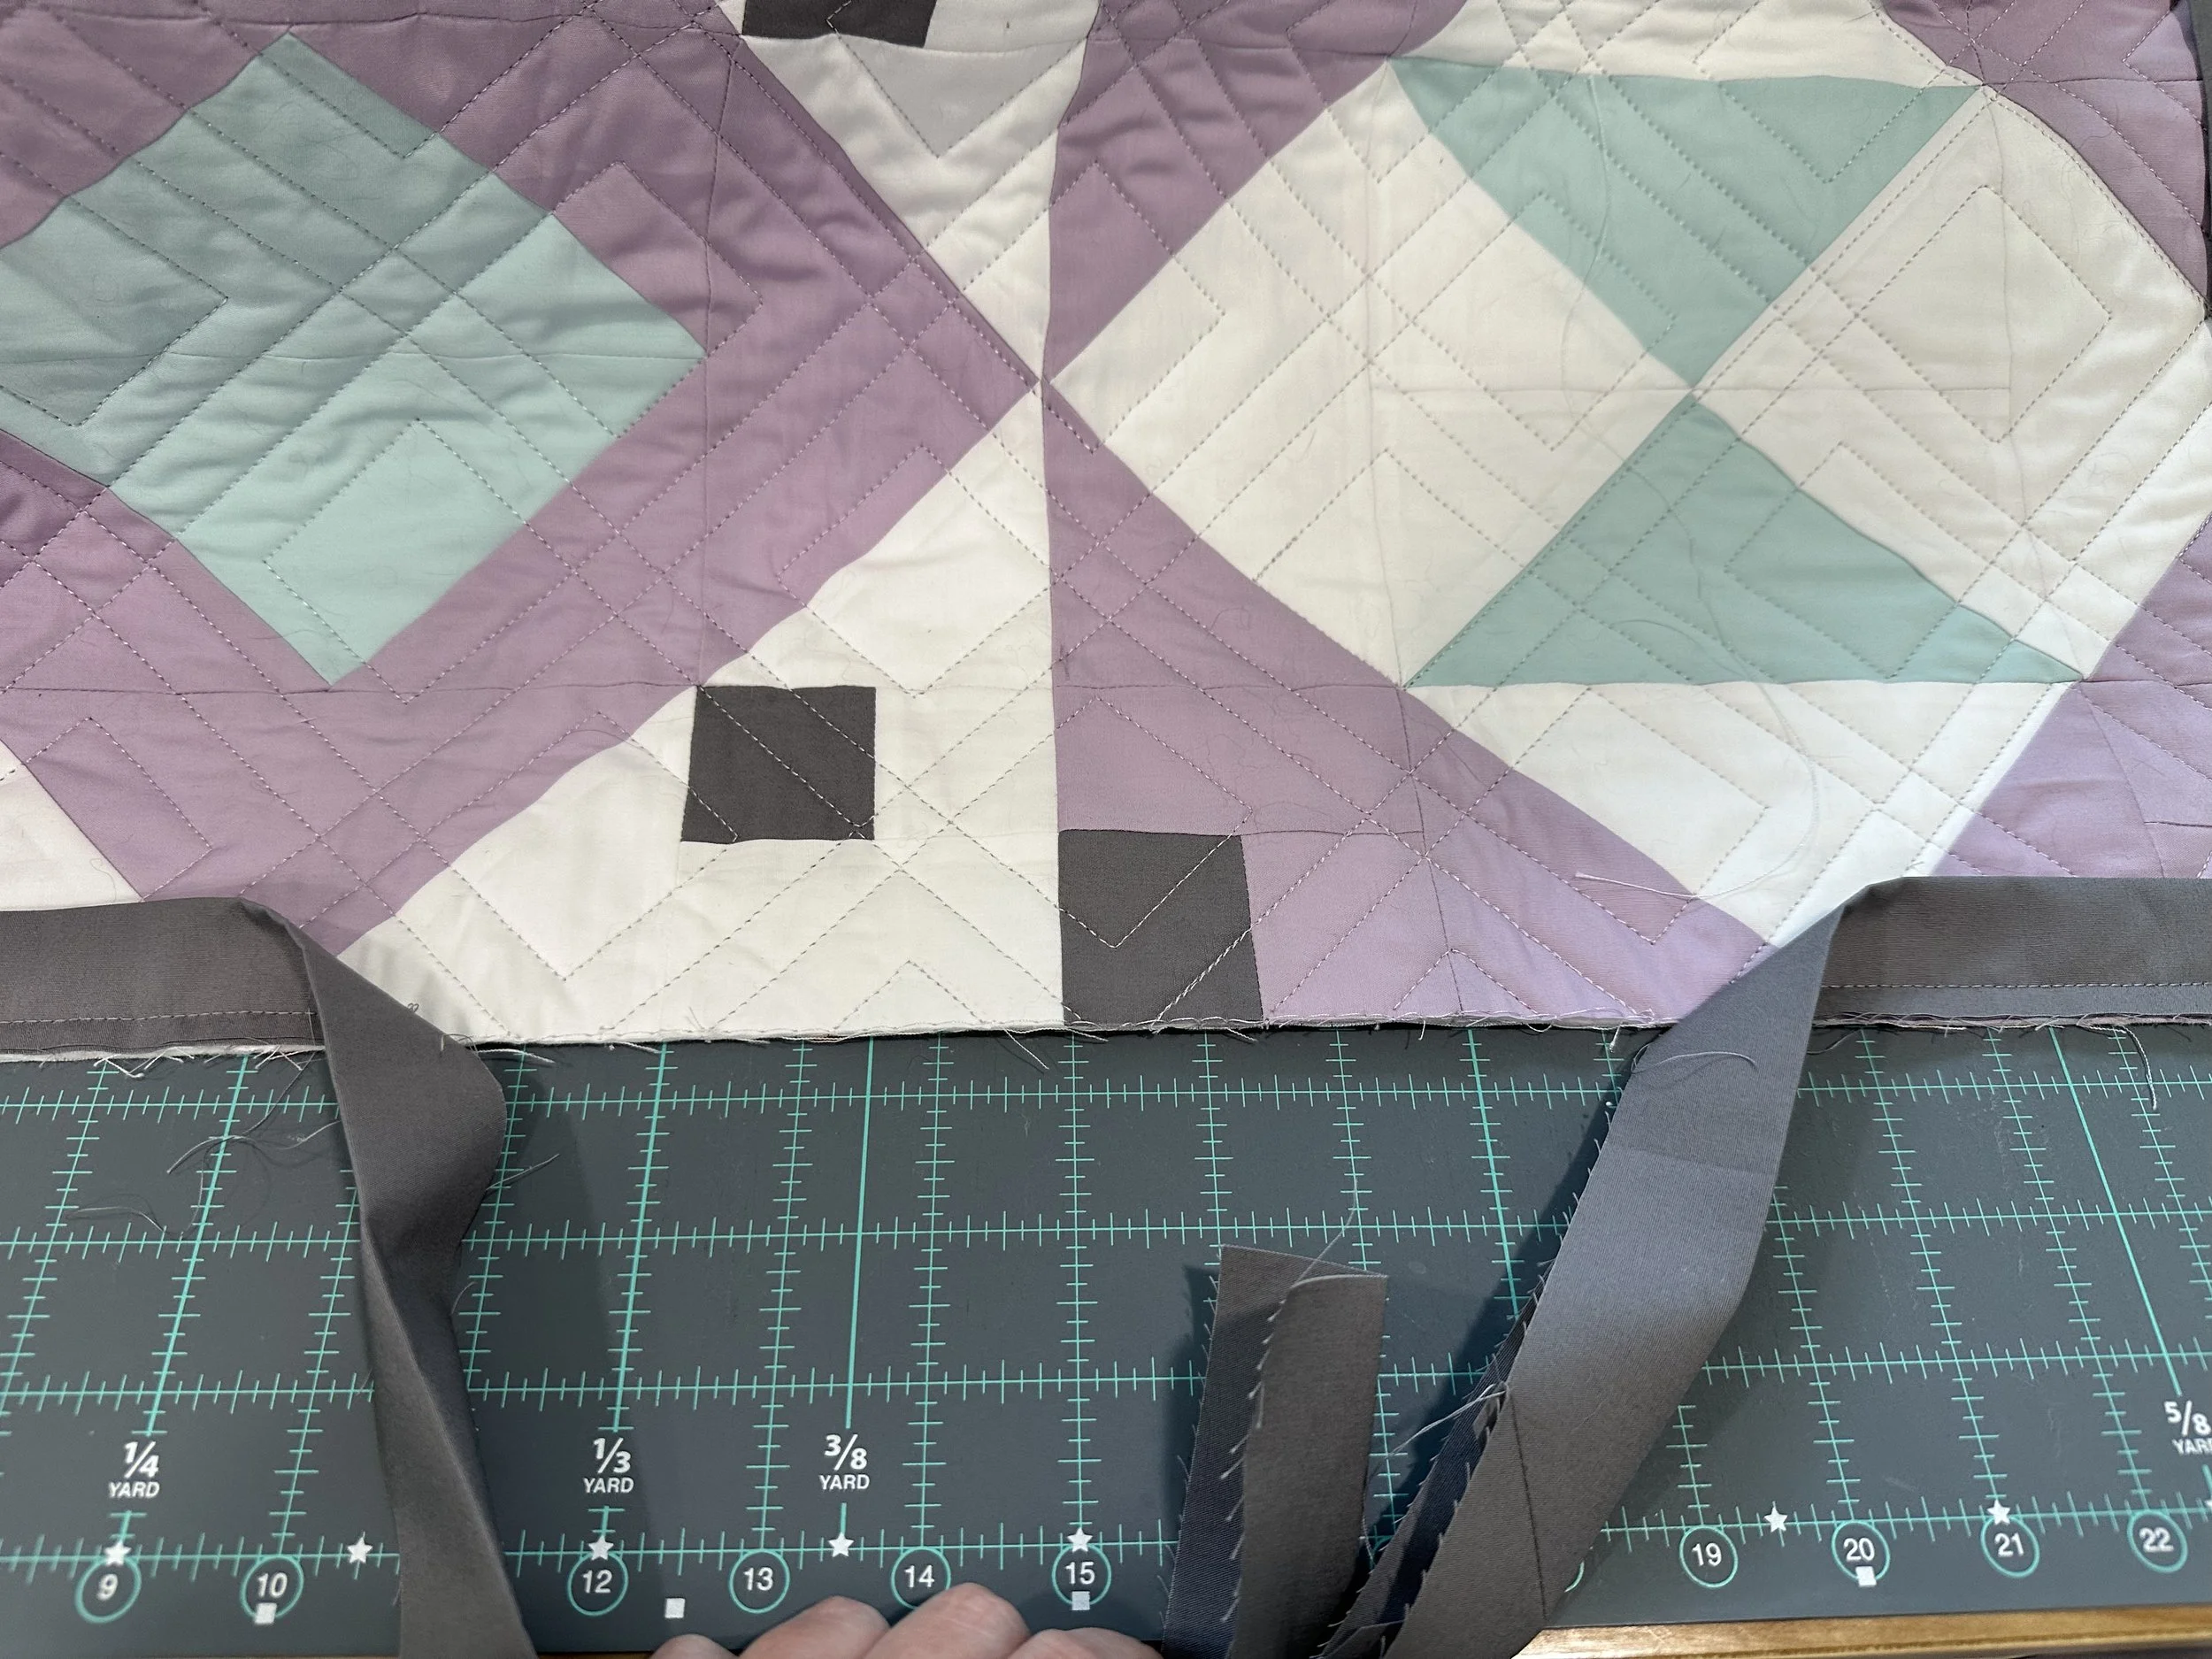
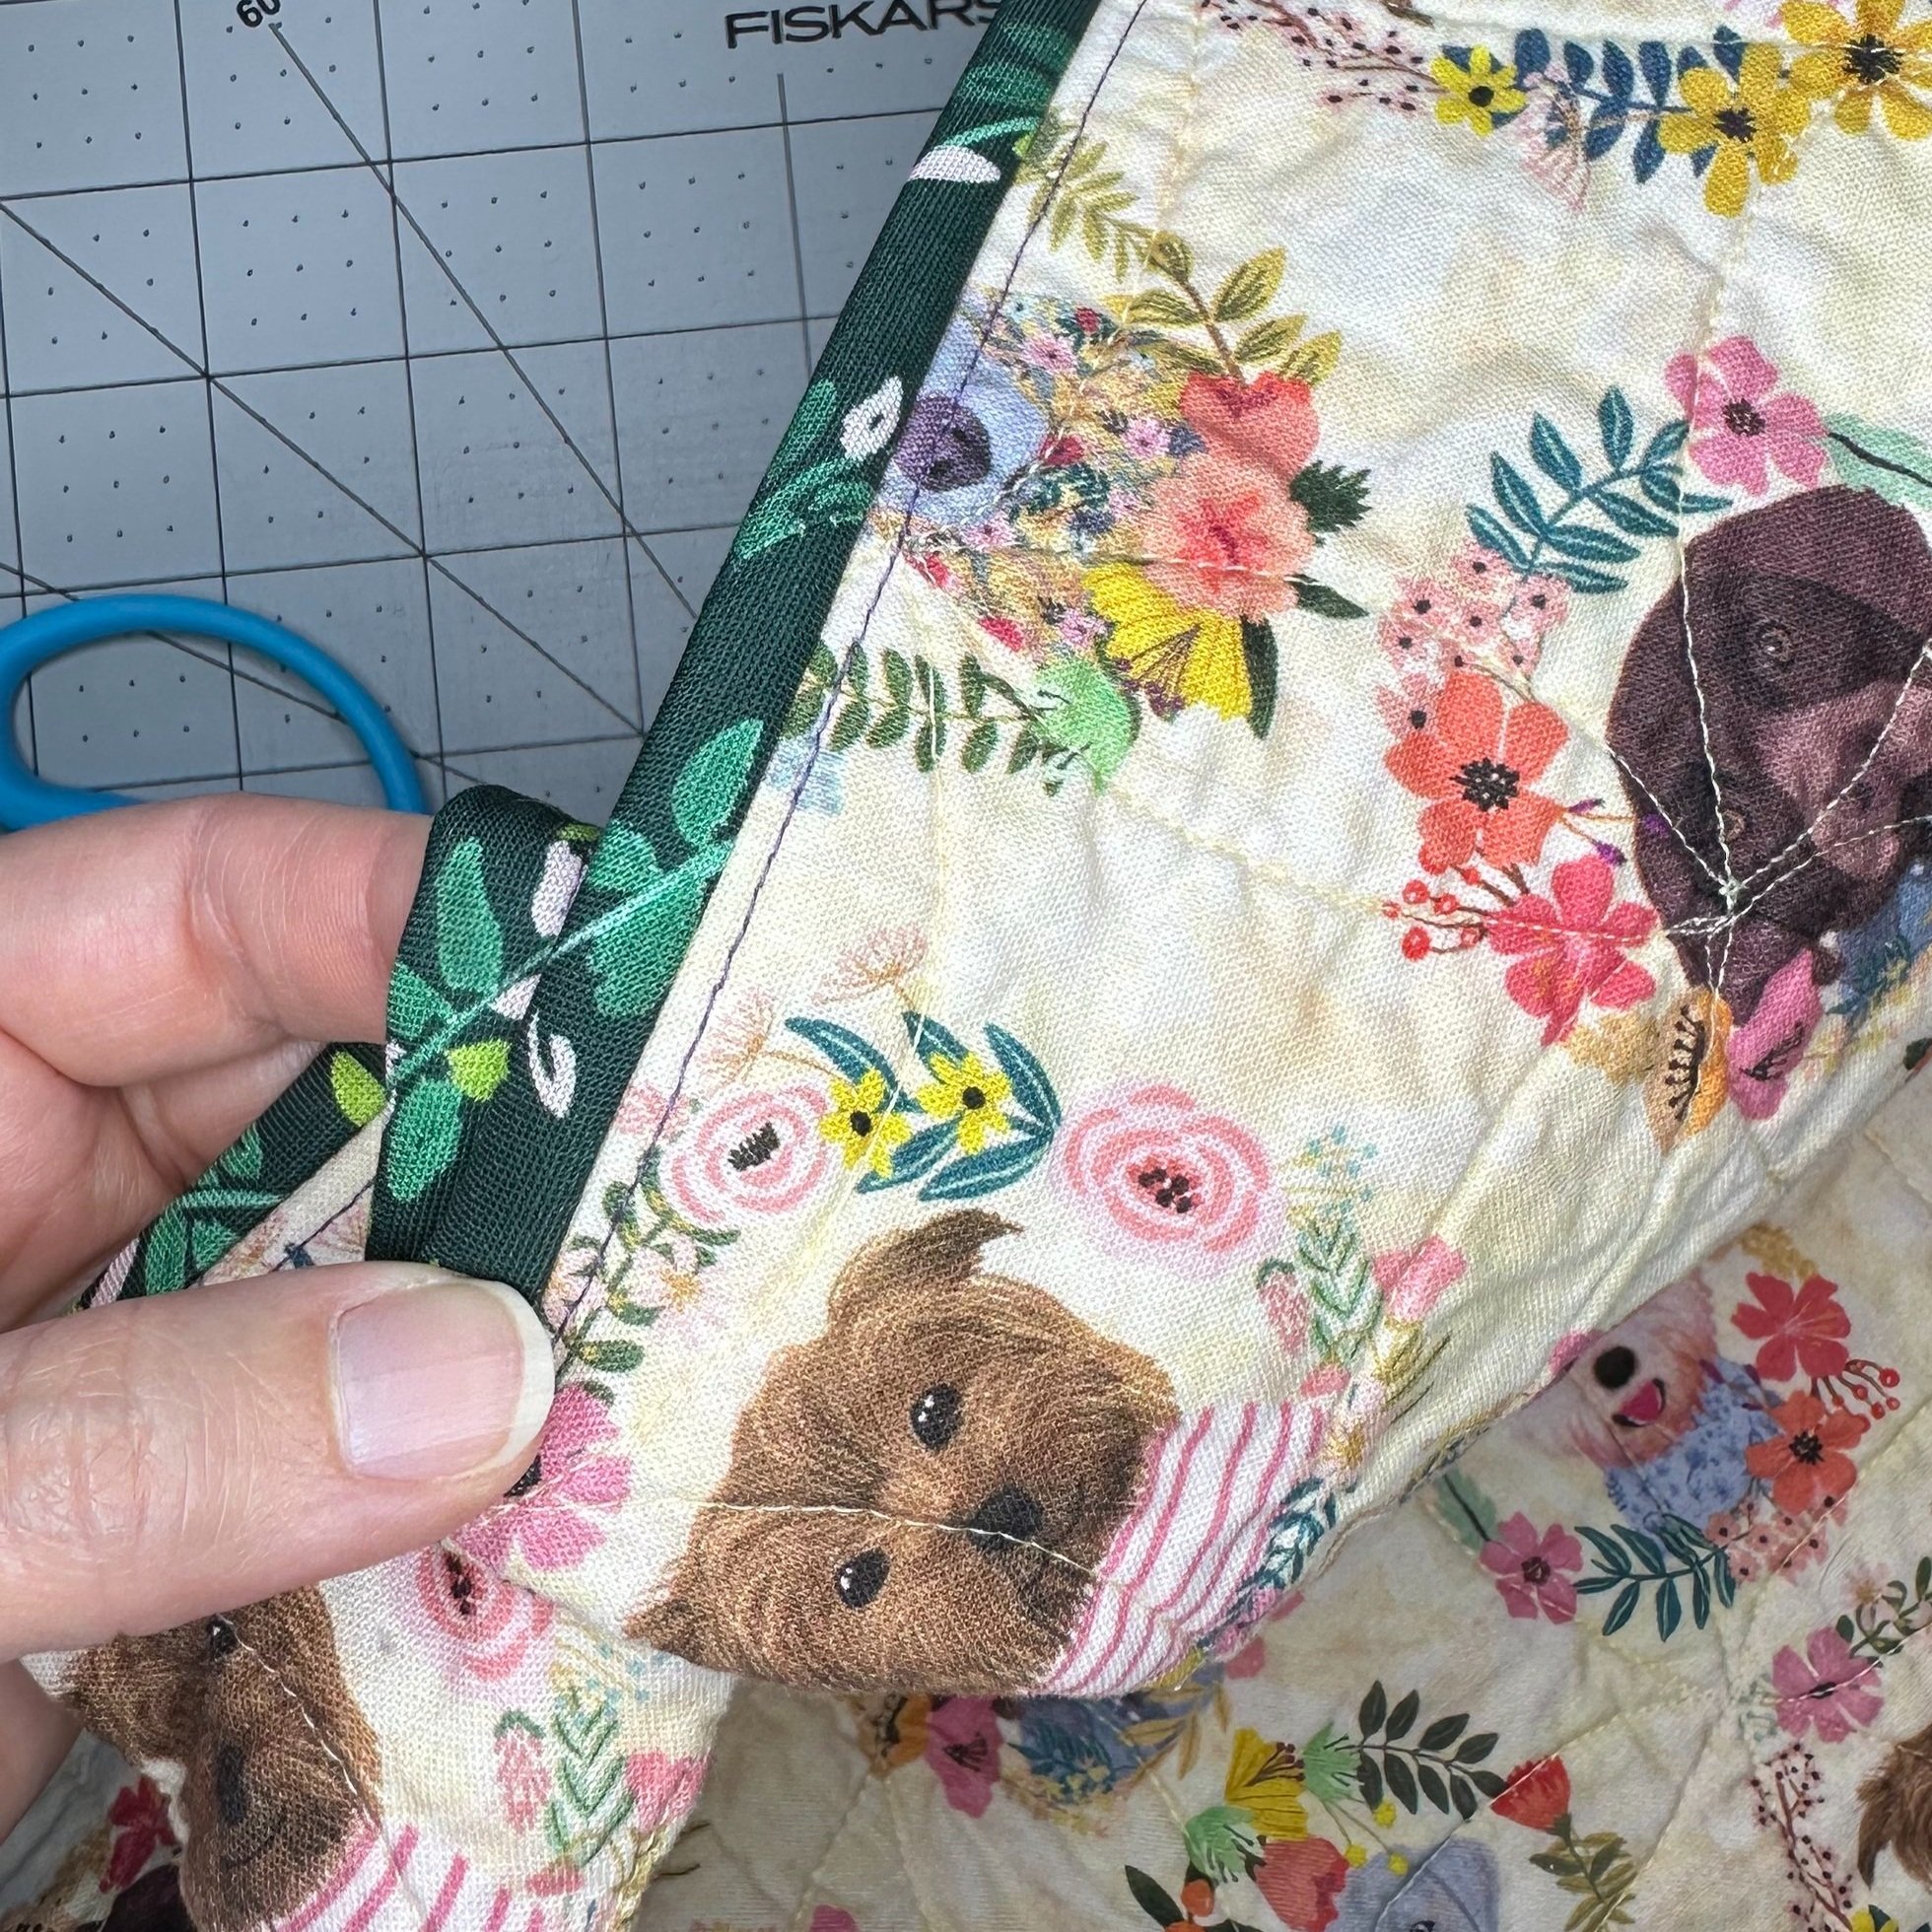
Secondly, you end up with an extra line of stitching on the back. This extra stitching is by no means a make-it or break-it scenario, but I like to avoid it if I can. Because you are stitching all the way through your quilt, (as opposed to be hand, where you can control your needle going only through certain layers), your final seam is visible. This is why we start on the back for this method. You can see the purple line of stitching I used to secure the binding from the reverse side of this quilt sample.
By Machine- Stitch in the Ditch
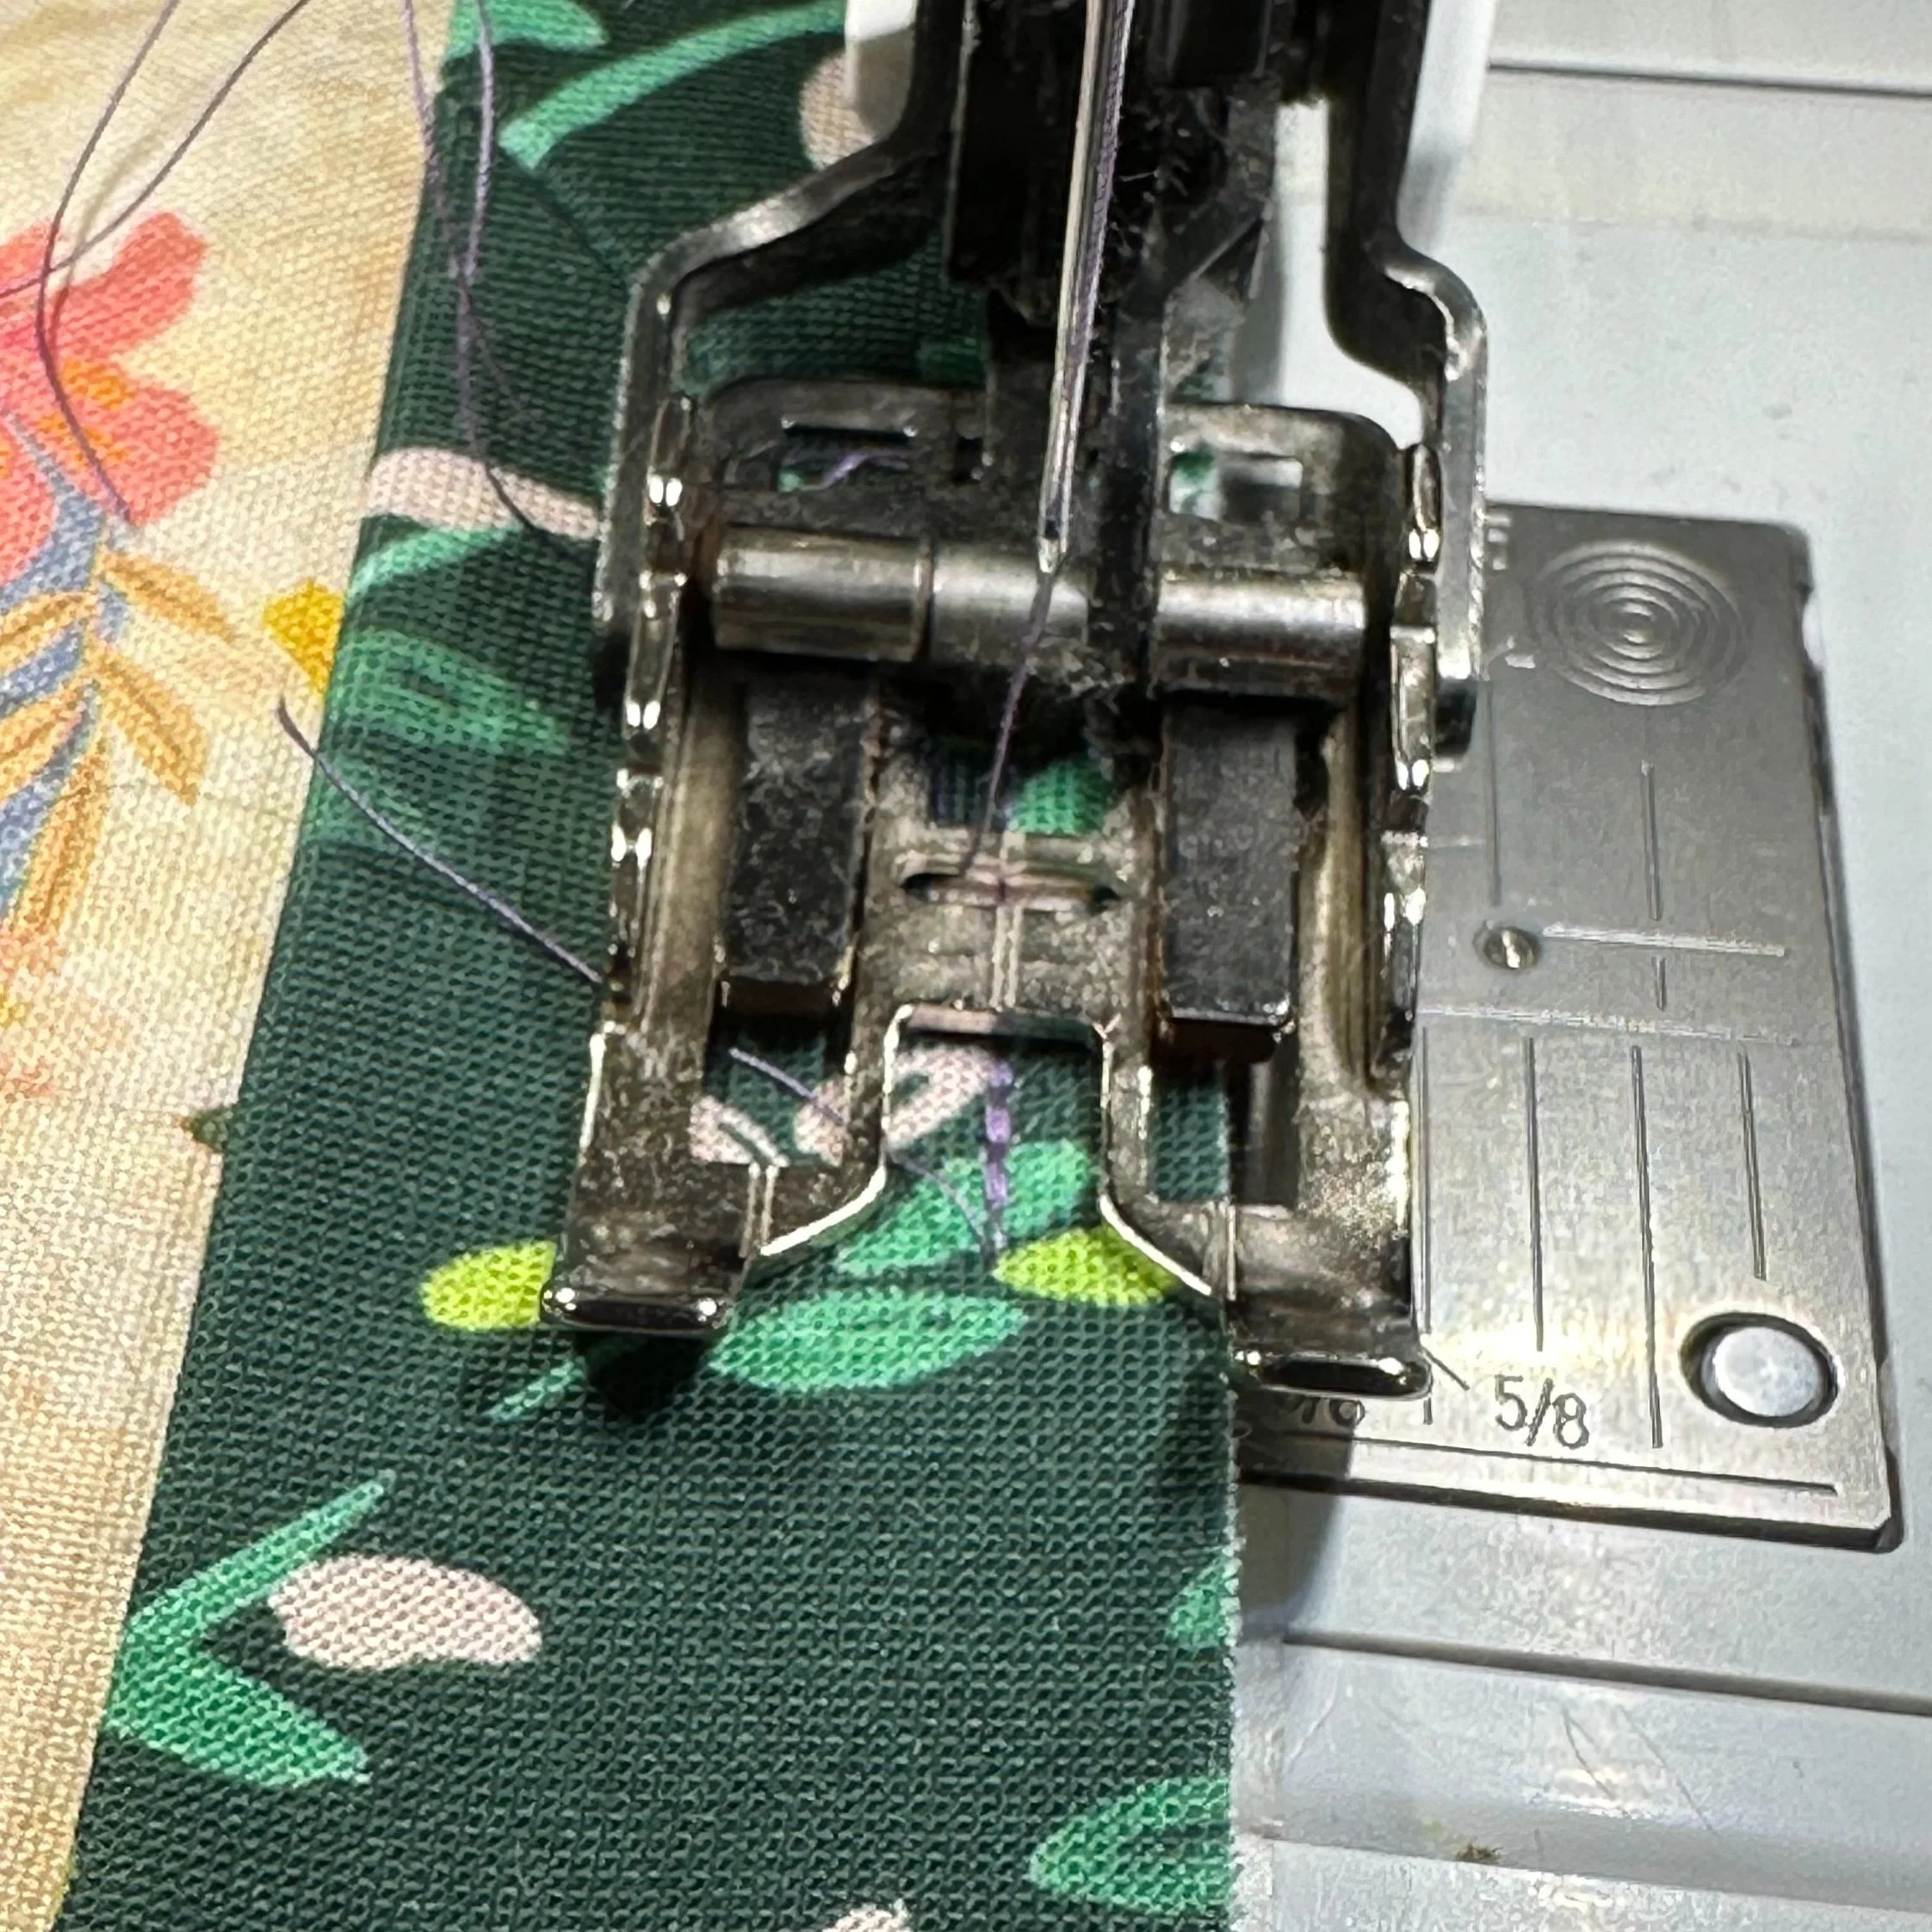
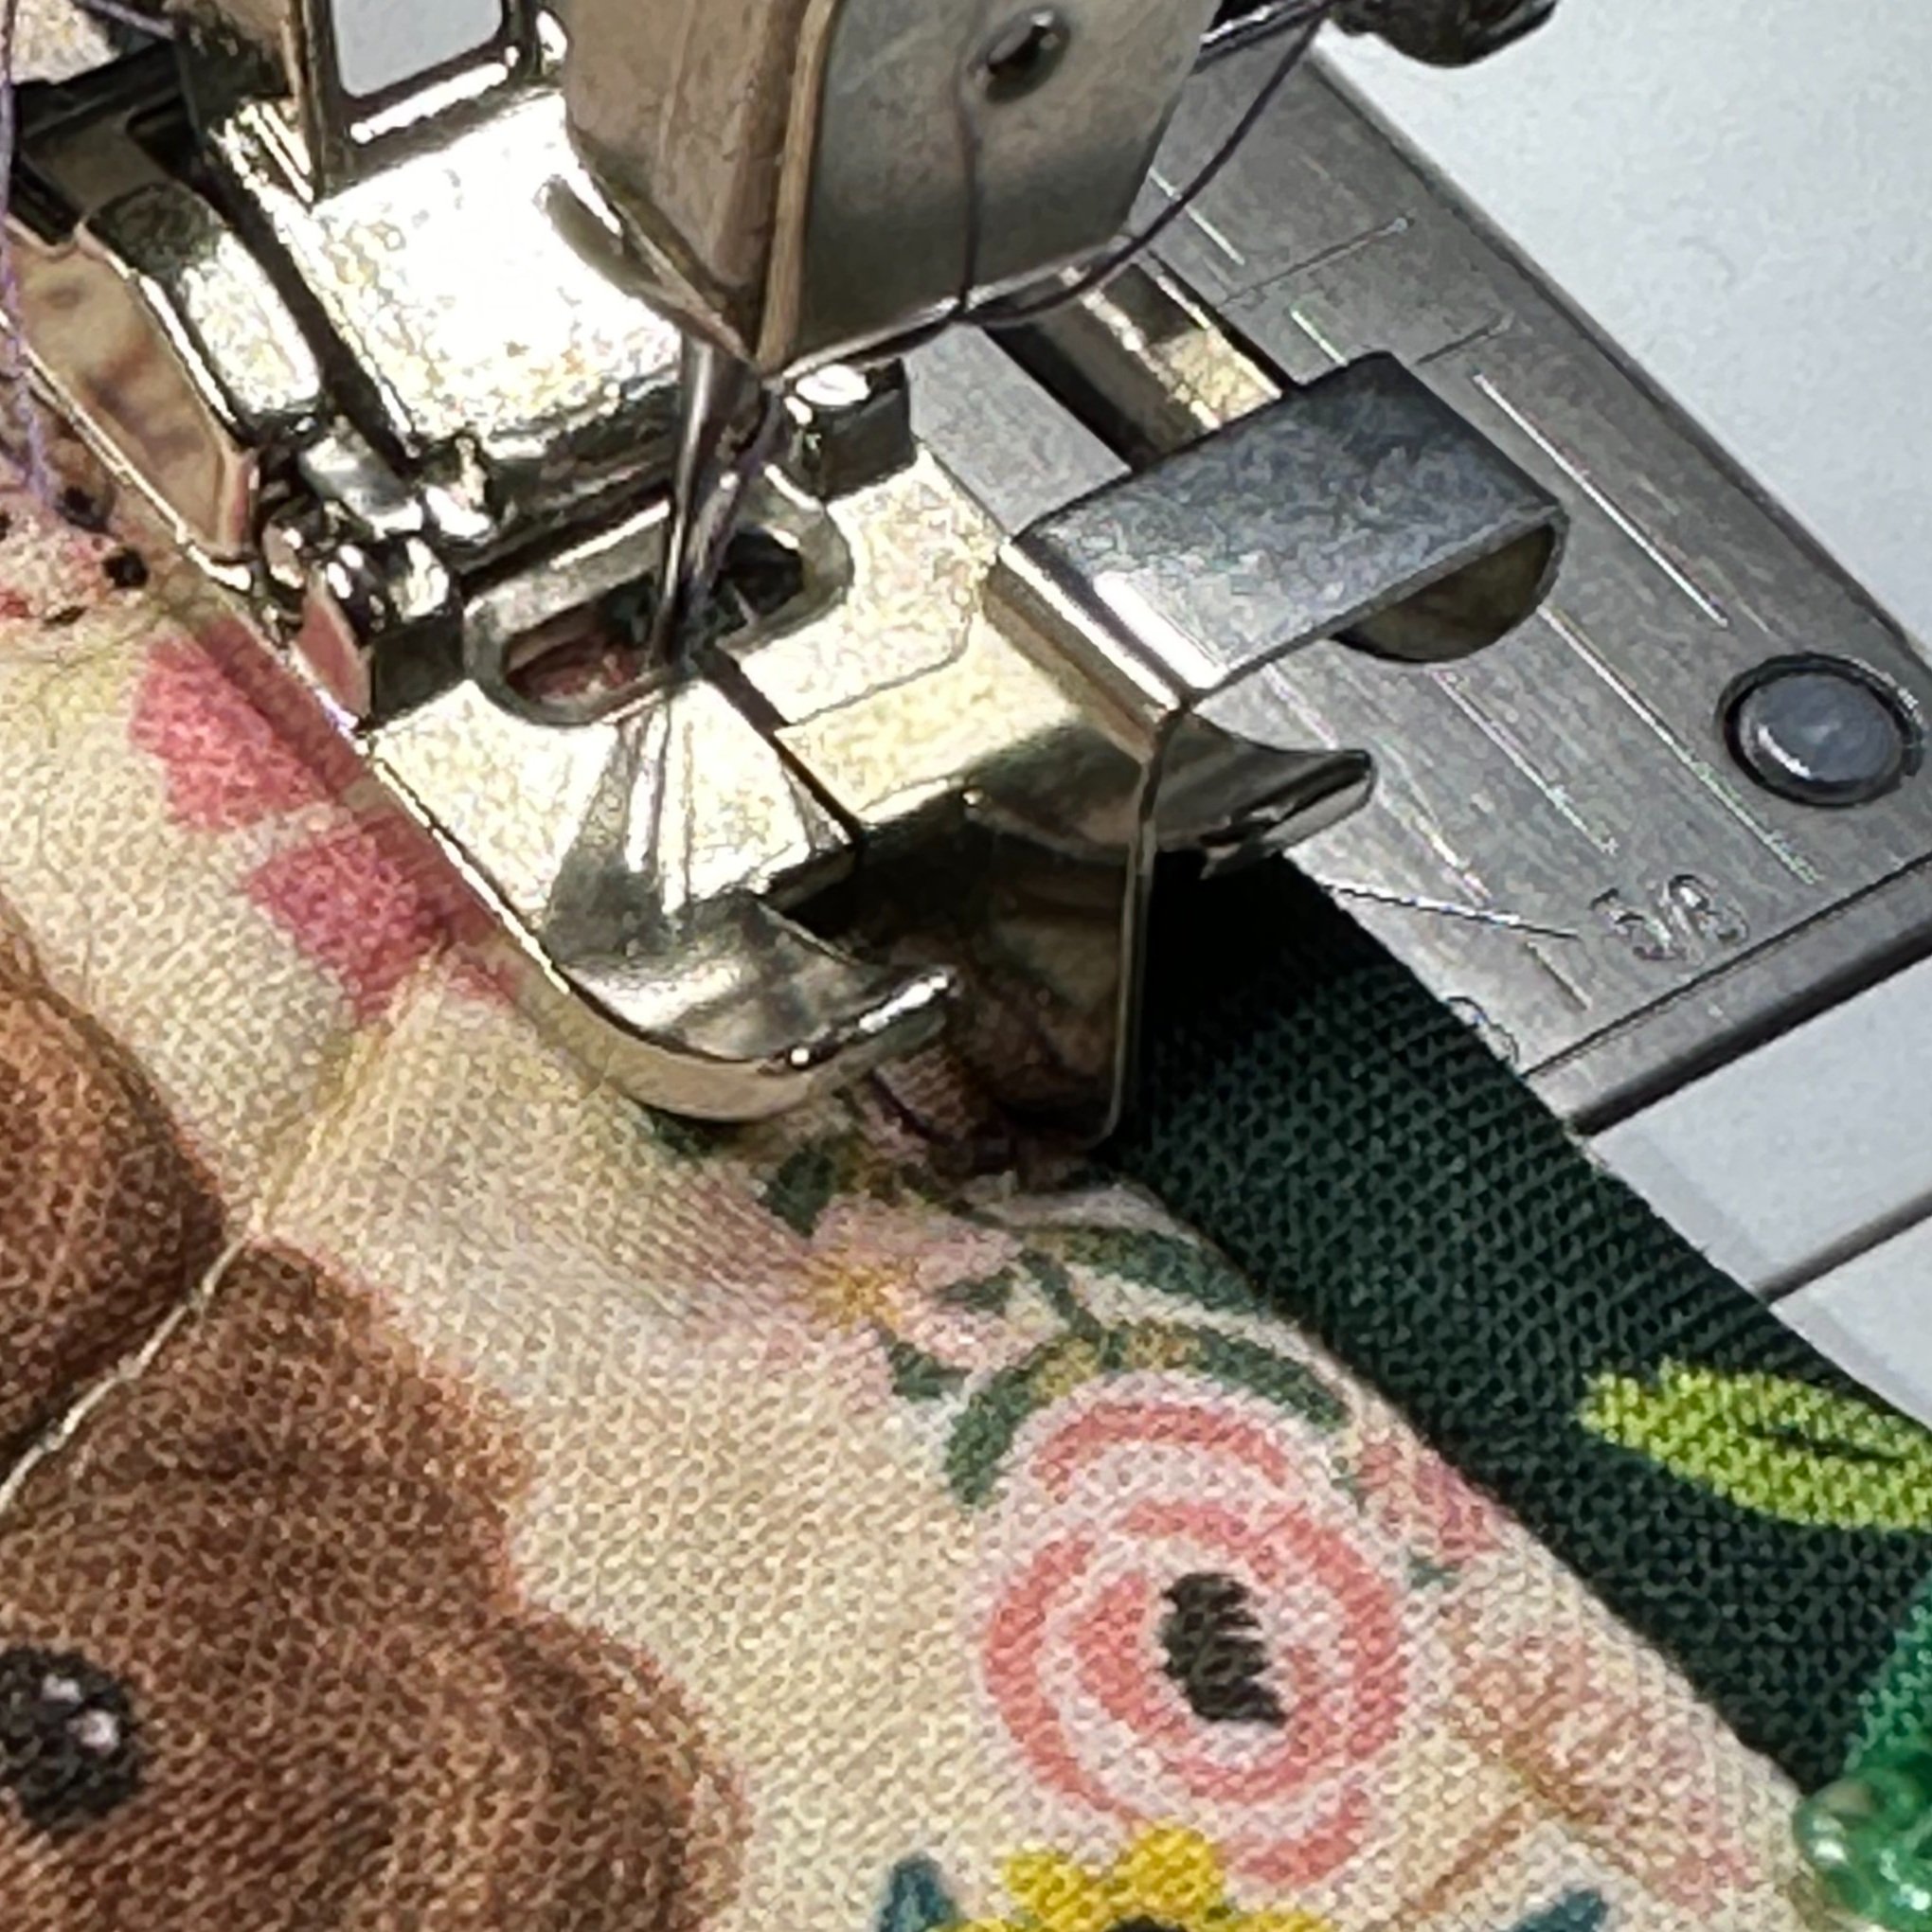
The last method is a Stitch in the Ditch method. This is kind of the best of both worlds, but it requires more accuracy and patience, and is greatly improved if you have an edge-foot. With this method, your binding is attached on the front of your quilt, but is also stitched down from the front of your quilt. It’s faster than hand-stitching, the prettiest side of your binding is still on the front, and you can avoid the extra line of stitching because it is hidden in the ditch of your binding.
If you don’t know, “stitching in the ditch” refers to stitching directly on top of another seam. This is a great way to hide a row of stitching. For this method of binding, when you stitch your final line to secure the second half of your binding down, you are aiming that stitch exactly where your binding is attached to your quilt top. Aiming for the seam exactly can be difficult, but it is made significantly easier if you have an edge-foot, which has a guide to keep you in the ditch as you sew. Even with an edge-foot, it takes patience to stay exactly where you want to be.
The other tricky thing about Stitching in the Ditch is that you cannot see the side of the binding you are stitching down as you sewing. You have to make sure that your binding extends far enough to be caught from underneath in your sewing, but not so far that you have too much excess on the other side of you stitching. It is not the easiest method in the world, and I still have room from improvement, myself, but I think that the payoff is well worth the work it takes.
For this method, you want to make sure you have enough biding to wrap around the edge of your quilt and have it extend about 1/8th inch past the line of stitching where you attached it. Too much further and you have a silly-looking amount of binding past your stitching. Just like everything, each person will have their unique way of sewing, so you may find your perfect formula to be different than mine. Trying for yourself and experimenting is the best way to learn what works best for you.
So How Wide Do I Make My Binding?
The easiest answer is 2.5”. That is a pretty common width as I have state before, and many quilt pattern writers will give you binding fabric requirements based off of that width. However I prefer a more narrow binding, and if doing the Stitch in the Ditch Method or binding by hand, I find that 2.5” in width is larger than the desired look I want to achieve.
If you prefer a wider binding, by all means, do what you prefer! Like most things in quilting, each quilter will have their favorite ways of doing things. It is neither wrong, nor right, it is simply individualistic.
When I do my binding width calculations, I follow the following “formula”:
Seam Allowance (usually 1/4”) + Seam allowance (doubling back on itself)+ depth of batting (usually 1/8th) + Seam allowance (to reach the line of stitching on the back) + however far past the line of stitching I want my biding to go. And then I double it. Because our biding is folded in half.
If I’m working with thin batting and I’m hand quilting, this would be 1/4 + 1/4 +1/8 + 1/4 + 1/8 = one inch. Then I double it for 2 inches. Two inches is very narrow for binding. I have bound quilts with that amount before, but to give myself a little breathing room, or if I think my batting is thicker, or if my edges aren’t very straight and I think I will need a little extra help, I’ll add another 1/8 or 1/4 inch to the whole measurement.
If I’m working with fat batting, and I’m doing the stitch in the ditch method, this would be 1/4 + 1/4 + 1/4 +1/4 + 1/8 = 1 & 1/8th inch. Doubling it would make it 2.25”.
Even though I use my “formula”, I allow myself a lot of wiggle room here. Some folks bind with a slightly larger seam allowance, so all of these widths would be larger. But I like to look back on this math to make sure that whatever I’m cutting my binding strips at, I’m making sure to take into account all factors involved.
You are now ready to go bind your quilt!
I hope you now how the knowledge and confidence to bind your quilt! If you have any questions, please don’t hesitate to reach out to me through social media, e-mail, or the contact portion of my site above “Keep in Touch”. Let me know what your favorite binding method is, whether it’s one of my three favorites, or a method not mentioned.


