Four at a Time Flying Geese
Four at a Time Flying Geese is not only a common way to make multiple blocks at once, but it is also a no-waste or minimal-waste method. If you want to to skip the technical extras and go straight to the cutting chart and instructions, feel free to jump to the steps by clicking the link below. If you are like me and understand how to do things a little better when you understand why you are doing them, keep reading!
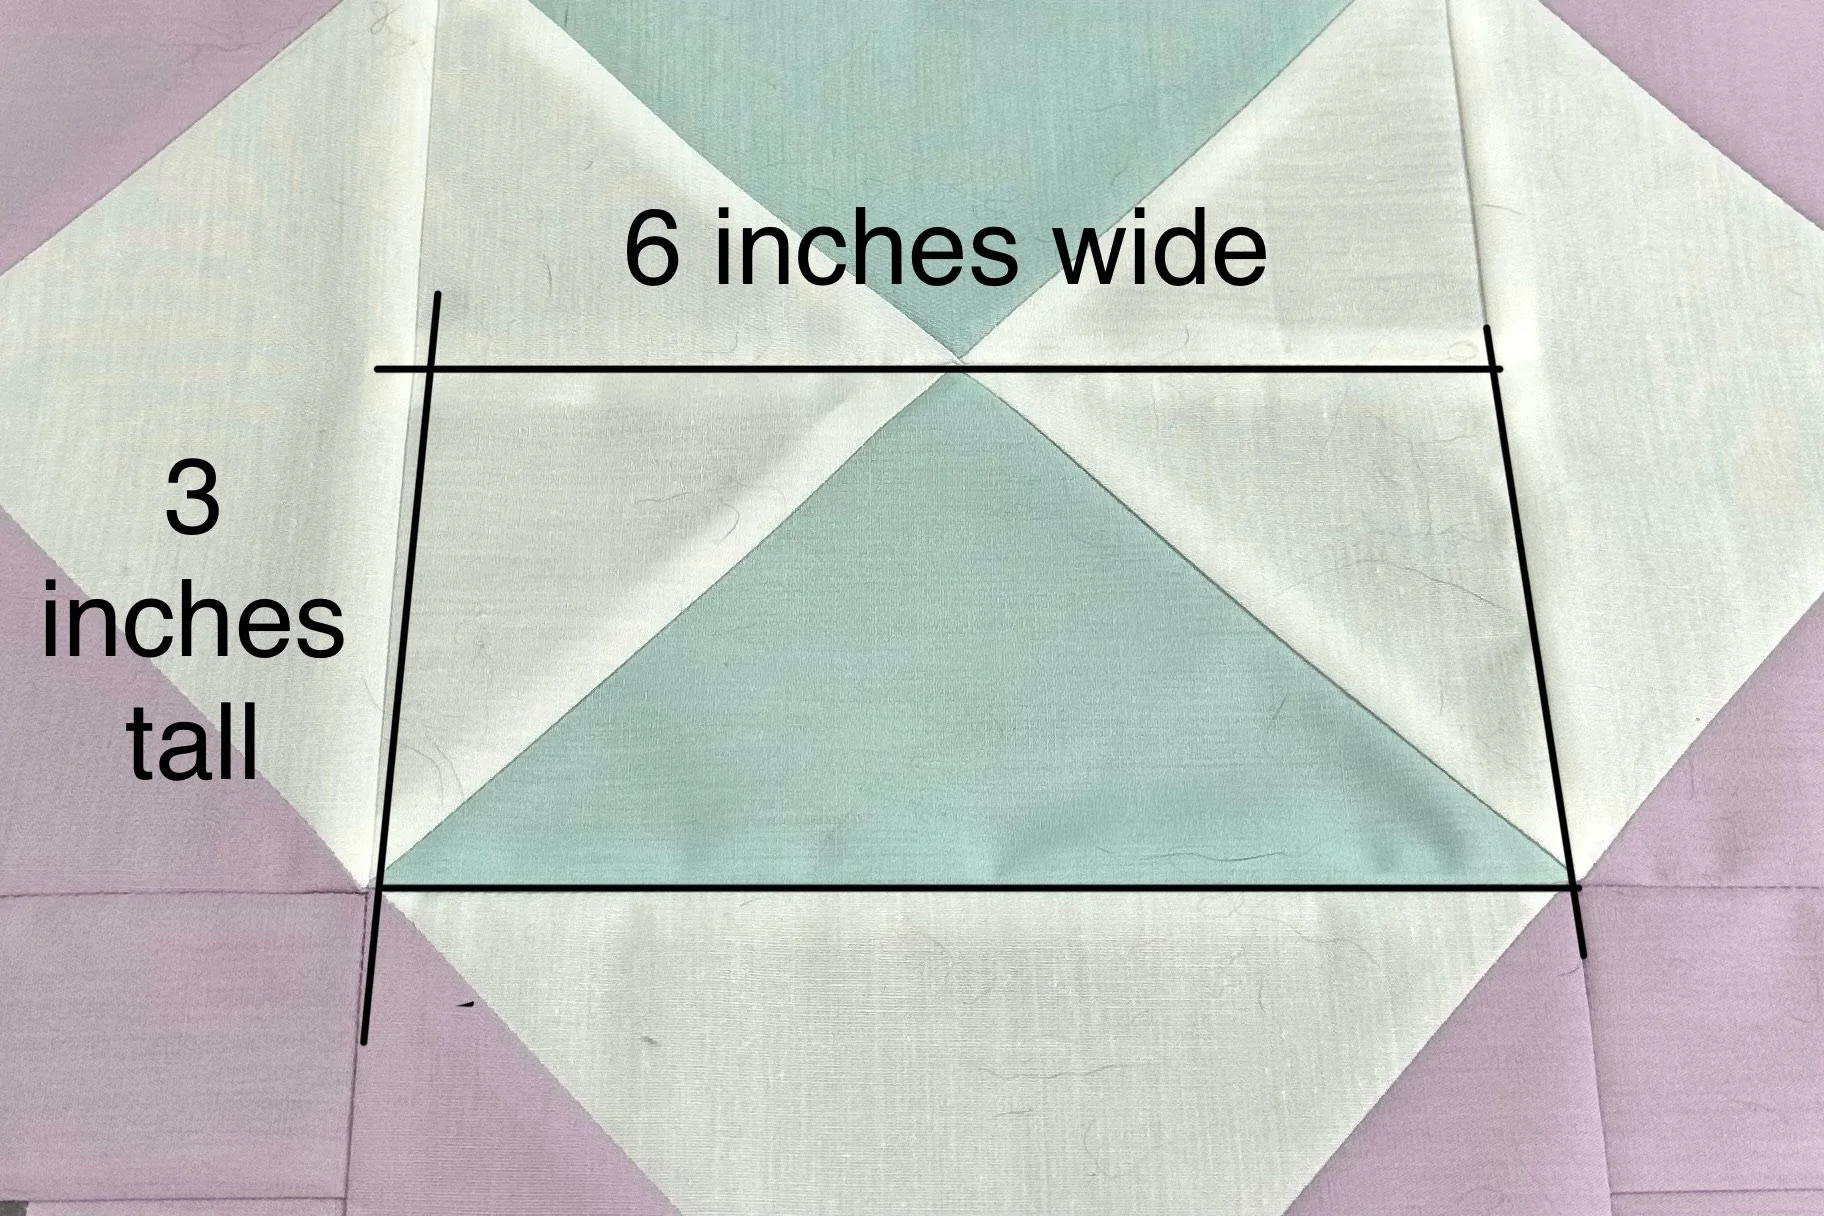
Flying Geese are virtually always in a 2:1 ratio when finished. Their width is twice their height. The Flying Geese in my Mazant pattern for example is pictured below, finished at 6” wide and 3” tall, but flying geese can be 2 x 1, 5 x 2.5, 8 x 4, etc., etc. And like with any quilt block, their unfinished size is a half-inch larger in each direction to include your quarter-inch seam allowance on all four sides; so the Mazant Flying Geese unfinished are 6.5 x 3.5”, and to continue with the other examples, those unfinished blocks would be 2.5 x 1.5, 5.5 x 3, and 8.5 x 4.5, respectively.
Take a look at any Flying Geese block and picture it as a goose flying in the sky. Think of main center triangle as the “goose” and the two outer triangles as the “sky”. To create them four at a time, you will always start with one larger Goose square and four smaller Sky squares. There are endless charts online to find sizing for the Goose and Sky squares (there is one farther down this tutorial, even), but you may notice that they are not all the same. If the instructions are for truly zero-waste, then there will be no need for trimming anything other than the dog-ears of the seam allowances. This can be great for the super-experienced, or for those who hate to trim down your blocks, but it can also be difficult for those who are not as accurate at a scant-quarter seam allowance, or even those of us (guilty) who aren’t good at sewing straight lines.
For this method, the directions usually have the Goose square cut 3/4”(or 0.75” as a decimal) larger than the unfinished width of your flying geese block. For example, when making a Flying Geese block that finishes at 6” wide, the minimal size of a Goose square to start with would be 7.25 x 7.25”. This is taking into account the unfinished width of the block (6.5”) plus an extra 3/8th inch for each seam allowance that will run diagonally through the Flying Geese, giving it the “V” shape. [3/8 + 3/8 = 6/8 AKA 3/4 inch. And 6.5 + 0.75 = 7.25]
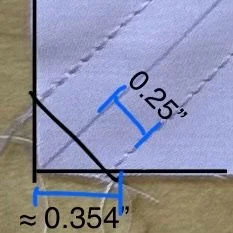
But why is the seam allowance 3/8ths inch? Shouldn’t it be 1/4 like always? Yes, but there’s the angle to account for. We’re going to get really mathy here. When we are sewing along the diagonal, we are using our 1/4” seam allowance. However, when we are figuring out the size of our goose square, we increasing our size from our unfinished size, not along the diagonal where our seam is running, but along the width. Take a look at the picture below. You can see that the seam allowance at an angle is 1/4” (or 0.25 if using decimals), but the amount of fabric we need for the seam allowance is closer 3/8th inch (or 0.375, as a decimal). For those who remember your high school geometry, what we have here in this Flying Geese seam allowance is a “right-triangle”. Remember those? And you can use the Pythagorean Theorem find out that the width we need to add is 0.354” on either side. Now, 0.354 is not 0.375 (3/8ths), but it’s certainly close enough for quilting purposes. The good news is that none of that math is required to understand, nor do you need to replicate it in order to make beautiful flying geese, but, as I said earlier, for some of us, knowing the “why” makes it easier to understand and remember the “how”.
“So, why would the charts I find on Flying Geese sizes be different from each other?” Because some folks, like me, prefer to have more than the exact amount when making flying geese, (or half square triangles, or hourglasses, or drunkard’s paths, or any of a myriad of quilt blocks) so that they can trim down for precise sizes, corners, and points. Depending on how much wiggle room you are given, the starting squares for Flying Geese get larger and larger. I have sized my Goose squares in the Mazant quilt pattern to be 7 & 3/8th” square. This gives me an additional 1/8th inch overall for error and for trimming, but not so much excess that it seems a waste.
The size of the Sky squares correspond to the Goose squares. They will be:
[1/4 the size of the minimum required Goose square(half the width and half the height)] + [the 3/8th inch for the diagonal seams that runs through the Sky square] + [additional trimming space for Goose square, divided by two, because each Sky square only touches one half of the Goose square]
For the Mazant Flying Geese, along with each 7 & 3/8th” Goose square, the pattern calls for four 4” sky squares.
[Half of a 7 & 1/4” square is a 3 & 9/16th” square] + [3/8th” (or 6/16th)] + [half of 1/8th, which is 1/16th] = 3 + 9/16 + 6/16 + 1/16 = 4.
If none of that makes sense, it’s a-okay. I thoroughly confused myself when writing this! Here is a chart below so we never have to do the math again!
Step by Step
Let’s Begin…
Step 1
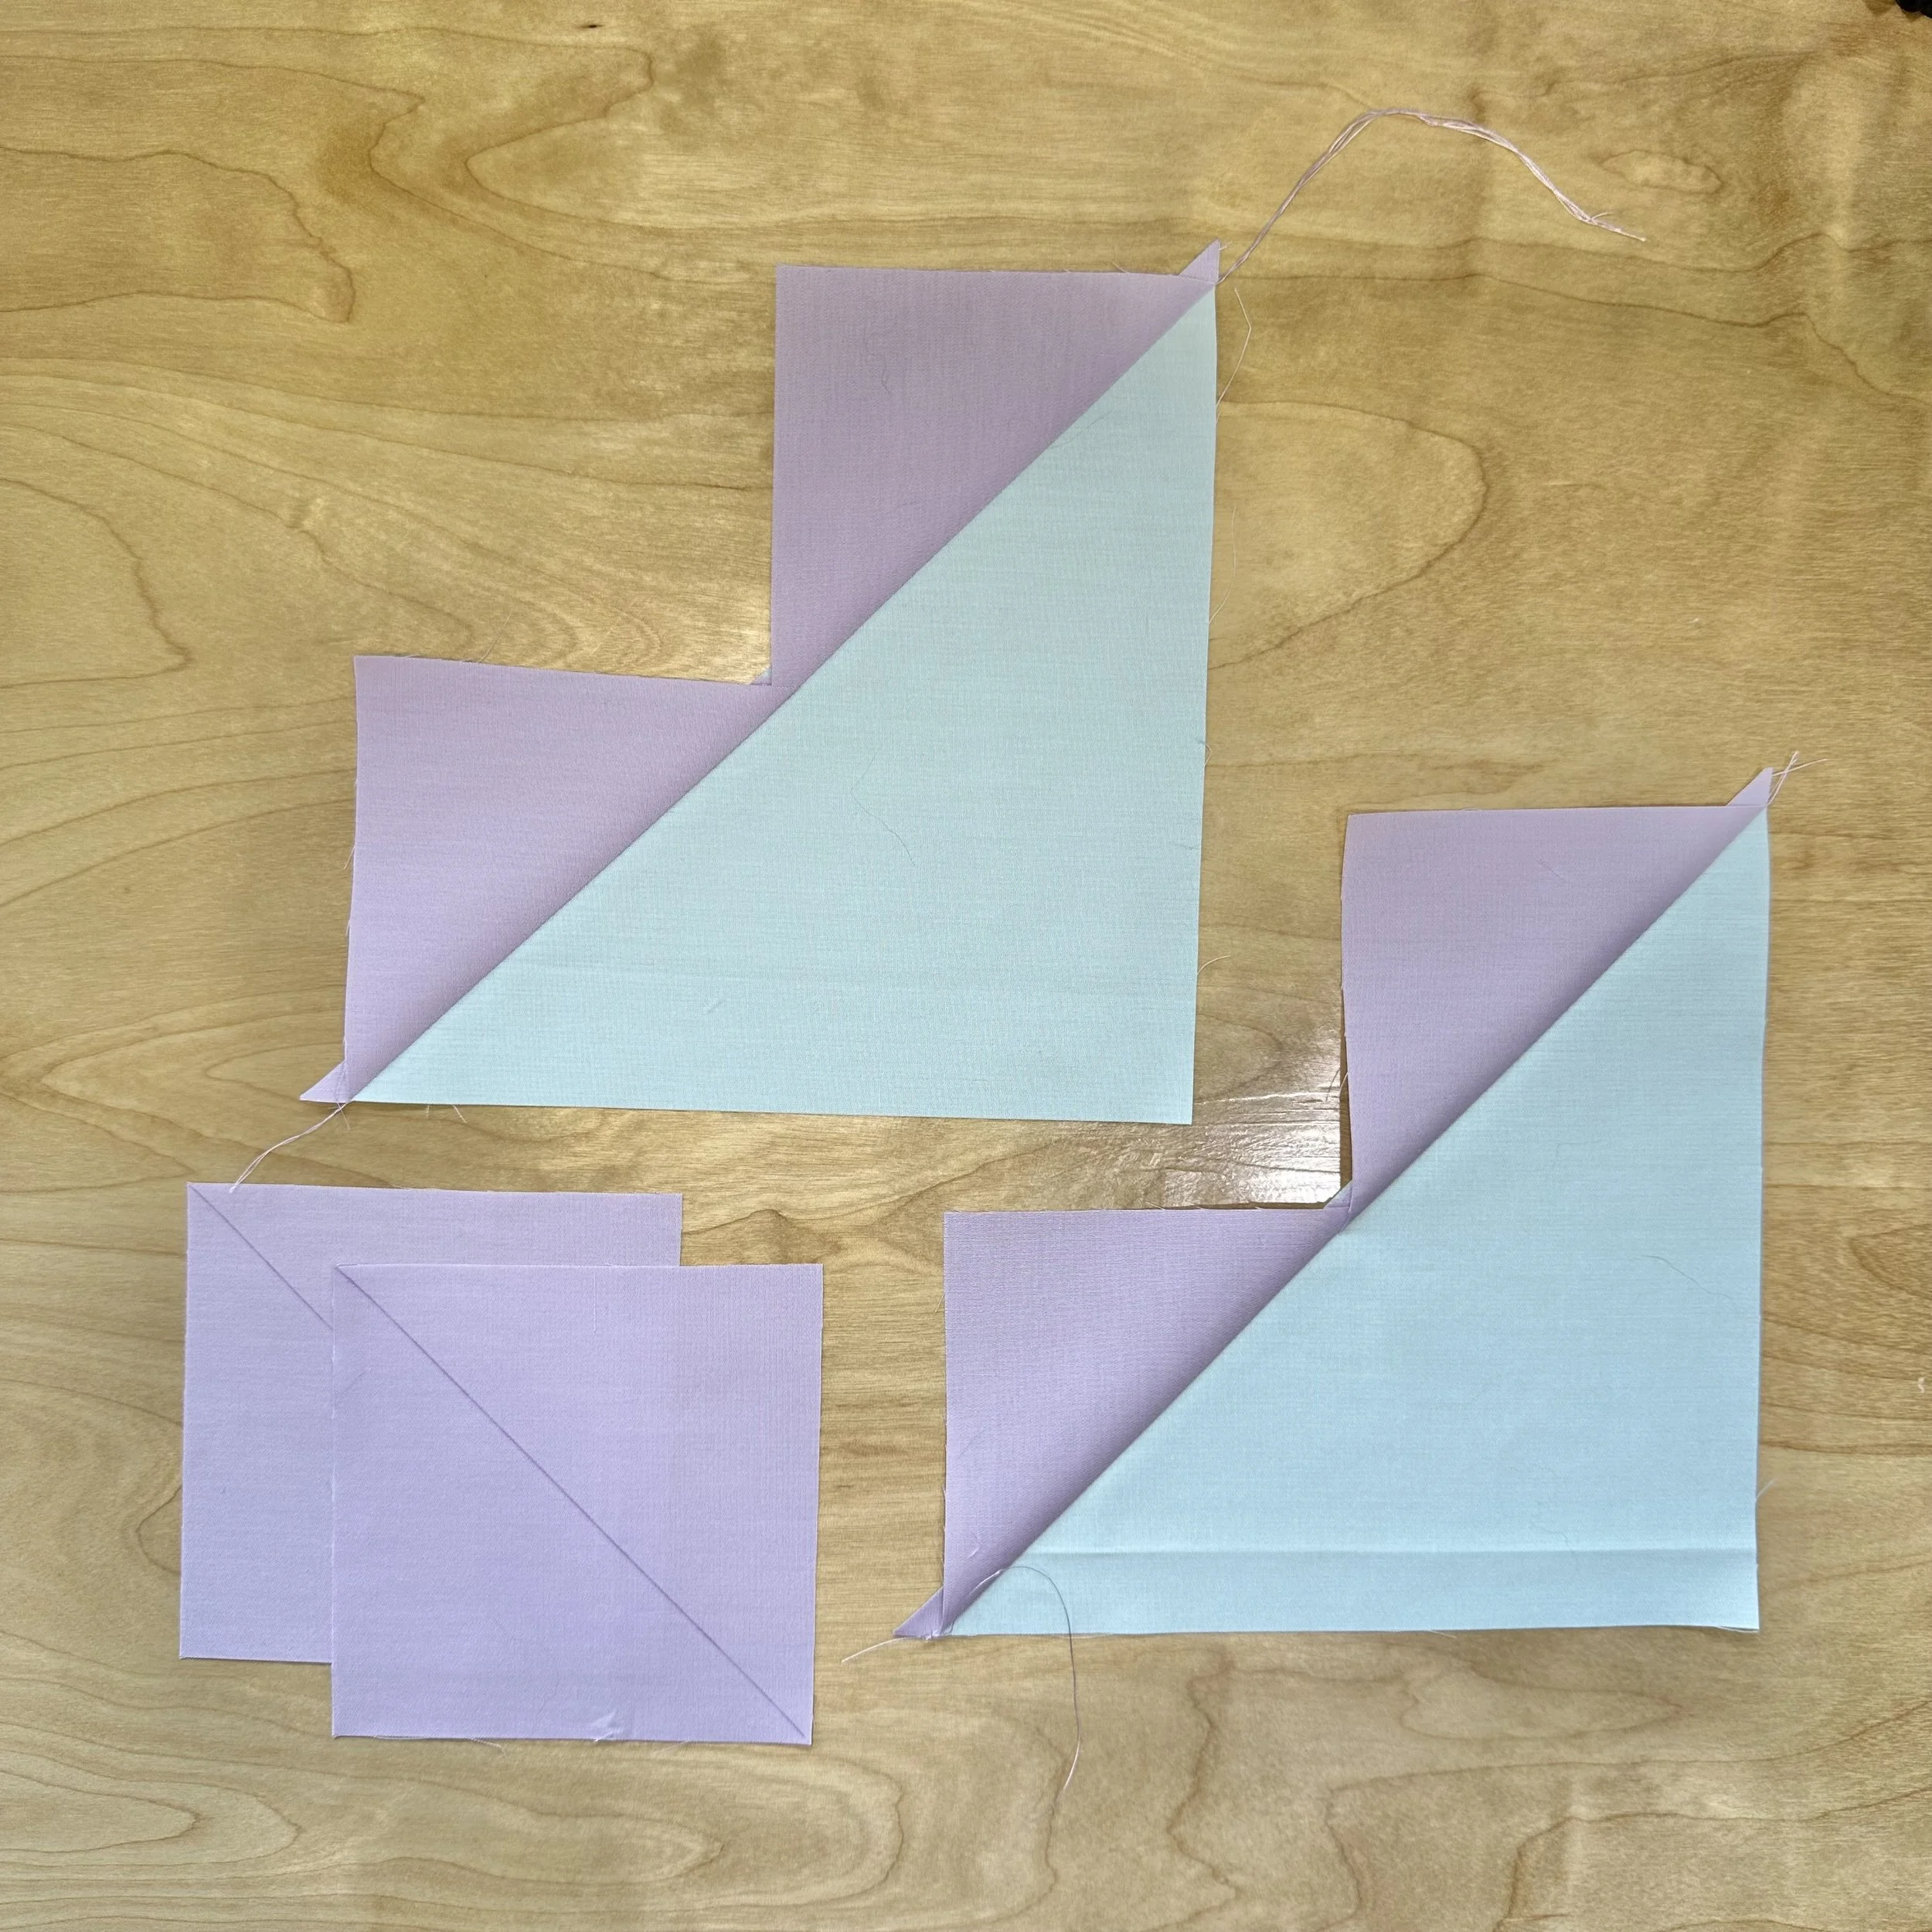
Place two small squares on the large square and sew on either side of the drawn line.
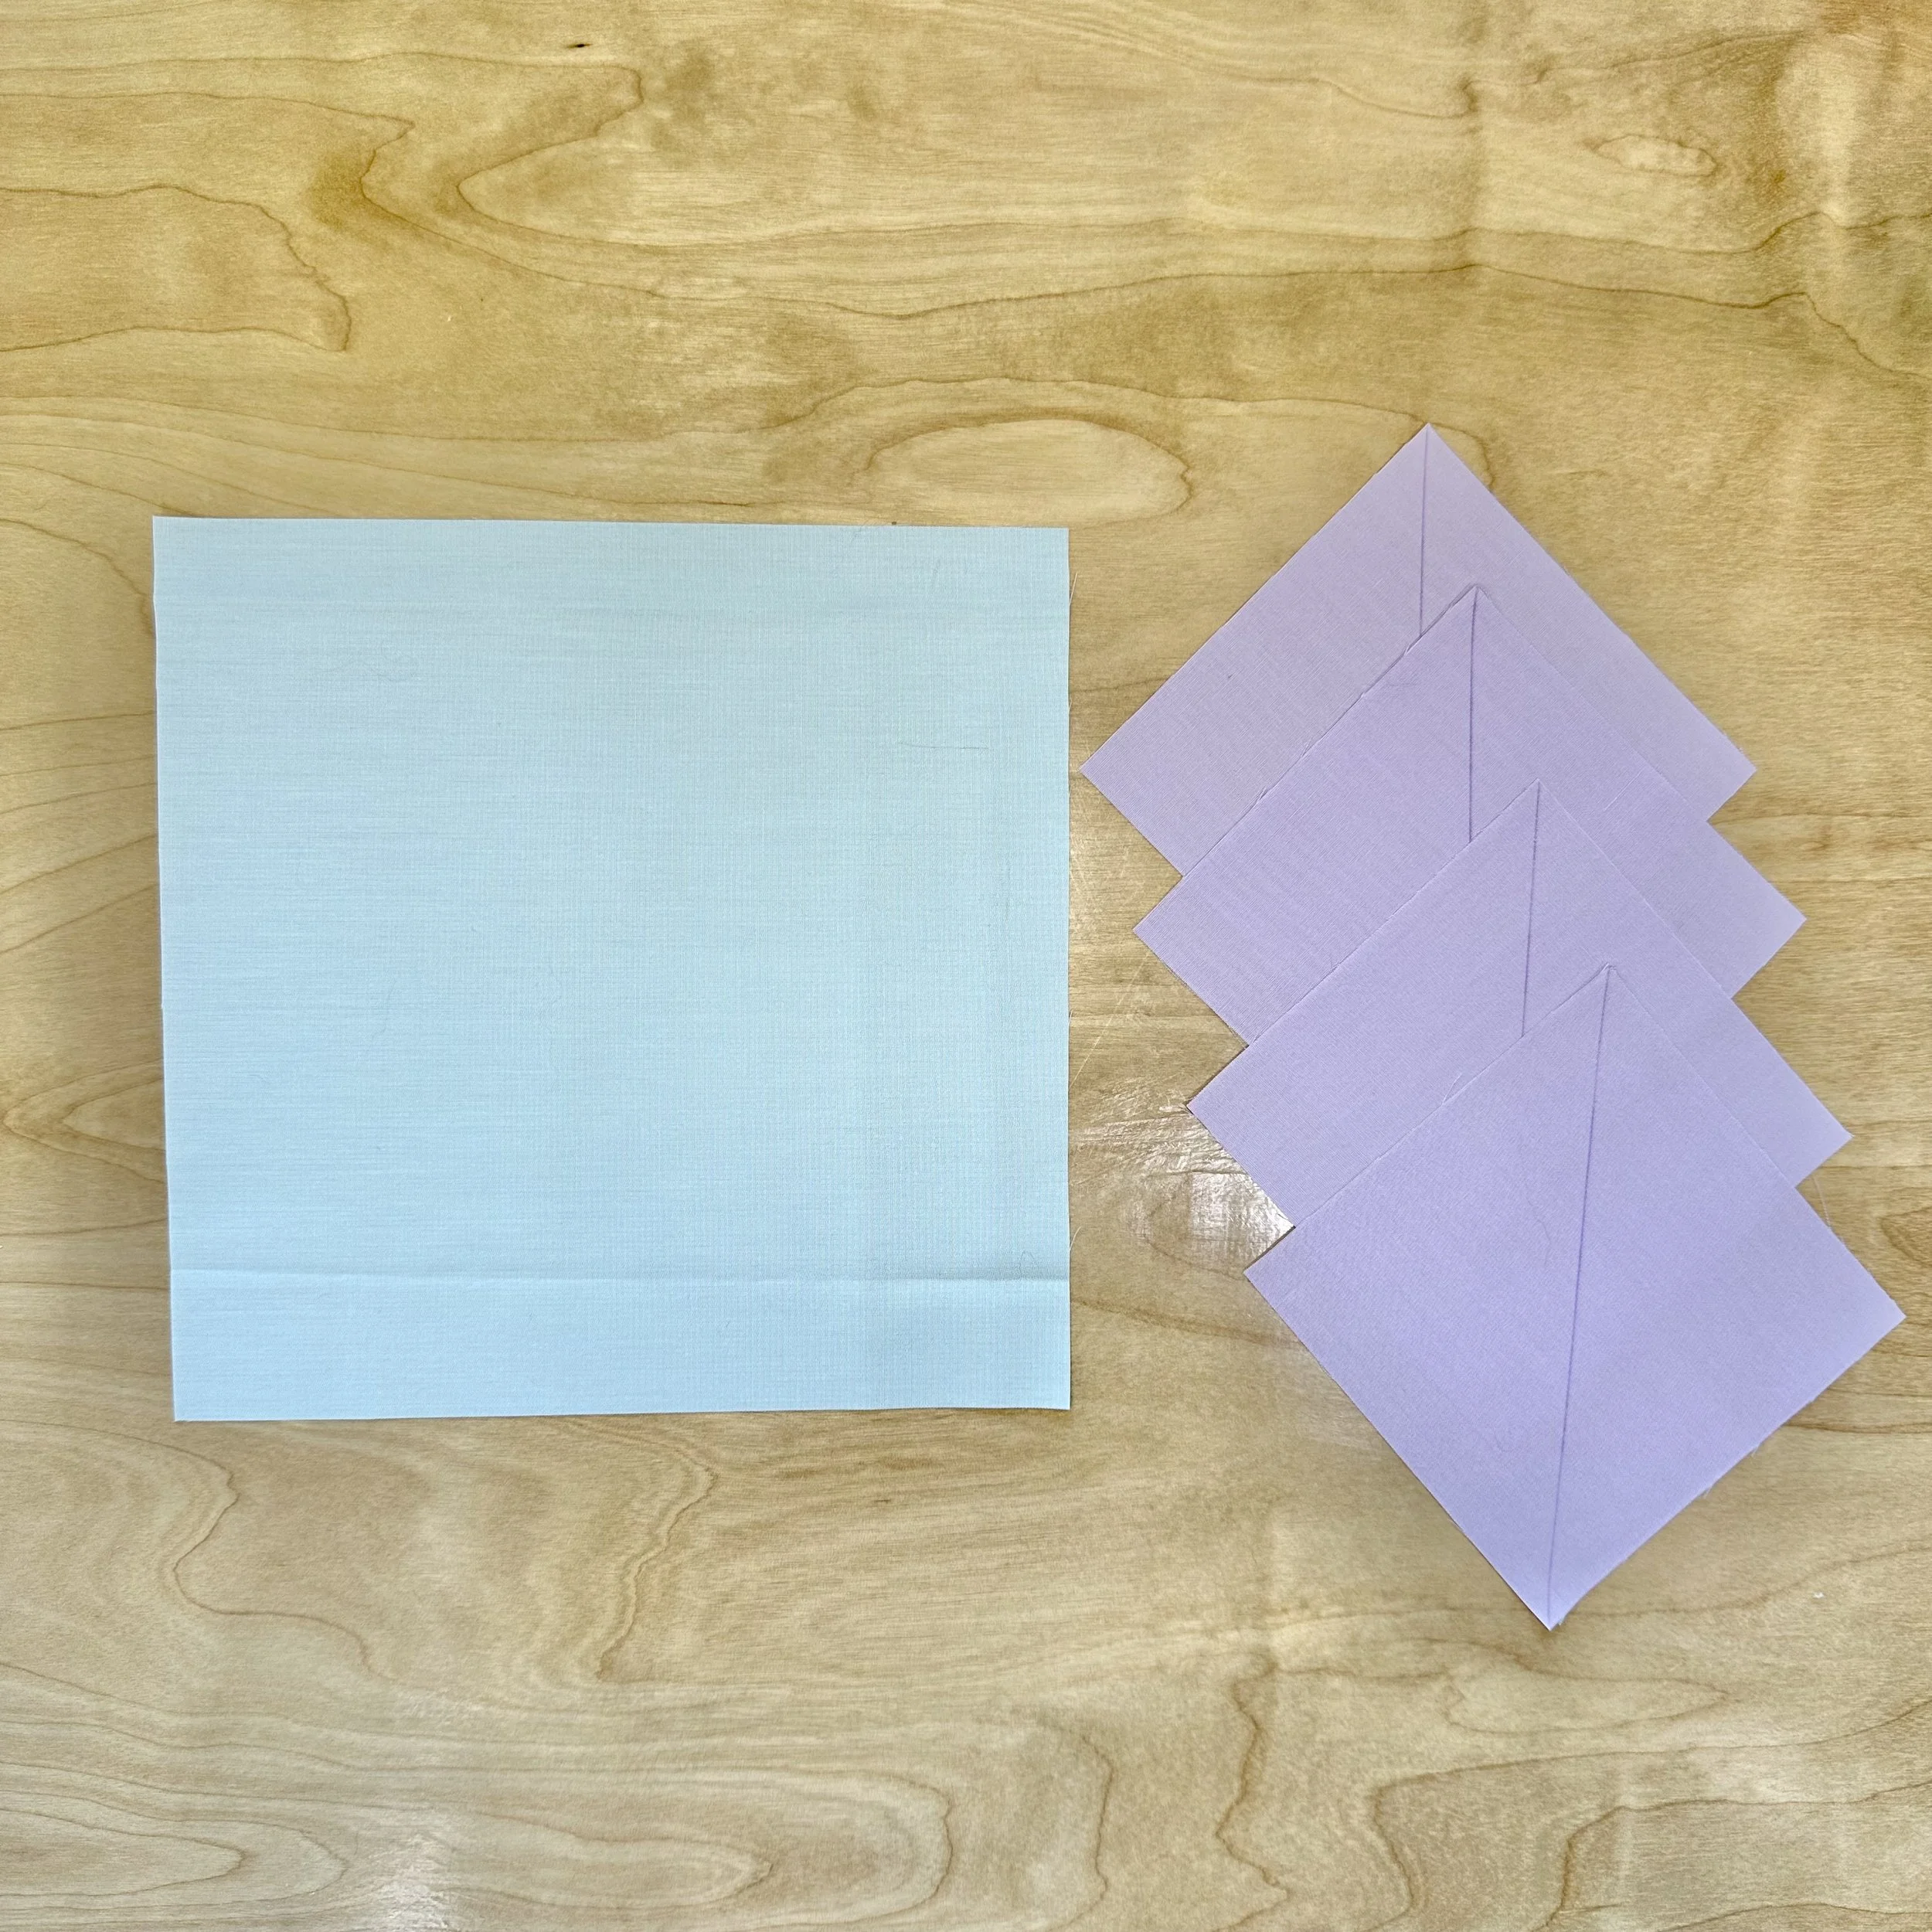
Start with you large square (or goose), and four smaller squares (the sky). On each small square draw a diagonal line down the wrong side from corner to corner.
The smaller squares should be in the opposite corners of the larger square and the diagonal lines on the backs of the small squares should touch to create one diagonal line all the way across the larger block. The small squares overlap a bit. This can create bulk further down the lines. Some folks trim these corners of the small squares where they overlap, as indicated by the picture below. Pin these squares in place and sew just a hair or thread’s width less than a 1/4”, AKA a scant 1/4”. Not using a scant 1/4 can cause your sky pieces to fall short of where they need to reach once they are pressed in place.
Step 2
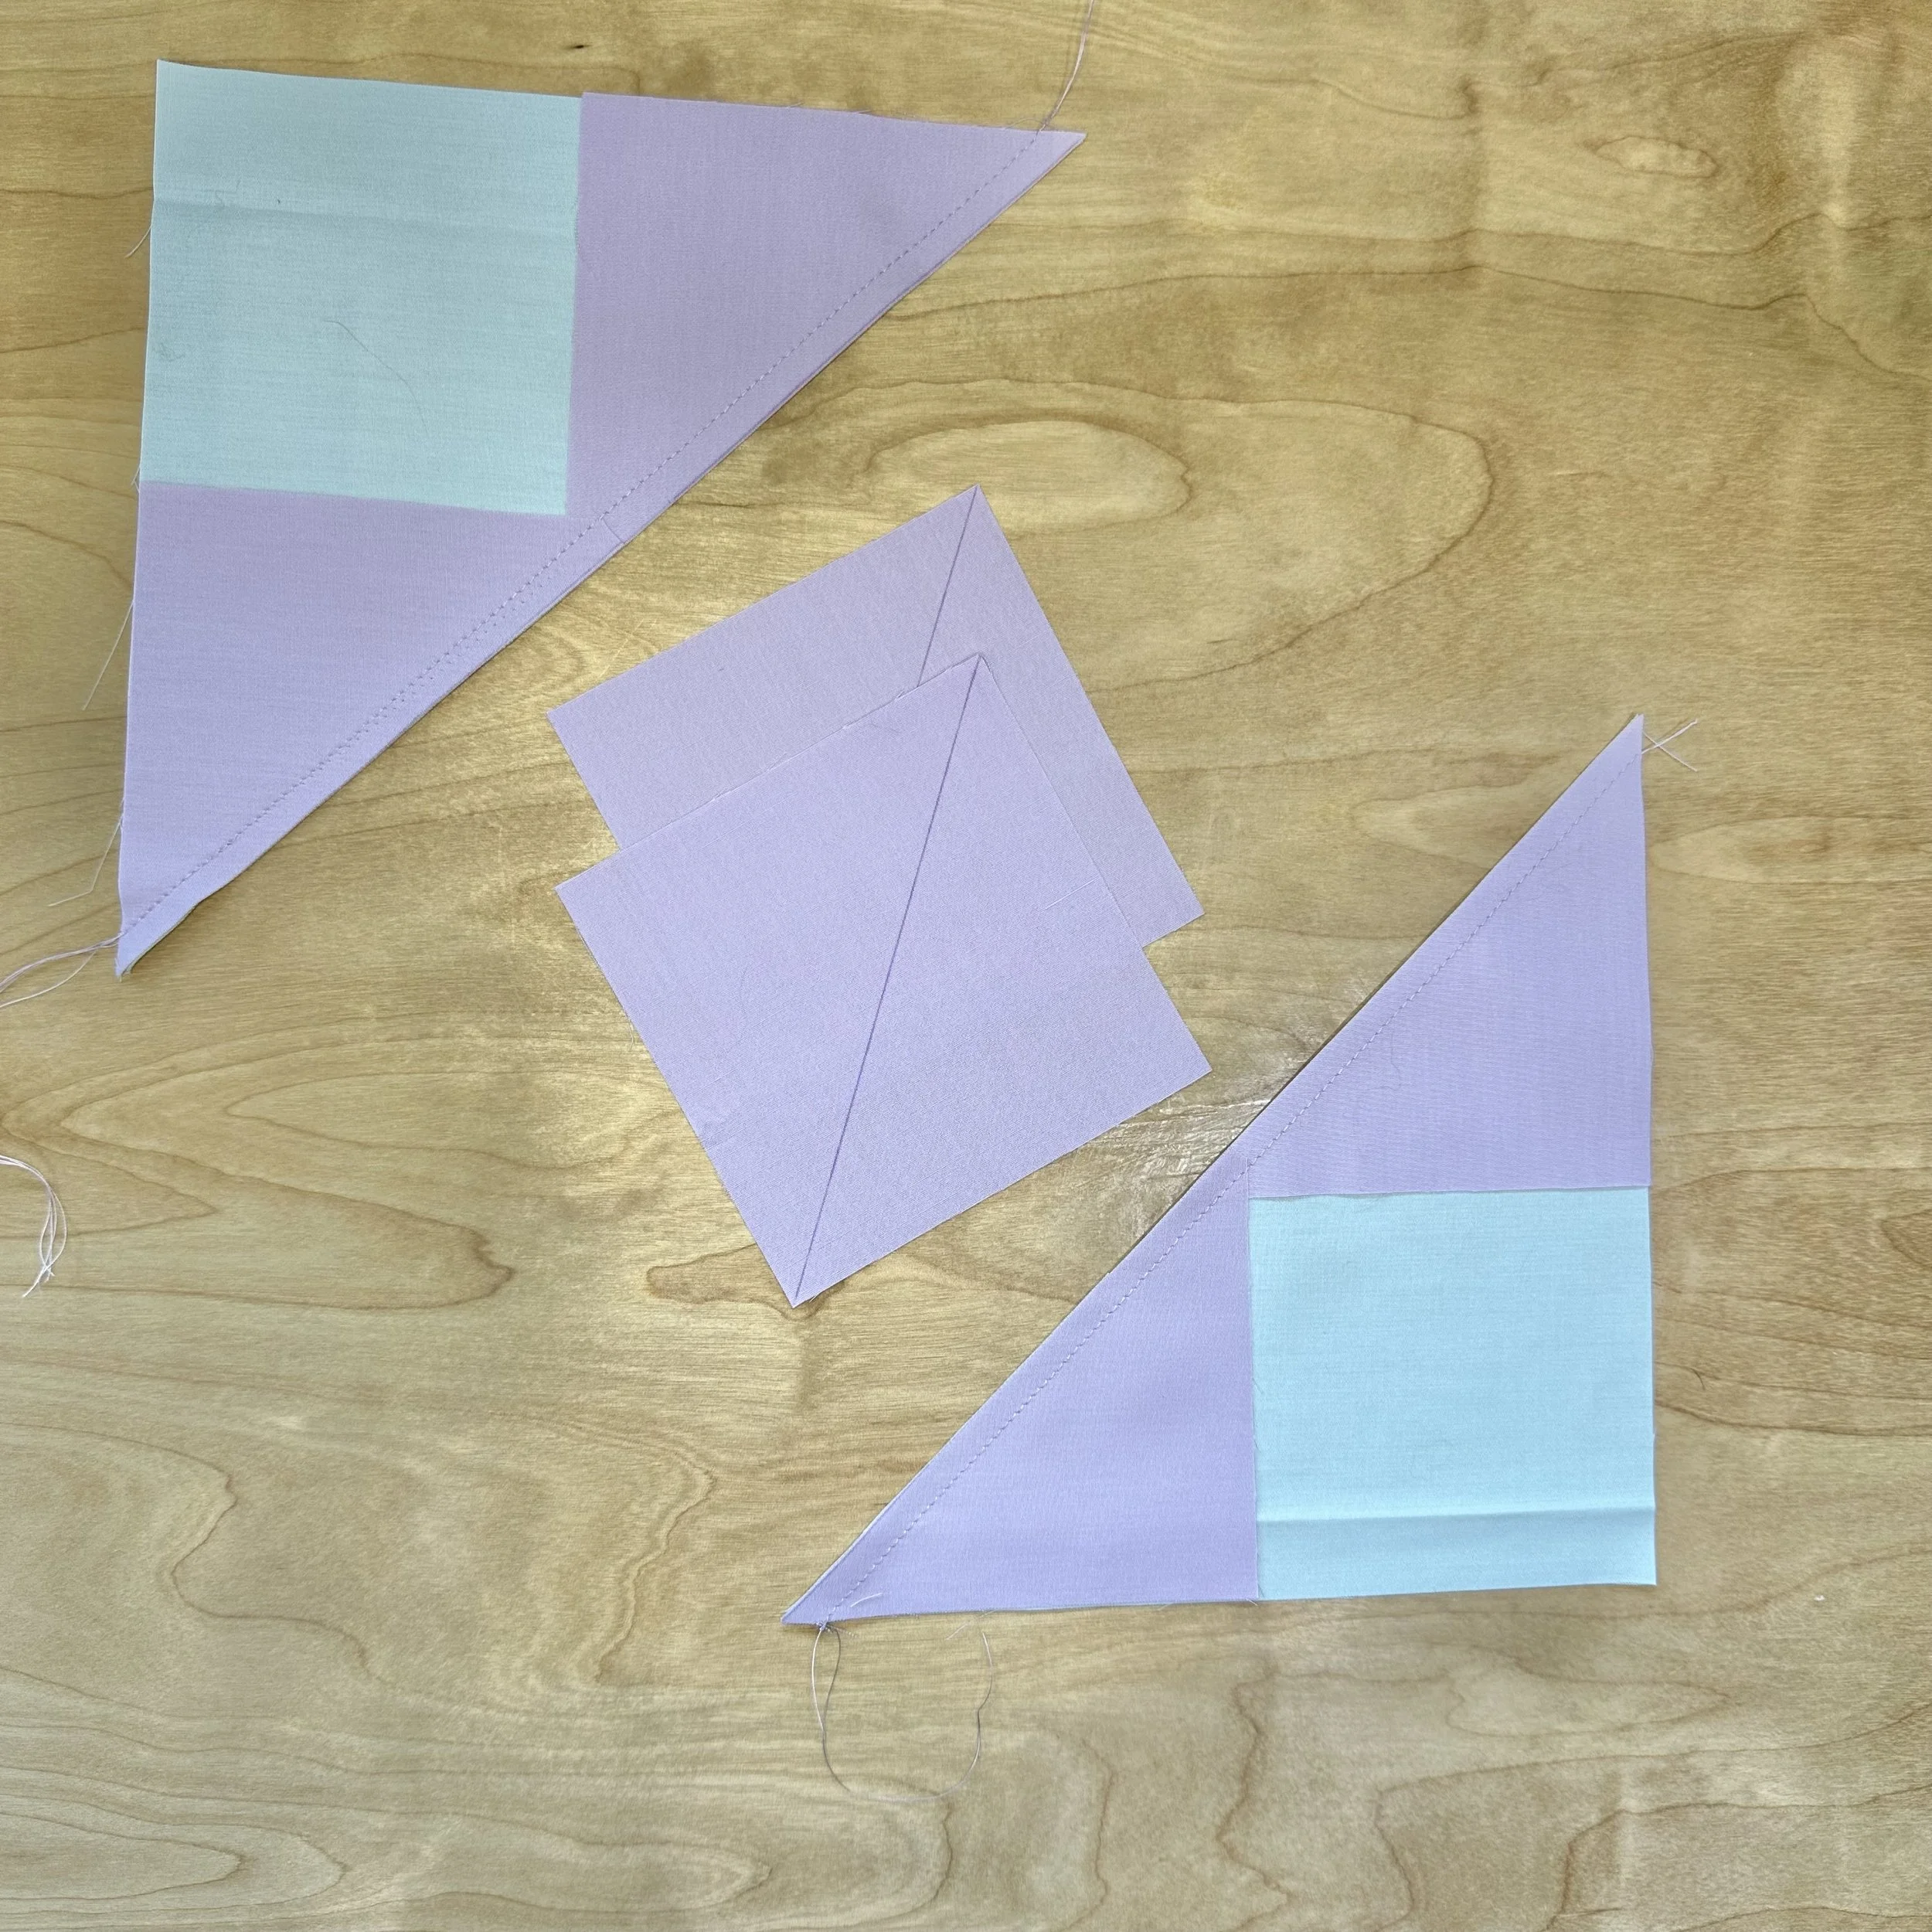
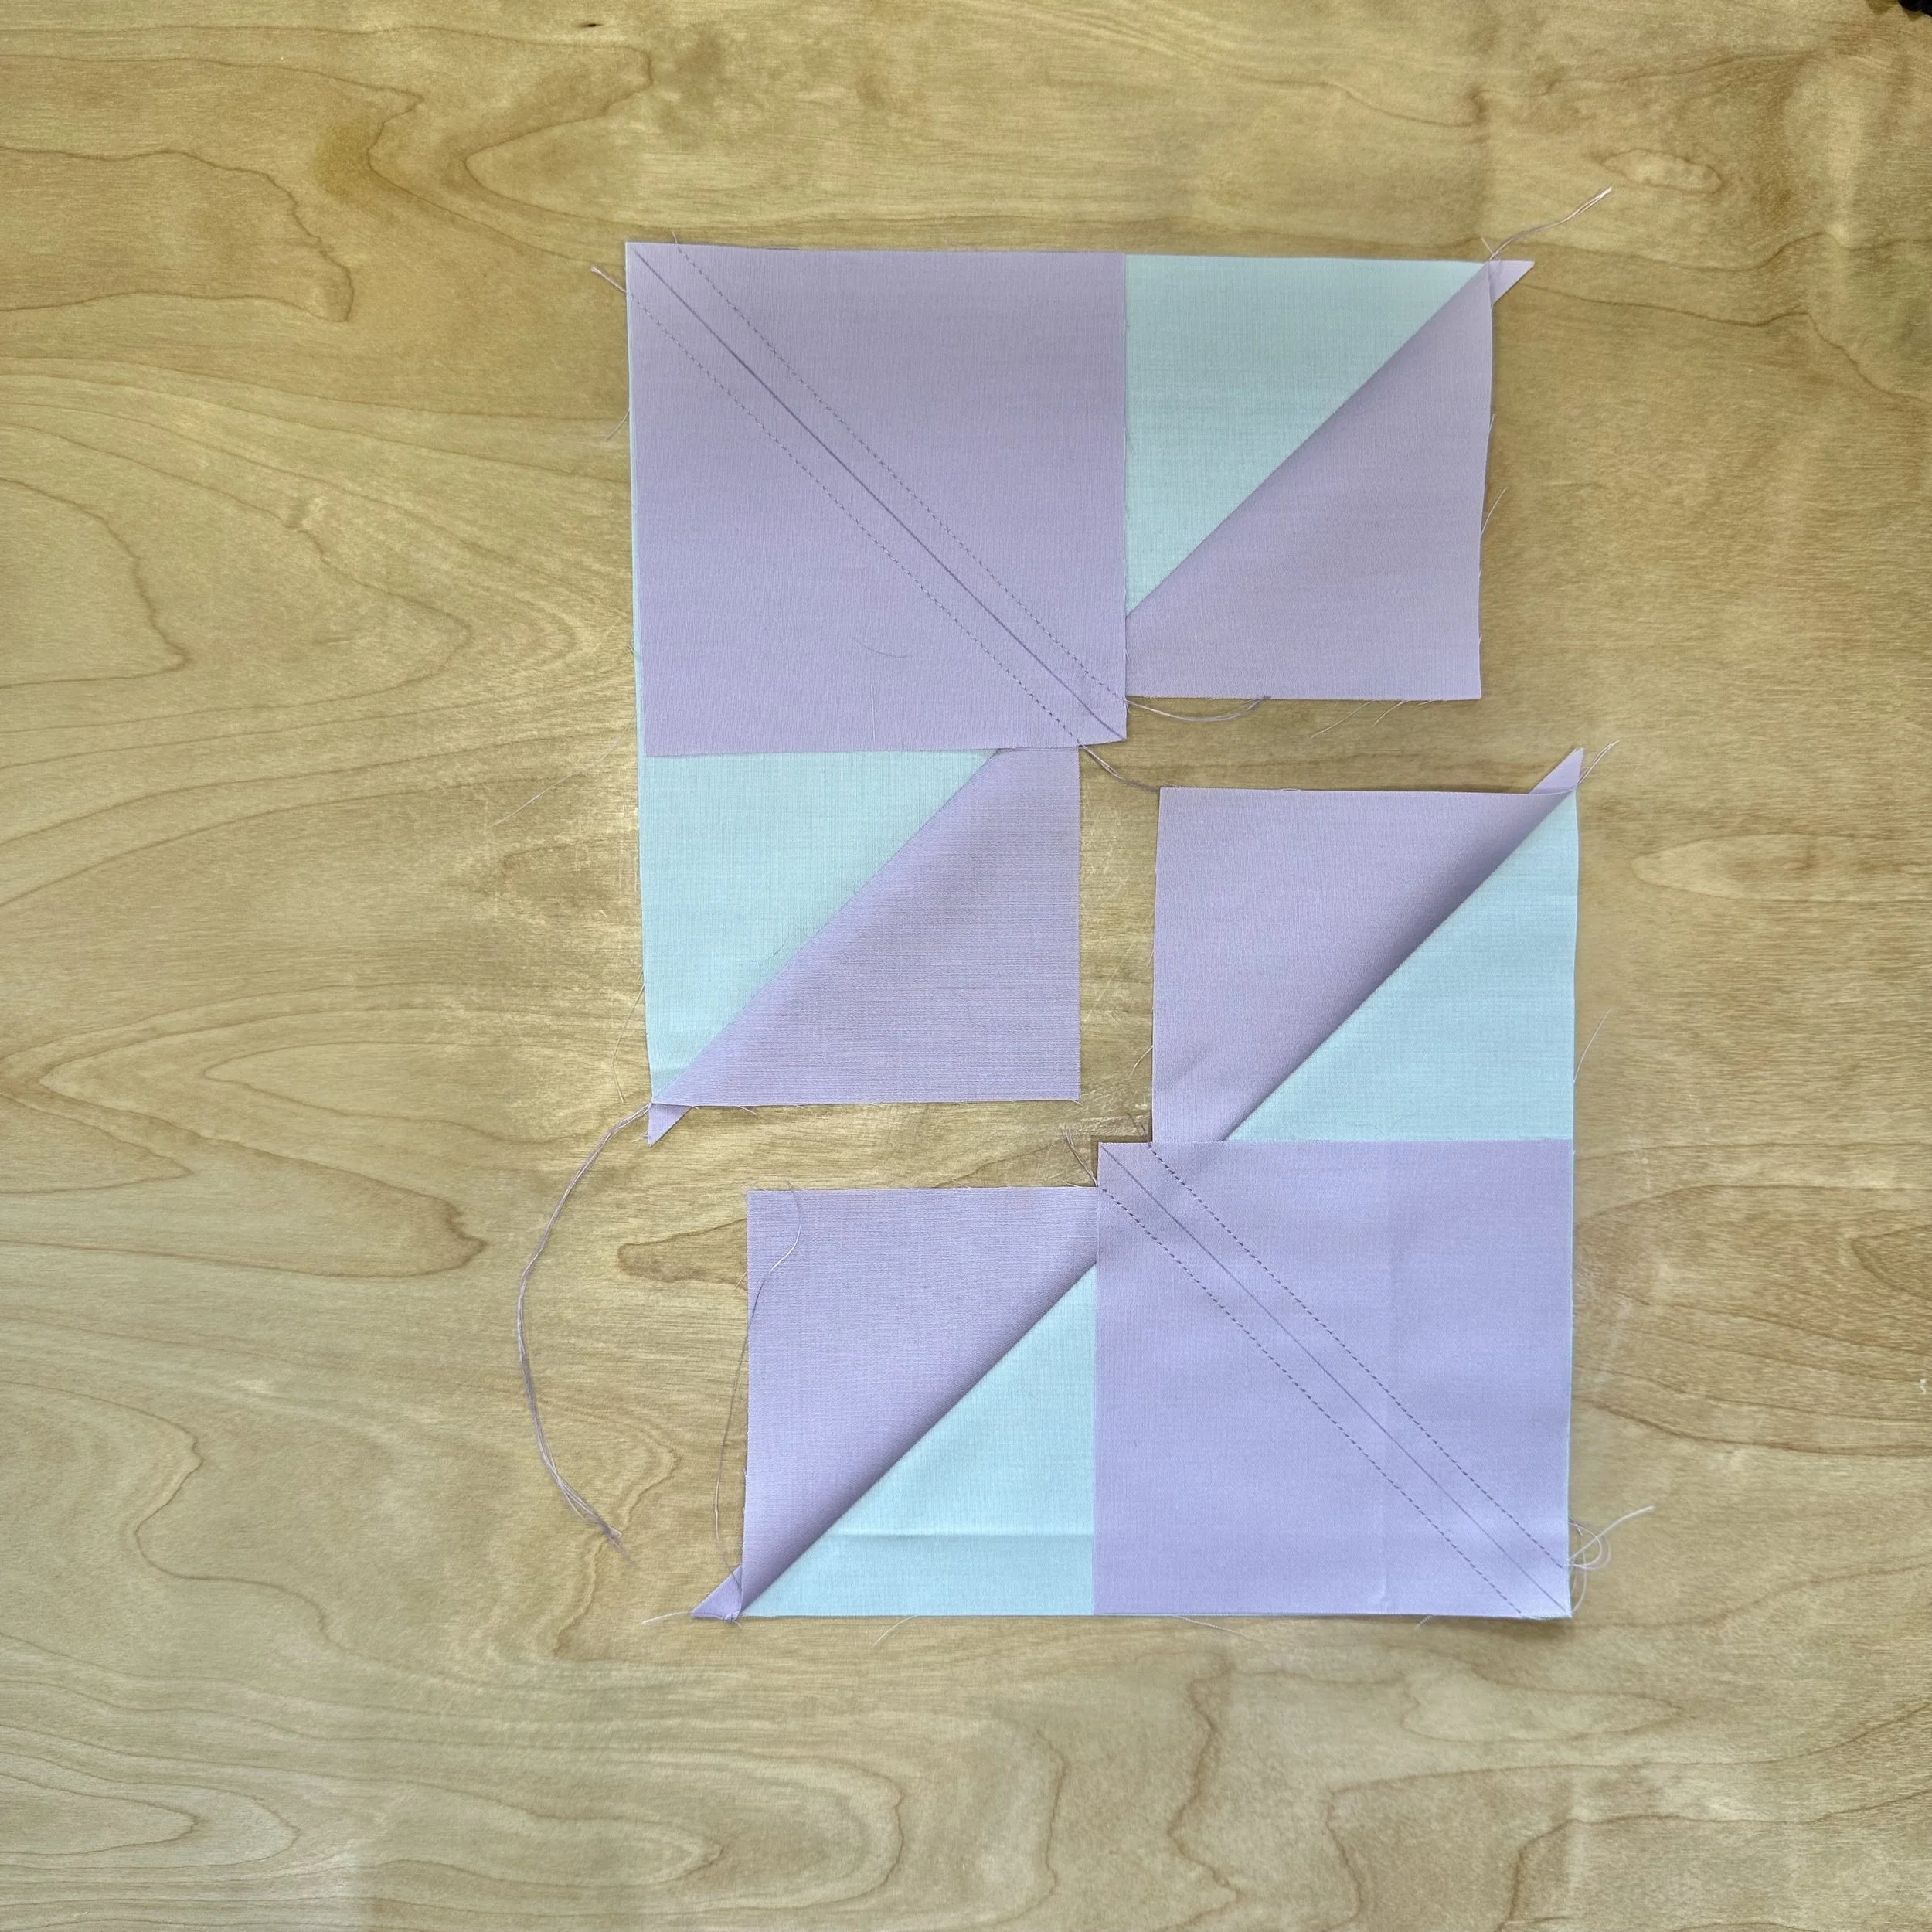
When you cut along the line, you will have two identical halves. If you have not trimmed off the corners of your small squares like in the previous step, as I have not done, I will sometimes trim a little off of the corners in this step to reduce future bulk within the seam allowance. I then press the two sky pieces (what are now triangles) away from the larger one, with the seam allowance pressed away from the main large triangle. You can also press the seams open, if you choose. If you have not sewn with a scant 1/4” or if your geese end up a little smaller than they should be, pressing the seams open should help.
Cut along the diagonal line. Press.
Repeat with two remaining squares.
Step 3
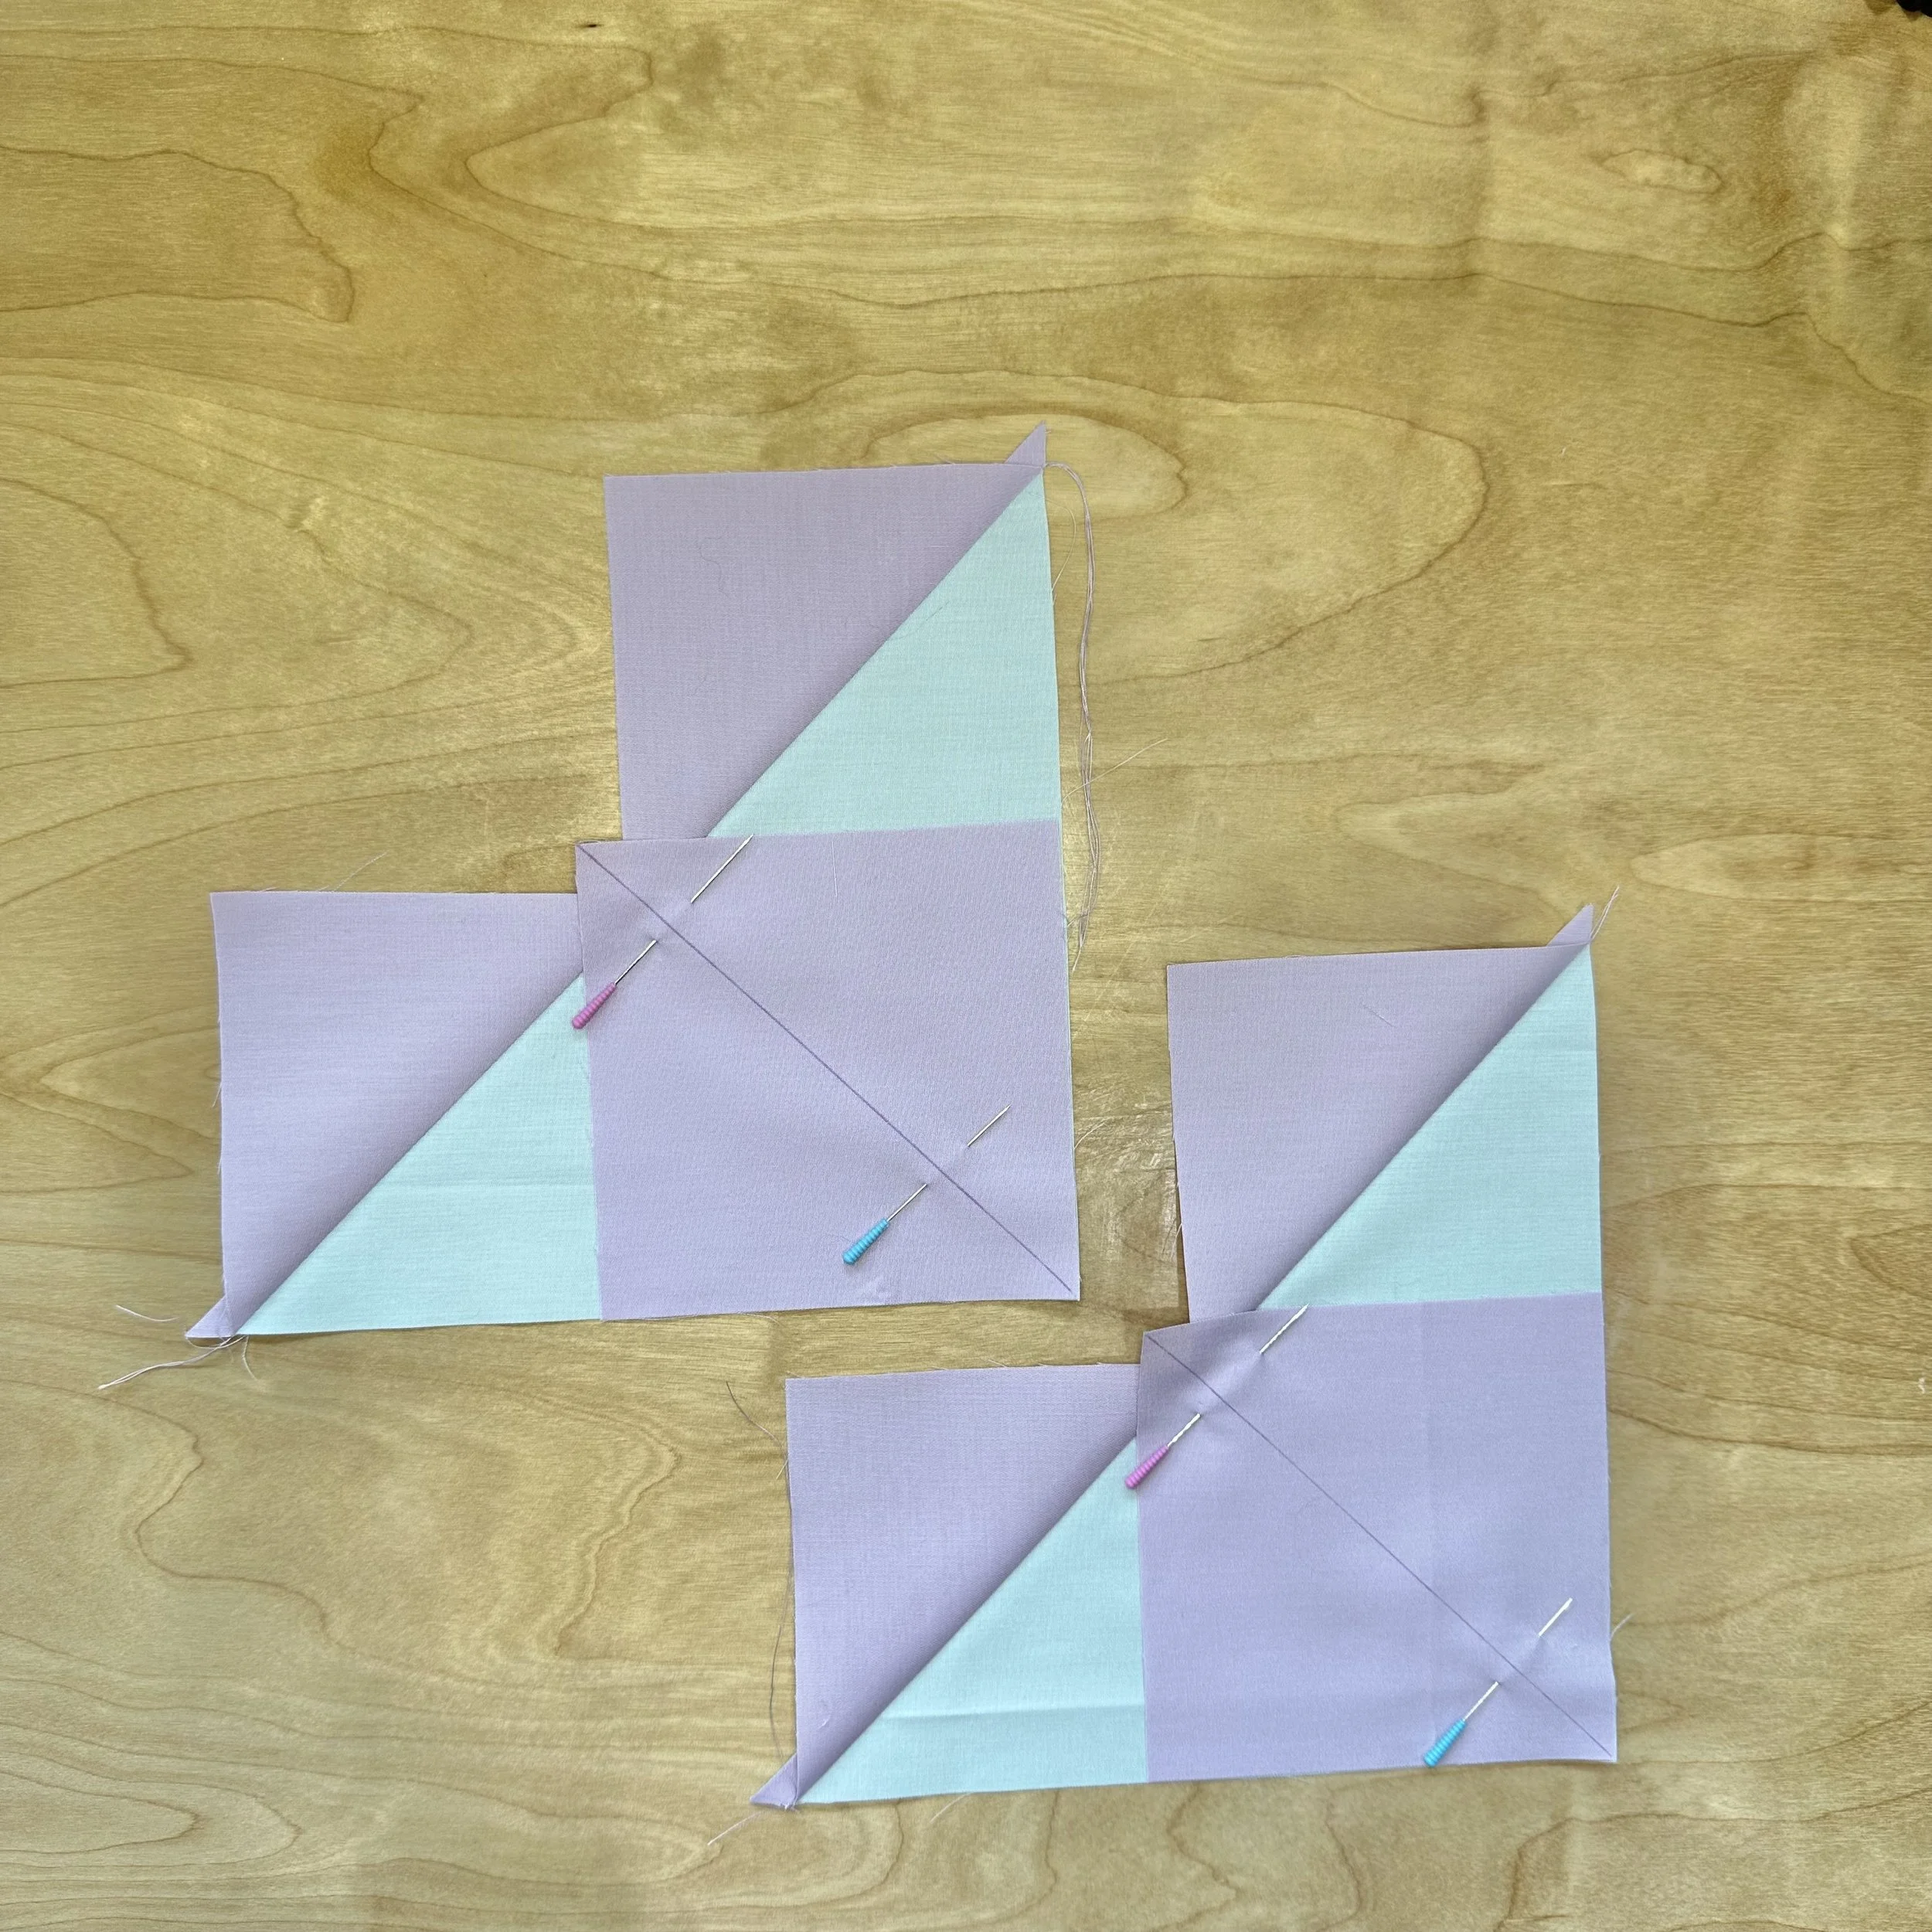
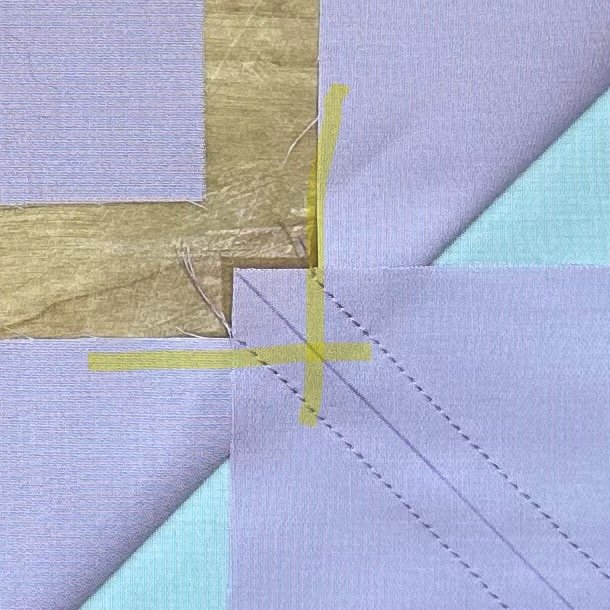
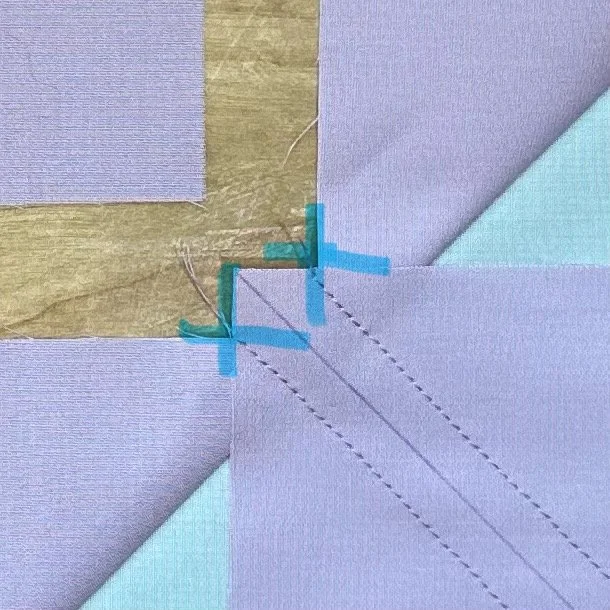
After step 2, you are left with two remaining small squares, and two weird, pieced heart-shaped, triangly units. Place one remaining small square on the remaining open corner of one of the pieced units with the right sides together. In theory, the drawn line on the back of the small square should run from the corner of the unit, right through where the sewn-in triangles intersect, shown in yellow highlight below. Pin in place. Do the same for the last small square and the other pieced unit. Sew another set of lines a scant 1/4 inch on both sides of each drawn line. Your line of stitching should, again, in theory, run through where each sewn-in triangle meets this new square, shown in the blue hightlight below.
Step 4
Cut along diagonal lines. Press.
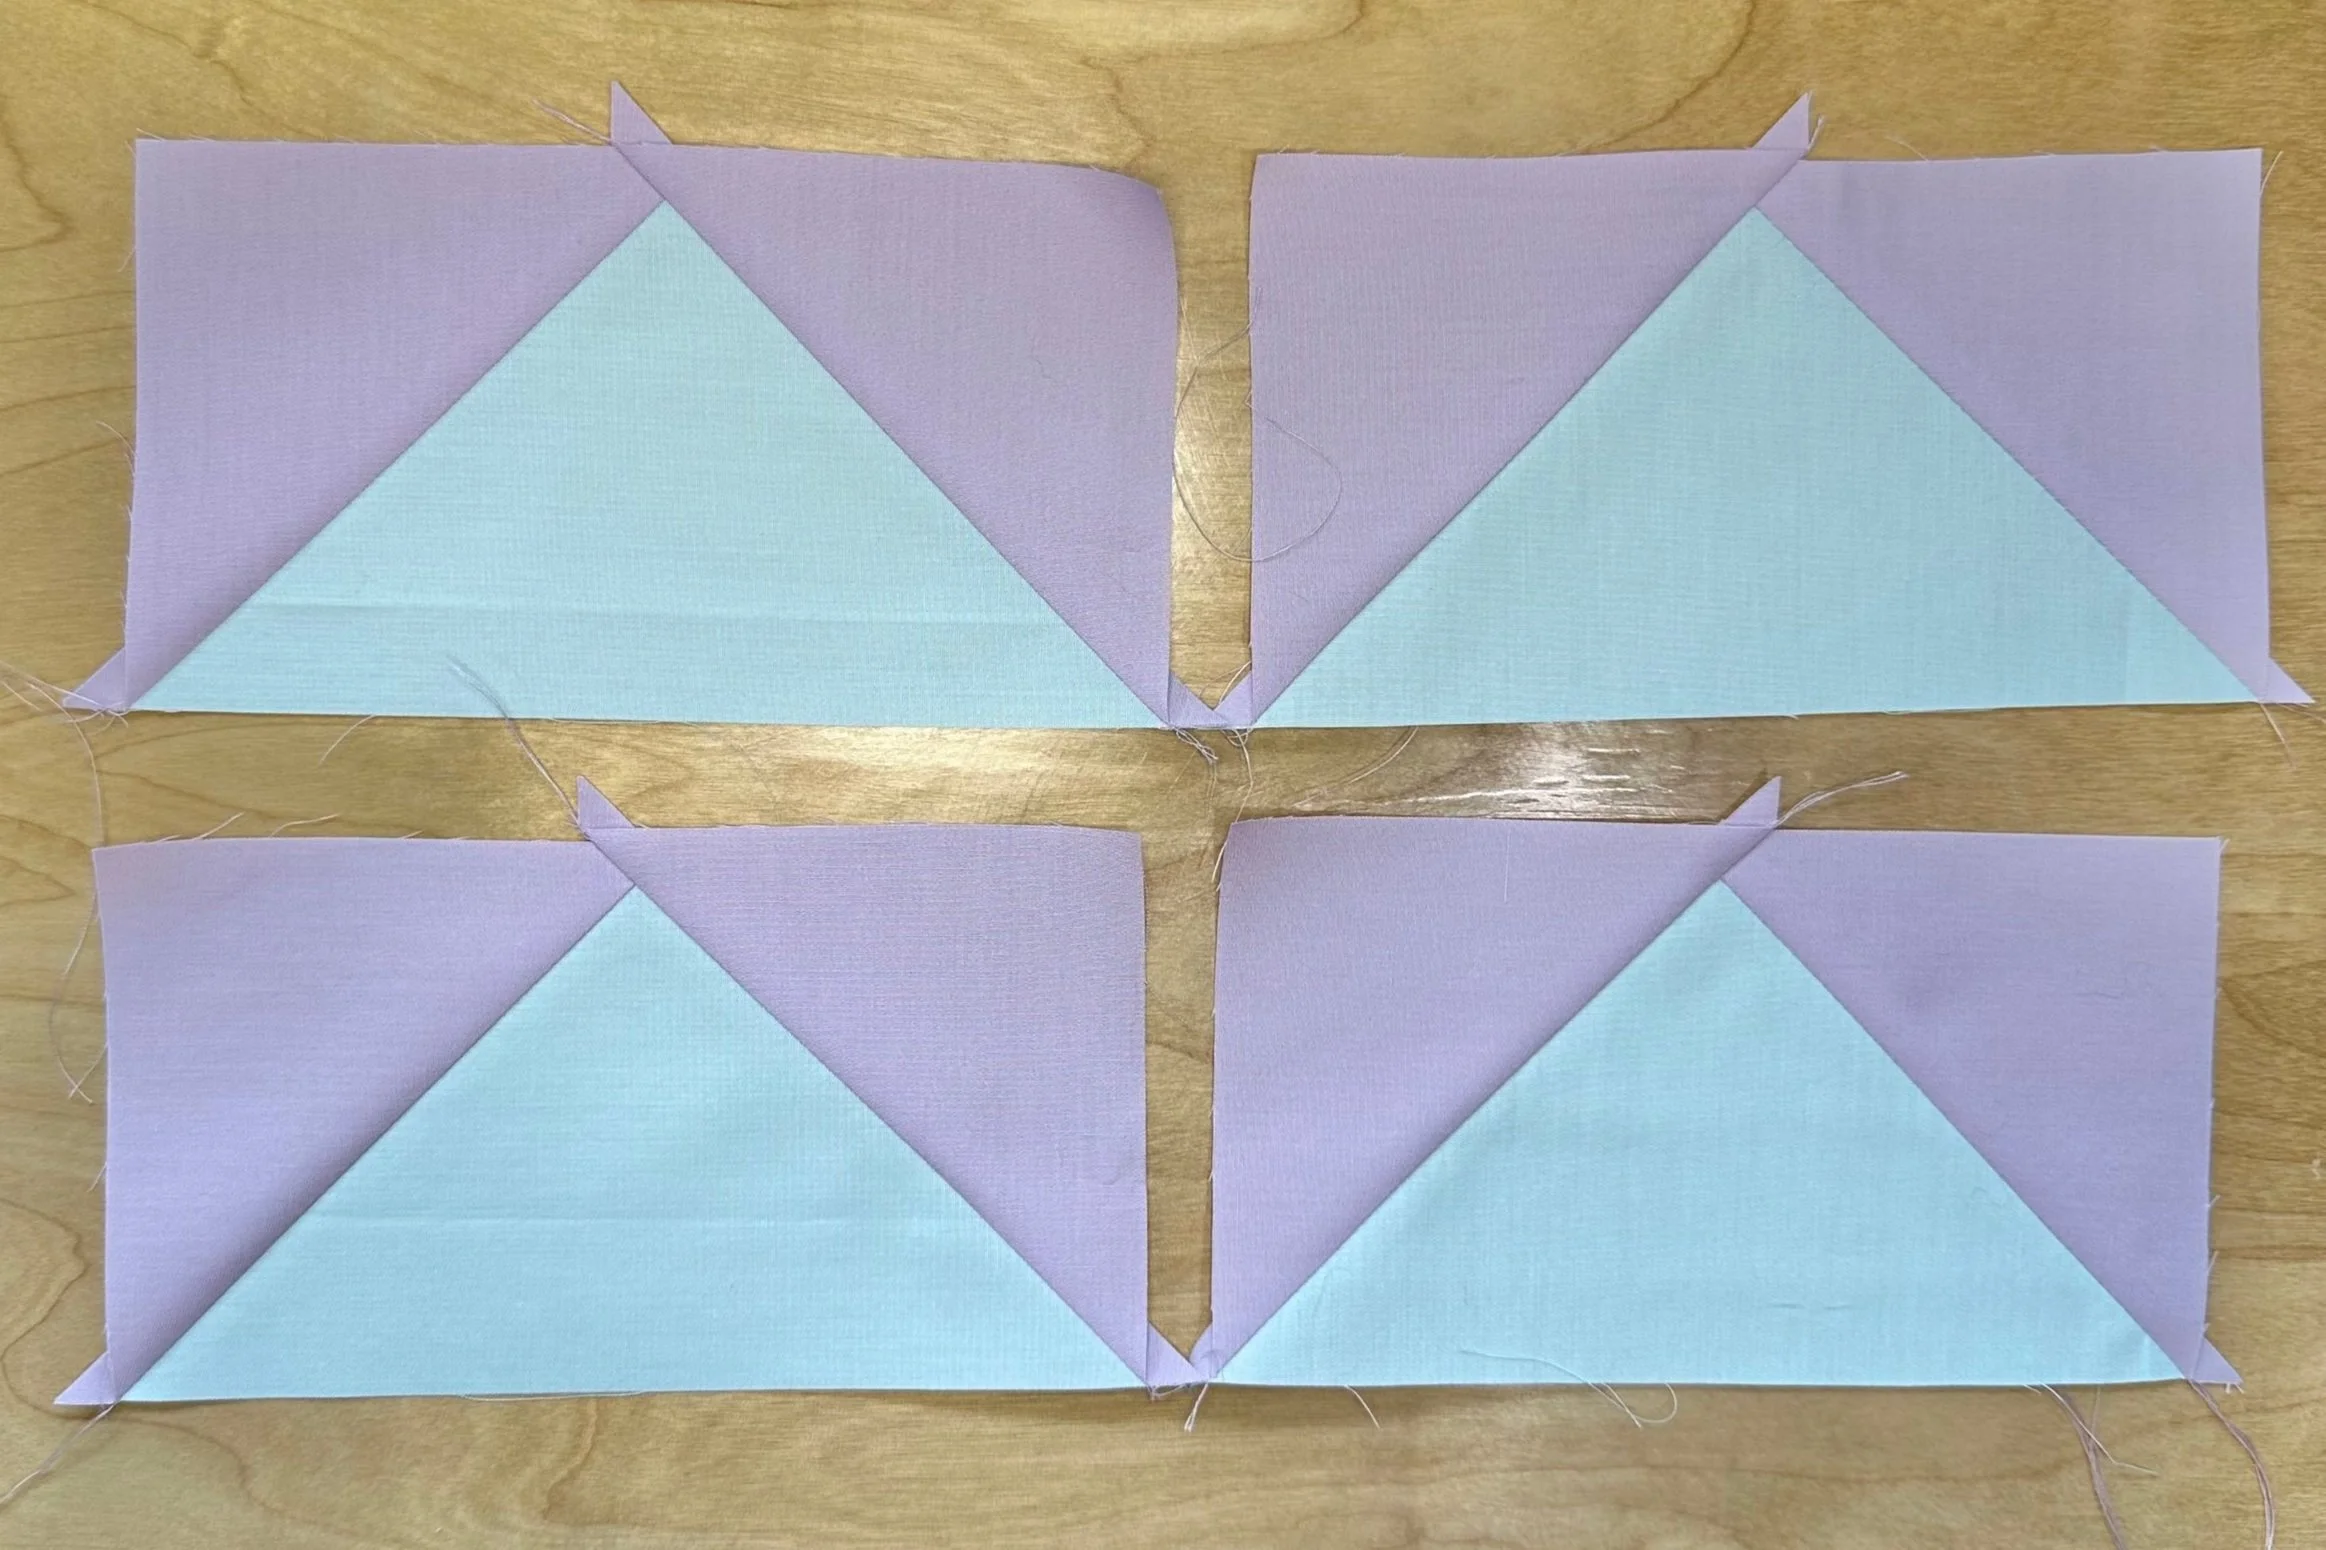
Cut along each drawn diagonal line, to create four separate units. Press to newly added triangles away from the main piece. I typically press my seams towards the sky, but again, if you want, press them open. Pressing them open does help if you find they are a bit too small.
Step 5
Trim.
When trimming, pay attention to the point of the goose being centered, width-wise on your block, and 1/4” away from the top. Ideally, the diagonal seams should be aligned with the trimmed corners.
The examples below are for an unfinished size 6.5” x 3.5”. On the picture to the left, the point of the goose is positioned so that it is 1/4” from the edge of the ruler, where it is to be trimmed of, and it is also positioned at 3.25” along the width (half of the 6.5” trimmed width).
In the picture on the right, you can see that the seams of the Flying Geese is running right along the 45 degree of the ruler, and each seam ends at the exact corner of the 6.5” ruler.


