International Scrap-Sorting Day
Happy International Scrap Sorting Day! Today, November 4th, has been dubbed by The Modern Quilt Guild as a day set aside for organizing our scrap bins, and I for one, am thrilled to participate in it. For information and tips on International Scrap Sorting Day from the MQG, you can visit their page here at https://www.themodernquiltguild.com/2023/10/09/international-scrap-sorting-day/ .
As quilters, it’s in our nature to save scraps to some degree or other. I fall on the conservative end of the spectrum regarding fabric-saving, with an emphasis on “conserve”. We are surely all aware that it is important to reduce, reuse, and recycle. Maybe that’s why you got into quilting to begin with; Making a scrappy quilt is a great way to use all the leftover fabric from previous projects. Or perhaps it was the other way round, and you became a quilter first, and quickly adopted the culture of saving all the scraps. Either way, our remnants of fabric from previous projects have too much potential to just get tossed in the trash.
However, you can save all the scraps you want from the landfill, but it won’t do you any good to continue to collect, but to never use. Just like salt and the Dead Sea, if there is no outflow then there won’t be any life to your scraps. But if you are like me, you won’t even consider working from your scraps if your bin is chaotic and unorganized. And if you never pull from your scraps, but continue to save them, you are getting closer and closer to the day it explodes Vesuvius-style. Death by fabric may not be the worst way to go, but let’s avoid that, shall we?
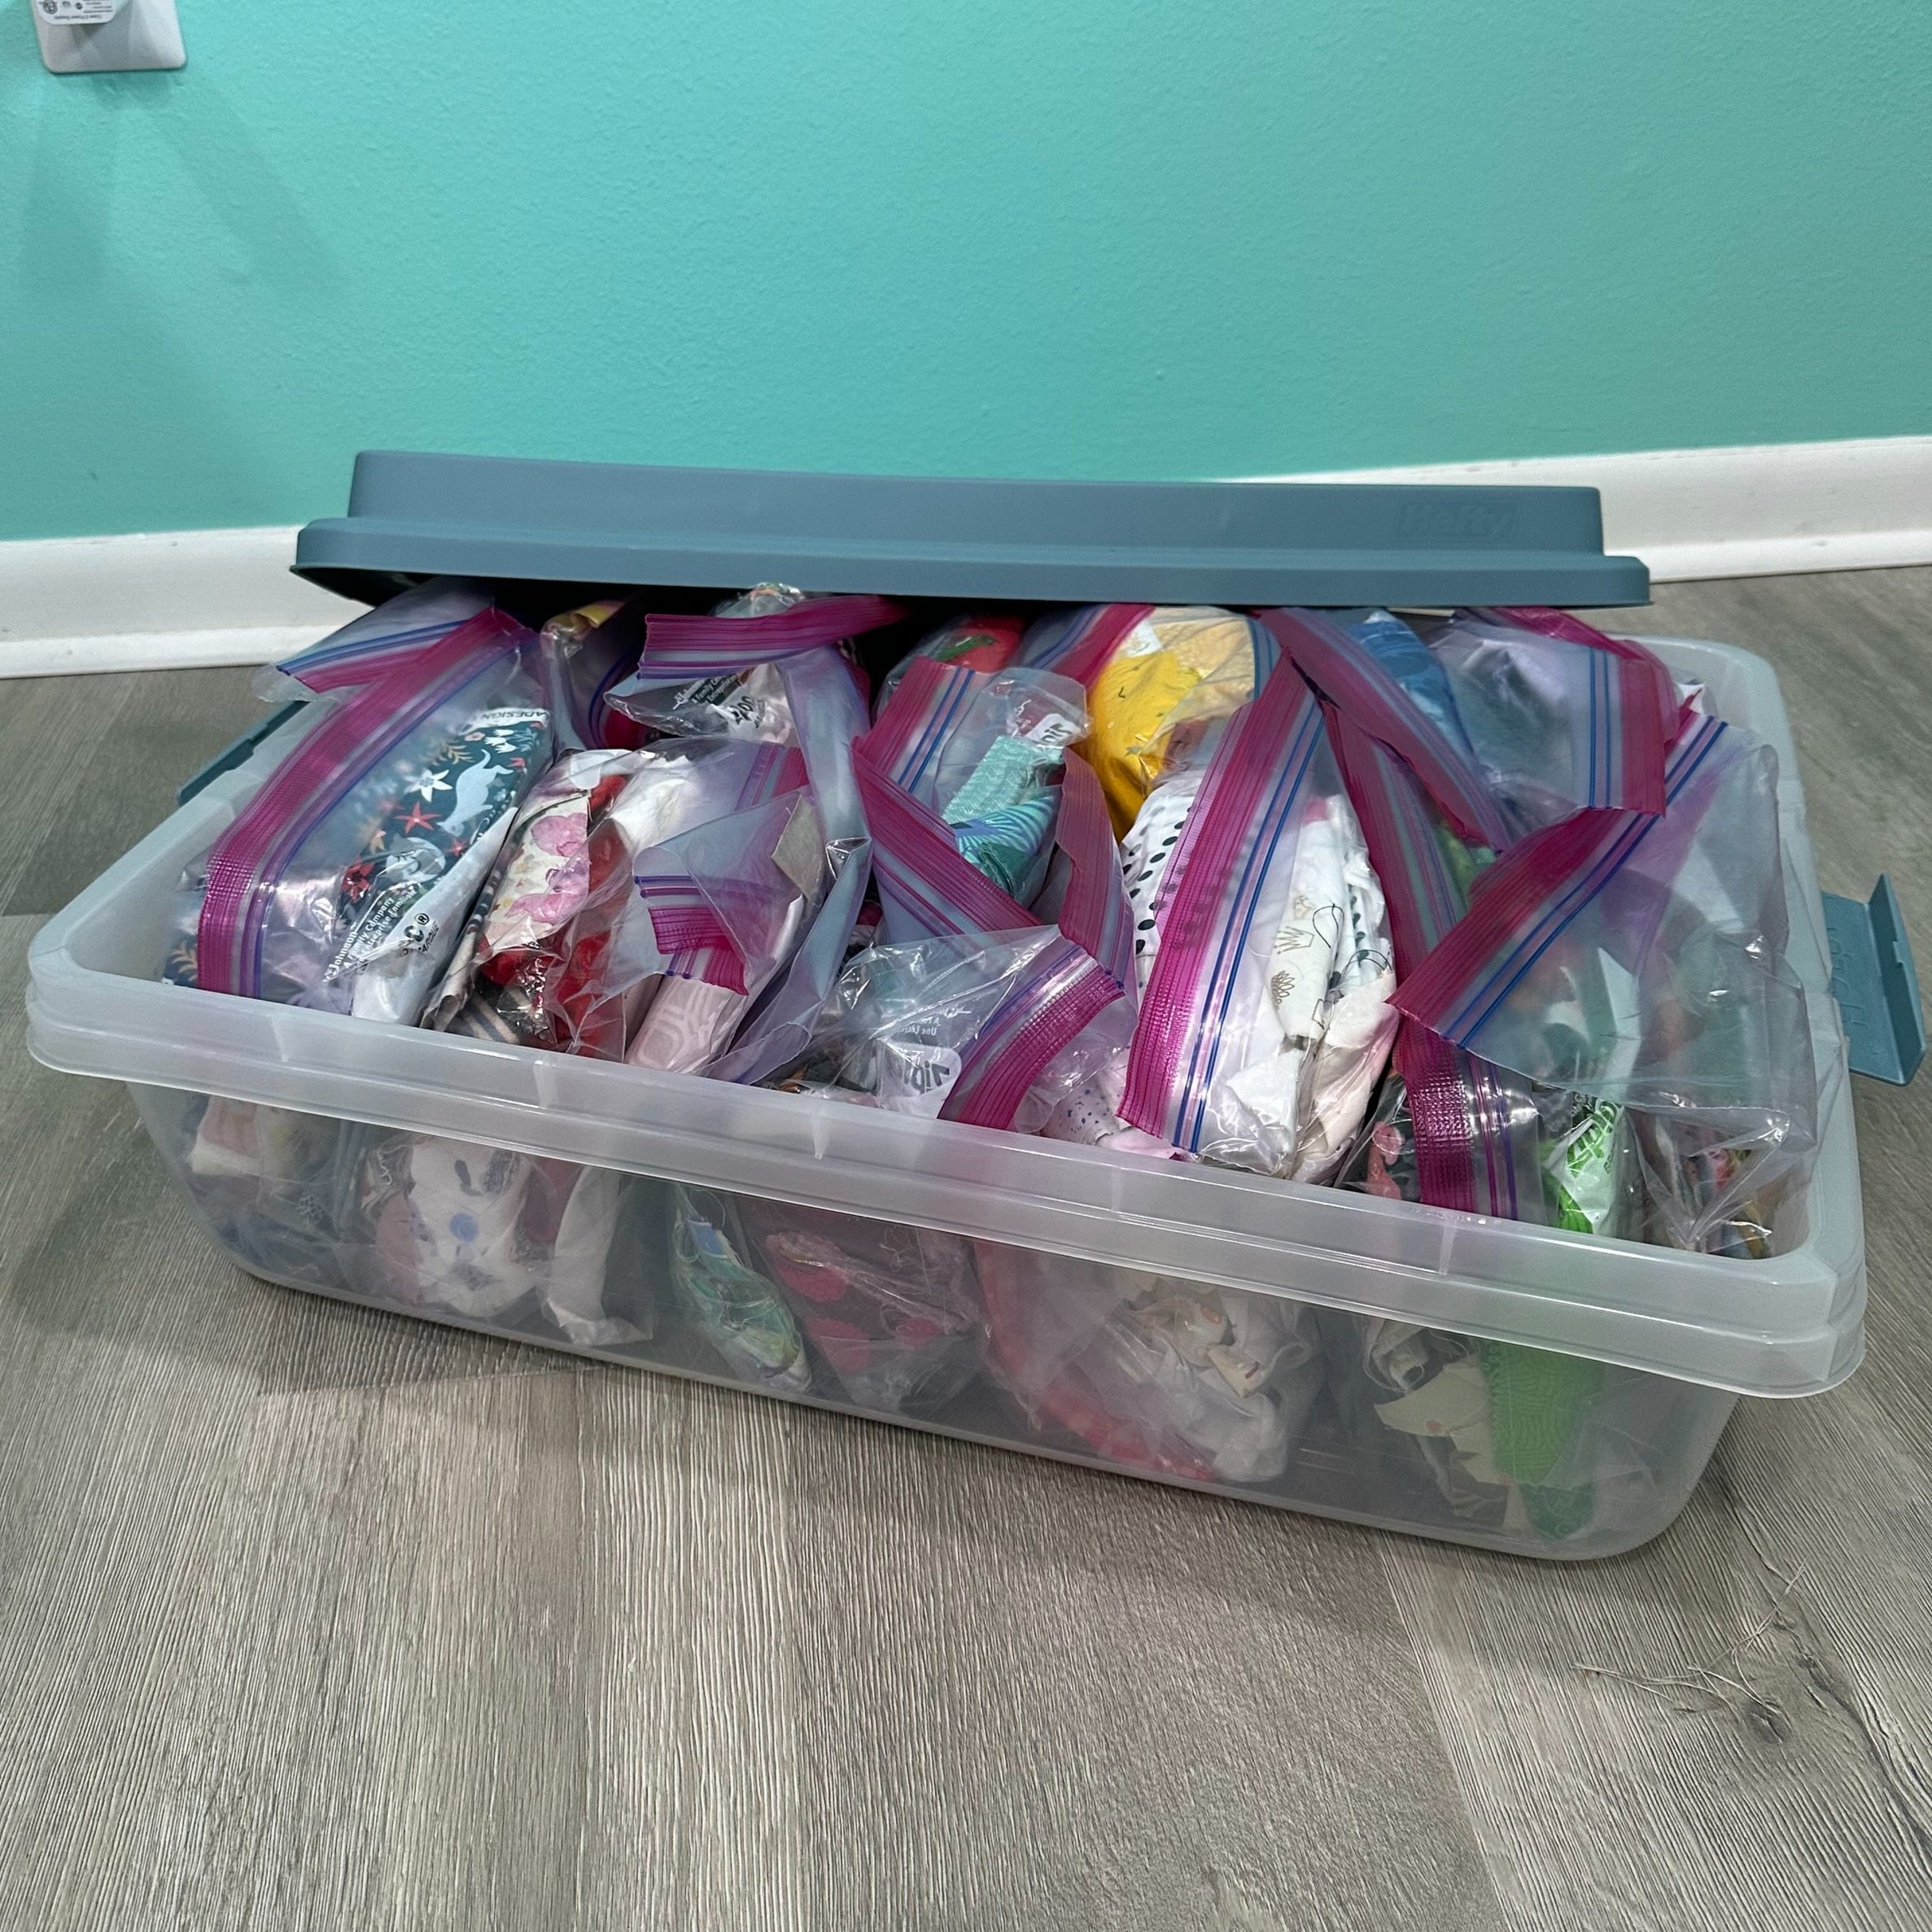
Hyperbole aside, the best way to increase your likelihood to use your scraps is to make your scrap bin as inviting as possible. For me, if it looks messy, then I can’t stomach it in my creative space. And if it’s not in my creative space, (my sewing room) I won’t think to look through it. It’s very much the situation of “Out of sight. Out of mind.” The other way to make your scrap collection is easier to use is for it to be efficiently organized. If I know it will take me too much time to find what I am looking for, then I won’t want to spend the time looking. And, if there is even the slightest potential that what I want isn’t where I hope it will be, then forget about it! So for me, an organized scrap bin, that doesn’t give me hives to look at is the key to using what I already have, and ipso facto, saving the planet, one quilt at a time.
Now, organizing one’s things is very much dependent on the person. What works for me, may not work for you, but if you haven’t found your way to organize your leftover fabric, the following is my person system. I hope it helps!
Scraps Versus Stash
For me, my scrap bin is not the same thing as my fabric stash. My stash consists of yardage I have purchased and have not yet used. Maybe there will be something from my stash that fits a project, but a lot of times, this was purchased with a specific project in mind, and I have not yet gotten to it. Call me a pedant, but for me, shopping from my stash is different from using my scraps.
My scraps are leftovers from fabrics I have already used for a project. Sometimes there might be enough fabric left for it to go back into my stash, but my parameters require there to be at least a quarter yard remaining (specifically, a fat quarter’s dimension, or 9” width of fabric that still has the selvedge remaining on both ends). If the leftovers don’t meet those parameters, they go into my scrap bin.
Size
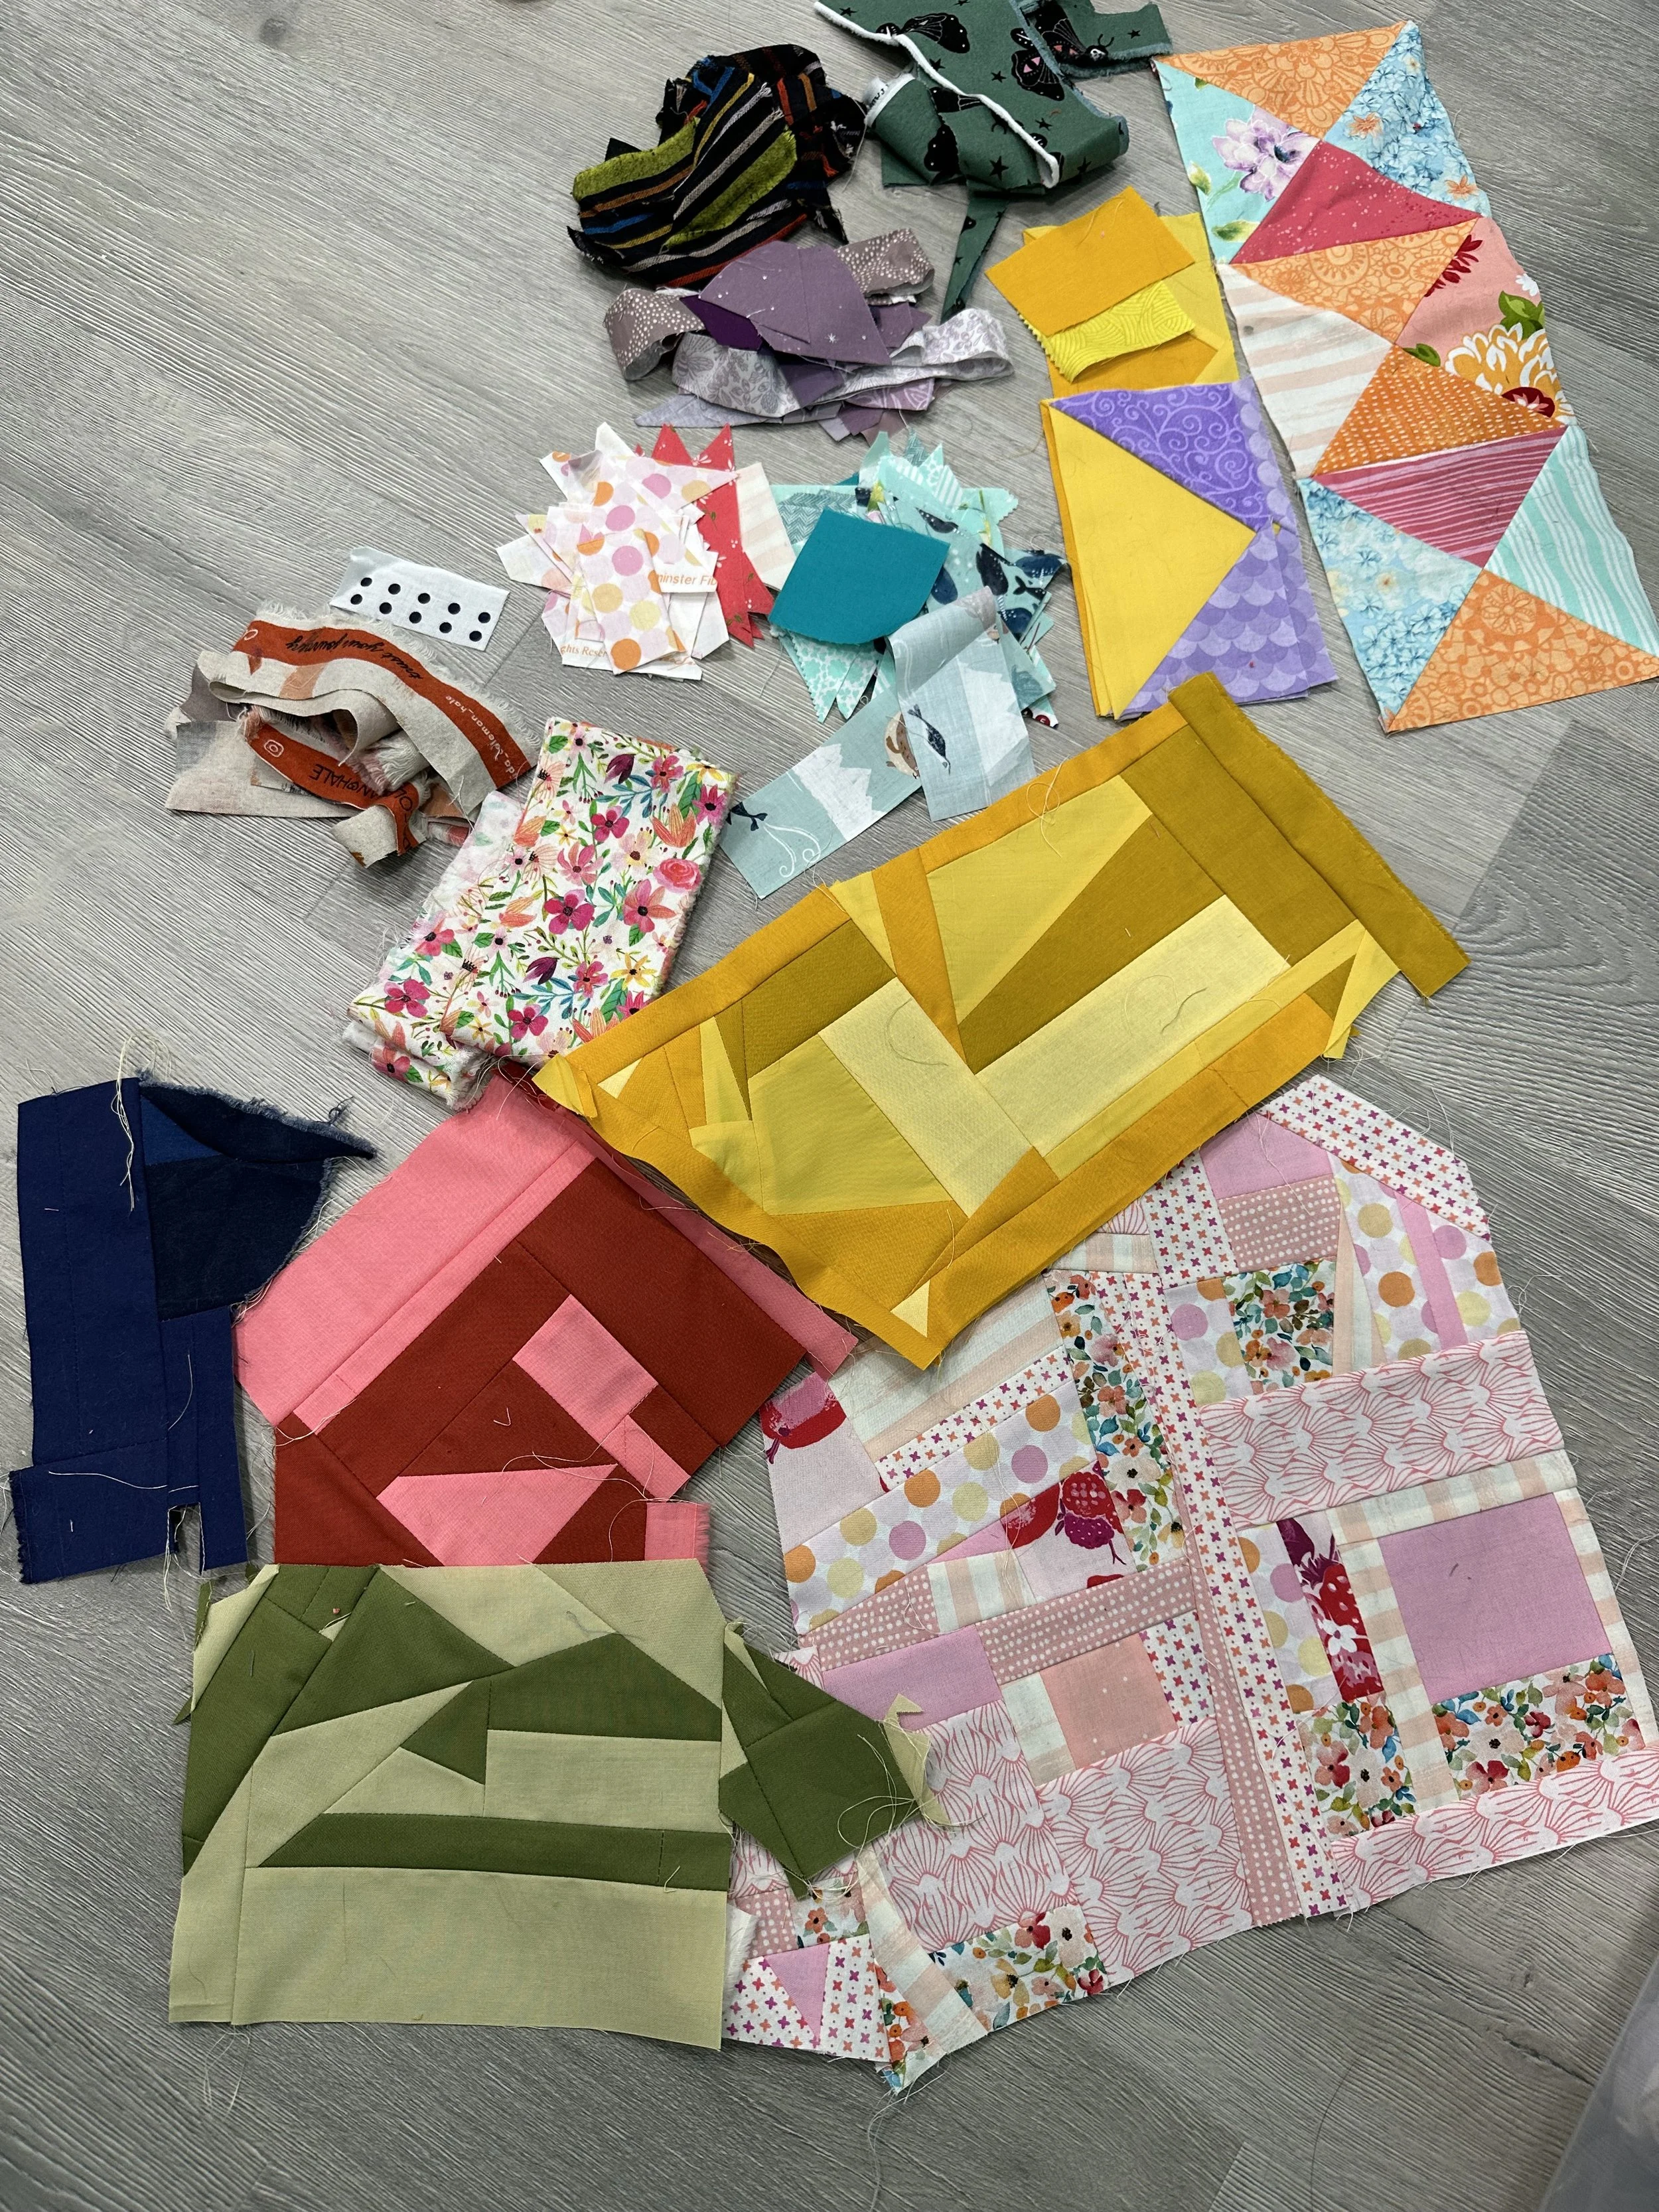
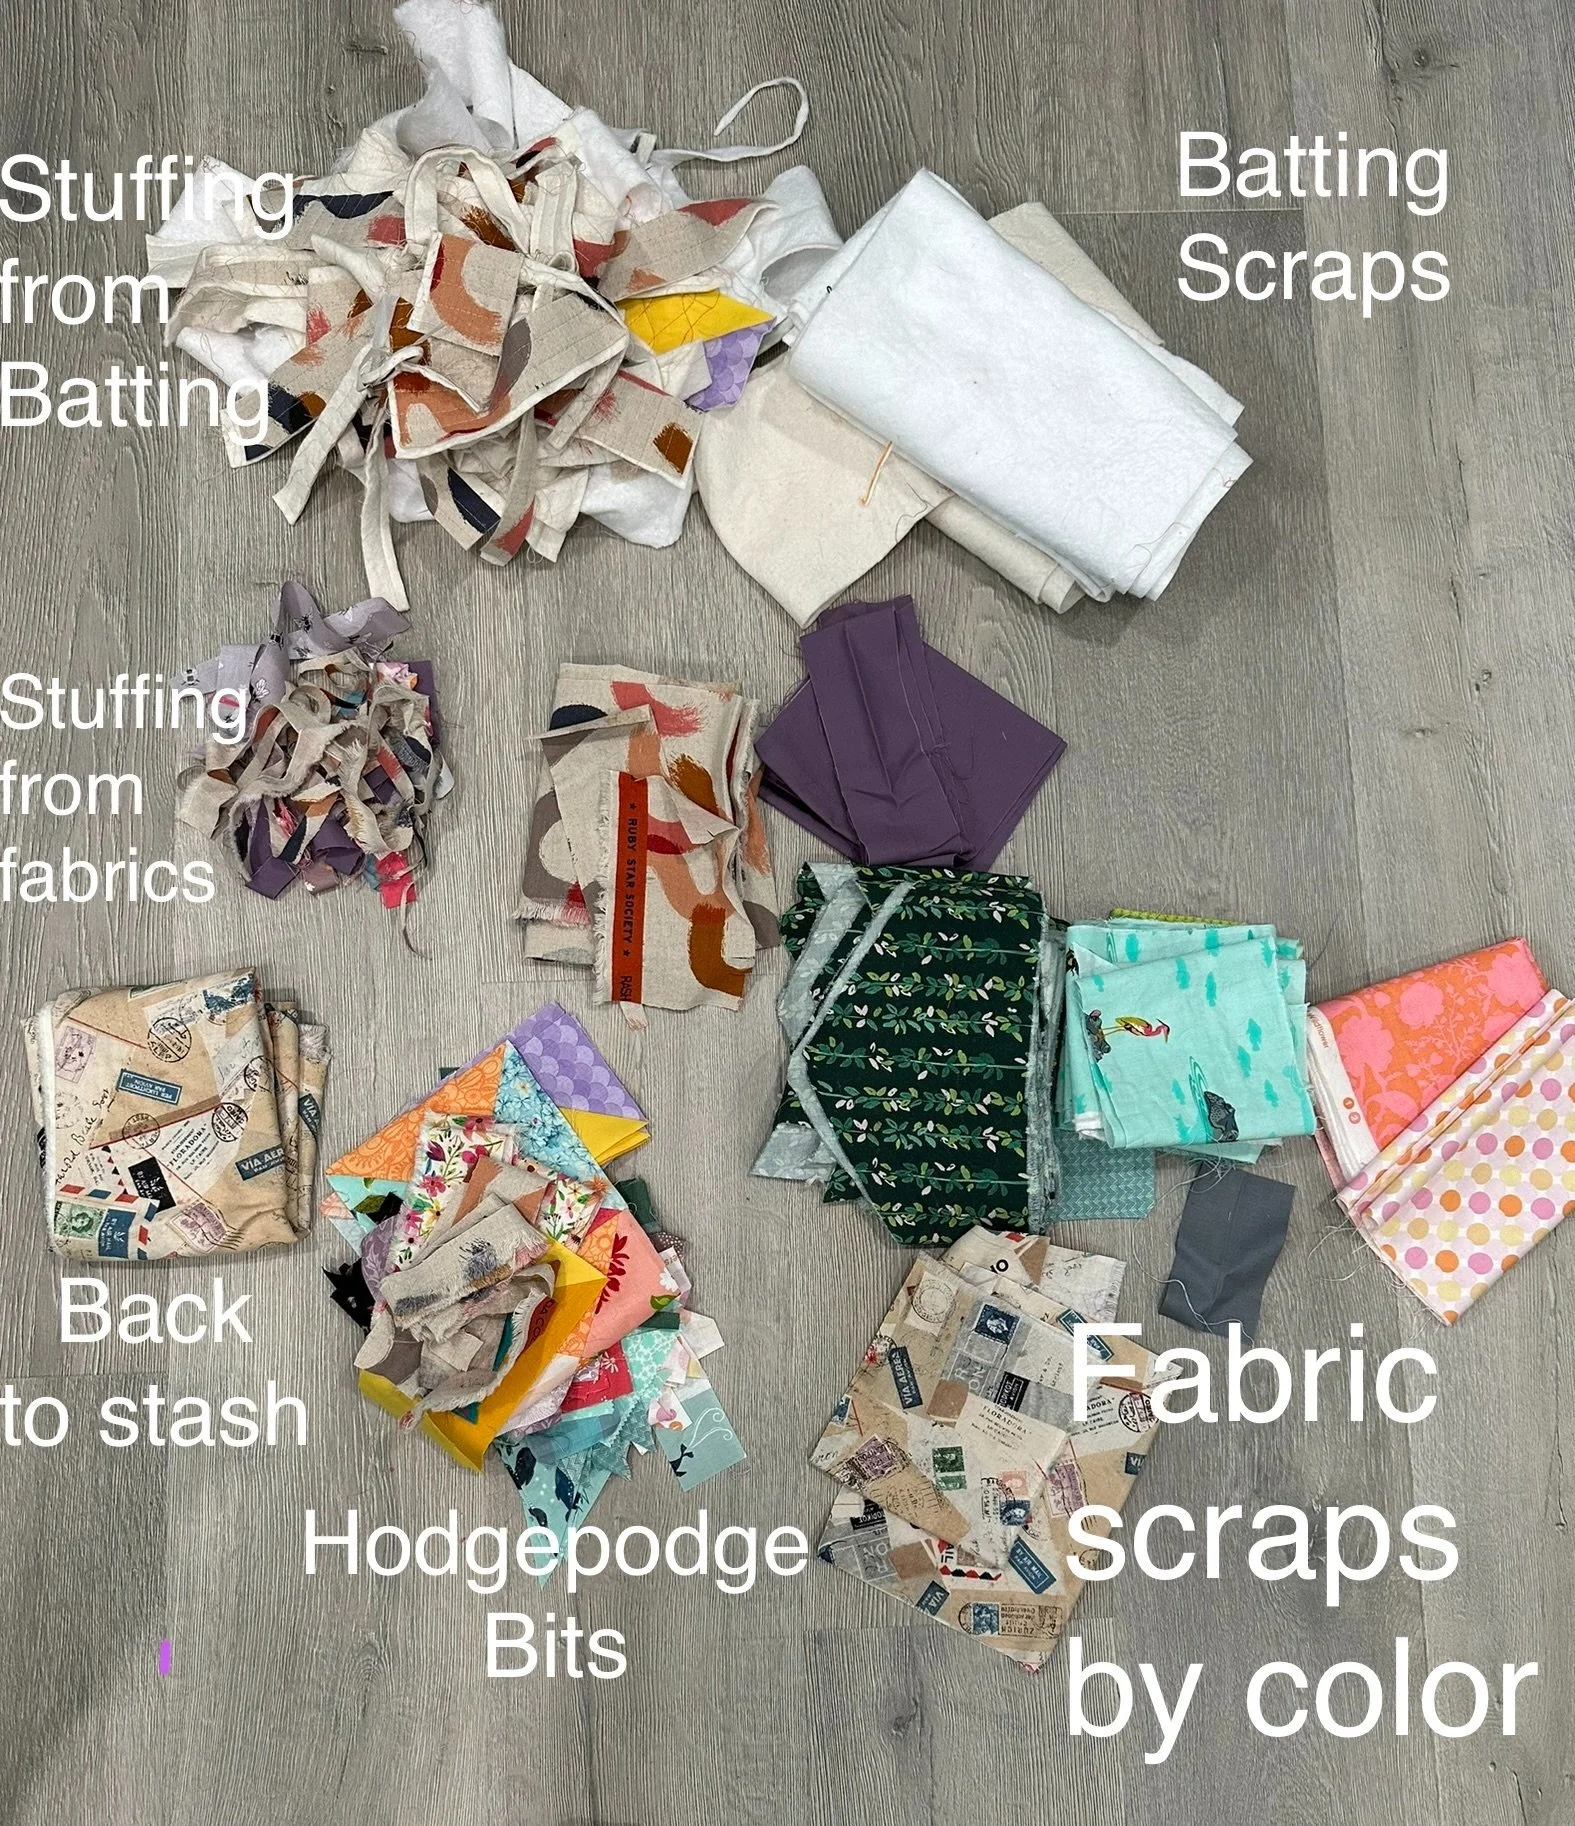
First and foremost, I have three separate categories of scrap-sizes. If it is not large or intact enough to stay in my stash, but is larger than 2.5 inches in both directions, it goes in my main scrap bin. This is a pretty wide range of sizes, so it’s possible you may want to be more decerning in how small of scraps you keep. I know some people like to use pre-cut sizes for how things are organized (10” squares, 5” squares, 2.5” squares according to layer-cakes, charm packs, and jelly-roll / mini charm packs, respectively), but so far, this works for me. For my bizarrely shaped scraps from paper-piecing or garment making, I trim off any dangly bits that get to be 2.5 inches and more narrow, and set those aside as hodgepodge scraps.
Anything between 2.5 inches and about 1 inch, I keep in a separate scrap pile, which I refer to as “hodgepodge” scraps. A lot of times, these scraps are the extra triangles from snow-balling corners, or possibly strip-pieced ends that didn’t get used in a project. After each project, I like to take these pieces that are already coordinated and sew them together to create a larger swatch of fabric. This is a relatively new category for me that came about when I saw the little pieces of fabric pushed aside after a project was finished, and thought it was such a shame for them to become stuffing as they looked so pretty together already. It remains to be seen how productive this will become, but it makes my heart happy to have hodgepodged blocks that have been saved from the garbage bin and can serve as a reminder of a previous project.
Stuffing is the last category of scrap-sizing. Nothing goes in the garbage for me (or at least as close to nothing as I can manage). Anything that is too small for hodgepoding gets tossed in my “to be stuffing” bags. I use these little scraps in lieu of polyfil if I’m making a plush animal toy, a cat bed, or the infamous “floor pouf”. (I have yet to make a floor poof, but I have stuffing set aside for one and plans to make it soon!).
Color / Theme / Substrate
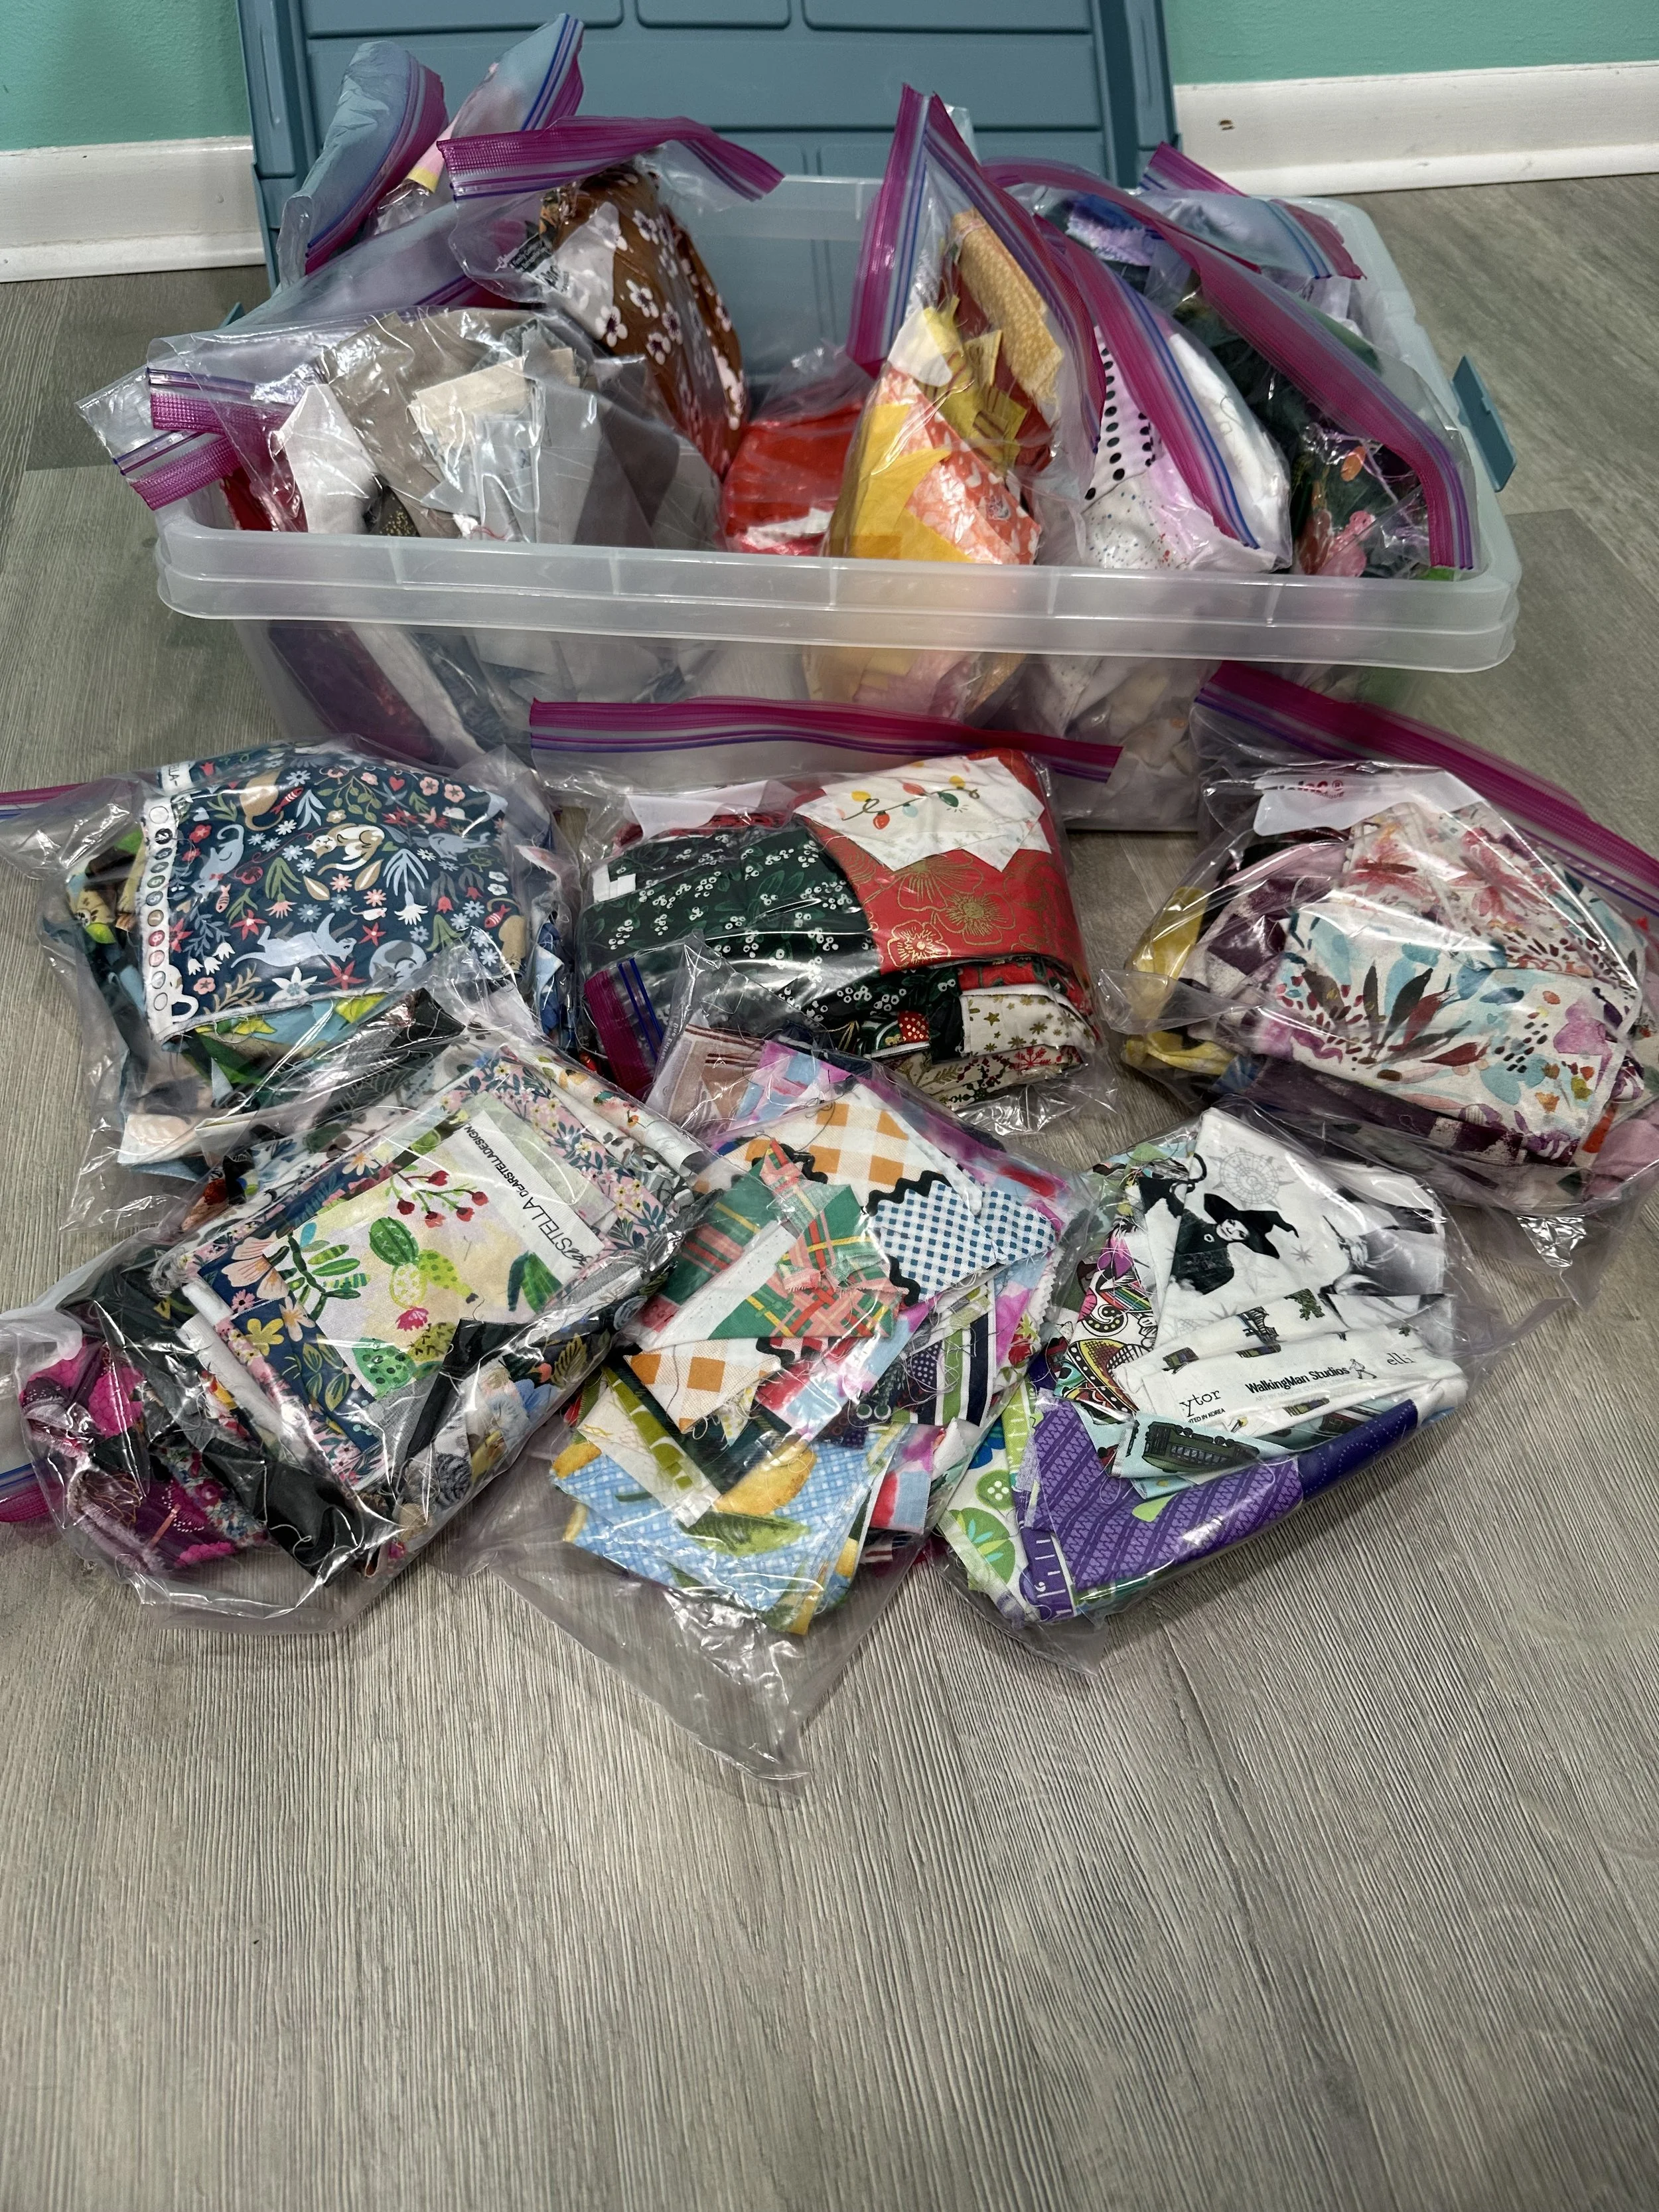
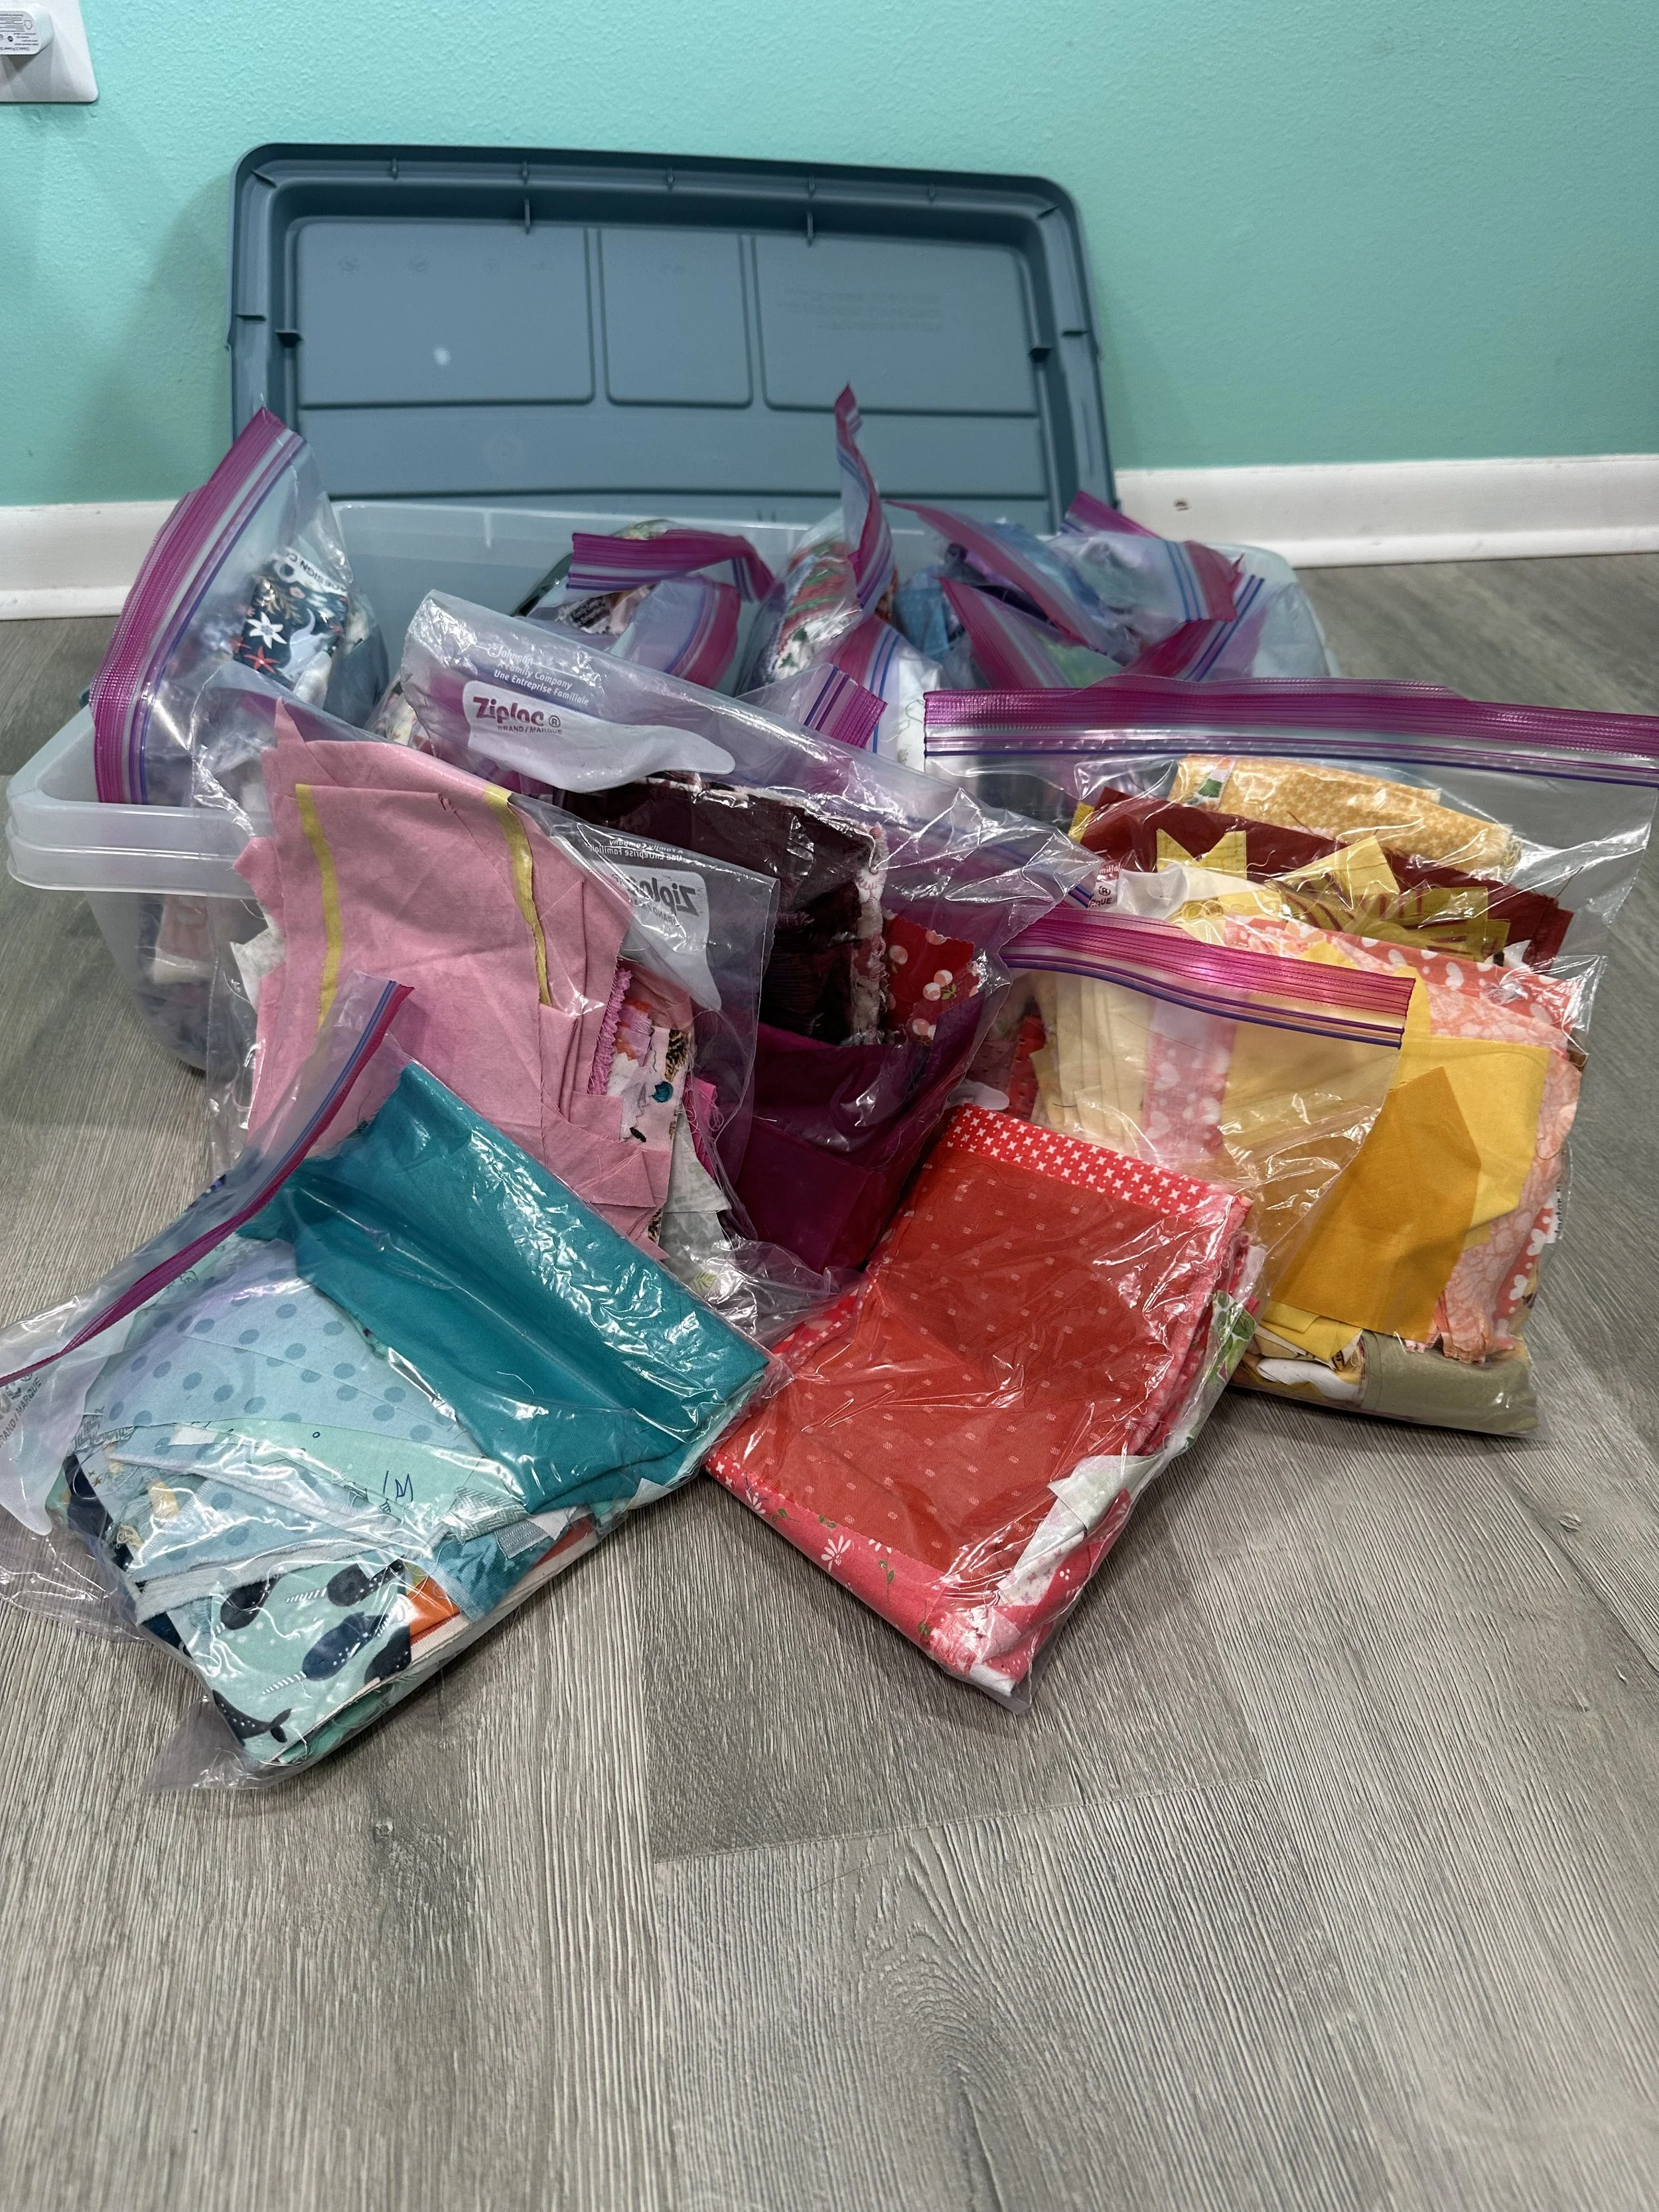
My regular scraps (2.5 inches and larger) are sub-sorted by color and theme. I would say that 80% of my scraps are divvied up by color. Each color has its own ziplock bag. If I have minimal scraps of certain colors, I may combine them; for instance, my yellow and orange scraps live in the same bag together. Some colors have multiple bags; I have a bag of blue scraps, a bag of green scraps, and a bag of “blue/green” scraps. This bag includes the teals, mints, aquas, and and other colors that I can’t decide if they are more blue or more green. I also had too many scraps of reds for one bag, so I have a bag of and dark red scraps, and a second bag for more medium value red scraps that include some deep pinks.
Sorting by color only works for fabrics that only have one color, or mostly one color. For fabrics that have multiple colors represented equally, I usually go by theme. Typically, these would be holiday fabrics, florals, local fabrics (LSU, Louisiana, Mardi Gras, etc), and animal fabrics. (FYI: I have a lot of animal themed fabrics. “Cat” is about to have its own bag.) Lastly, I have my catch-all bag of “multi-color”. It’s pretty small, but I make sure to sift through it each time I’m looking through scraps just in case something will work for what I am making. The majority of my scraps are quilting cottons, and they are all subject to the above sorting process. All other substrates have their own scrap bag that includes rayons, double gauzes, felt, canvas, etc.
Since the whole purpose of sitting down and organizing my scraps is to spend as little time as possible dealing with my scraps when I’m in the throes of a project, that means as I’m putting scraps away, they usually just get shoved willy-nilly in the appropriate bag. So for days like today, International Scrap Sorting Day, I take the time to go through each bag, make sure I don’t have anything mis-categorized, and take care to keep all the scraps of each fabric together, within the bag it belongs to.
Non-Fabric Scraps
I keep scraps of materials other than fabric as well, though I am more willing to throw away non-fabric material. If I think it’s appropriate to be stuffing, I will add scraps to my stuffing bags. (Small batting pieces are perfect for stuffing, or even the trimmed-off bits of a quilted project.) I will sew or tape together tracing paper to make large pieces. I fuse smaller pieces of interfacing to piecemeal one large piece, where appropriate. I may fall more towards the extreme side of scrap-saving, and I recognize that. I don’t think anyone should feel like this is the bar they must achieve when it comes to saving scraps, but if it inspires you to save a little bit extra, and keep a little bit more from the landfill, then I think it’s beneficial.
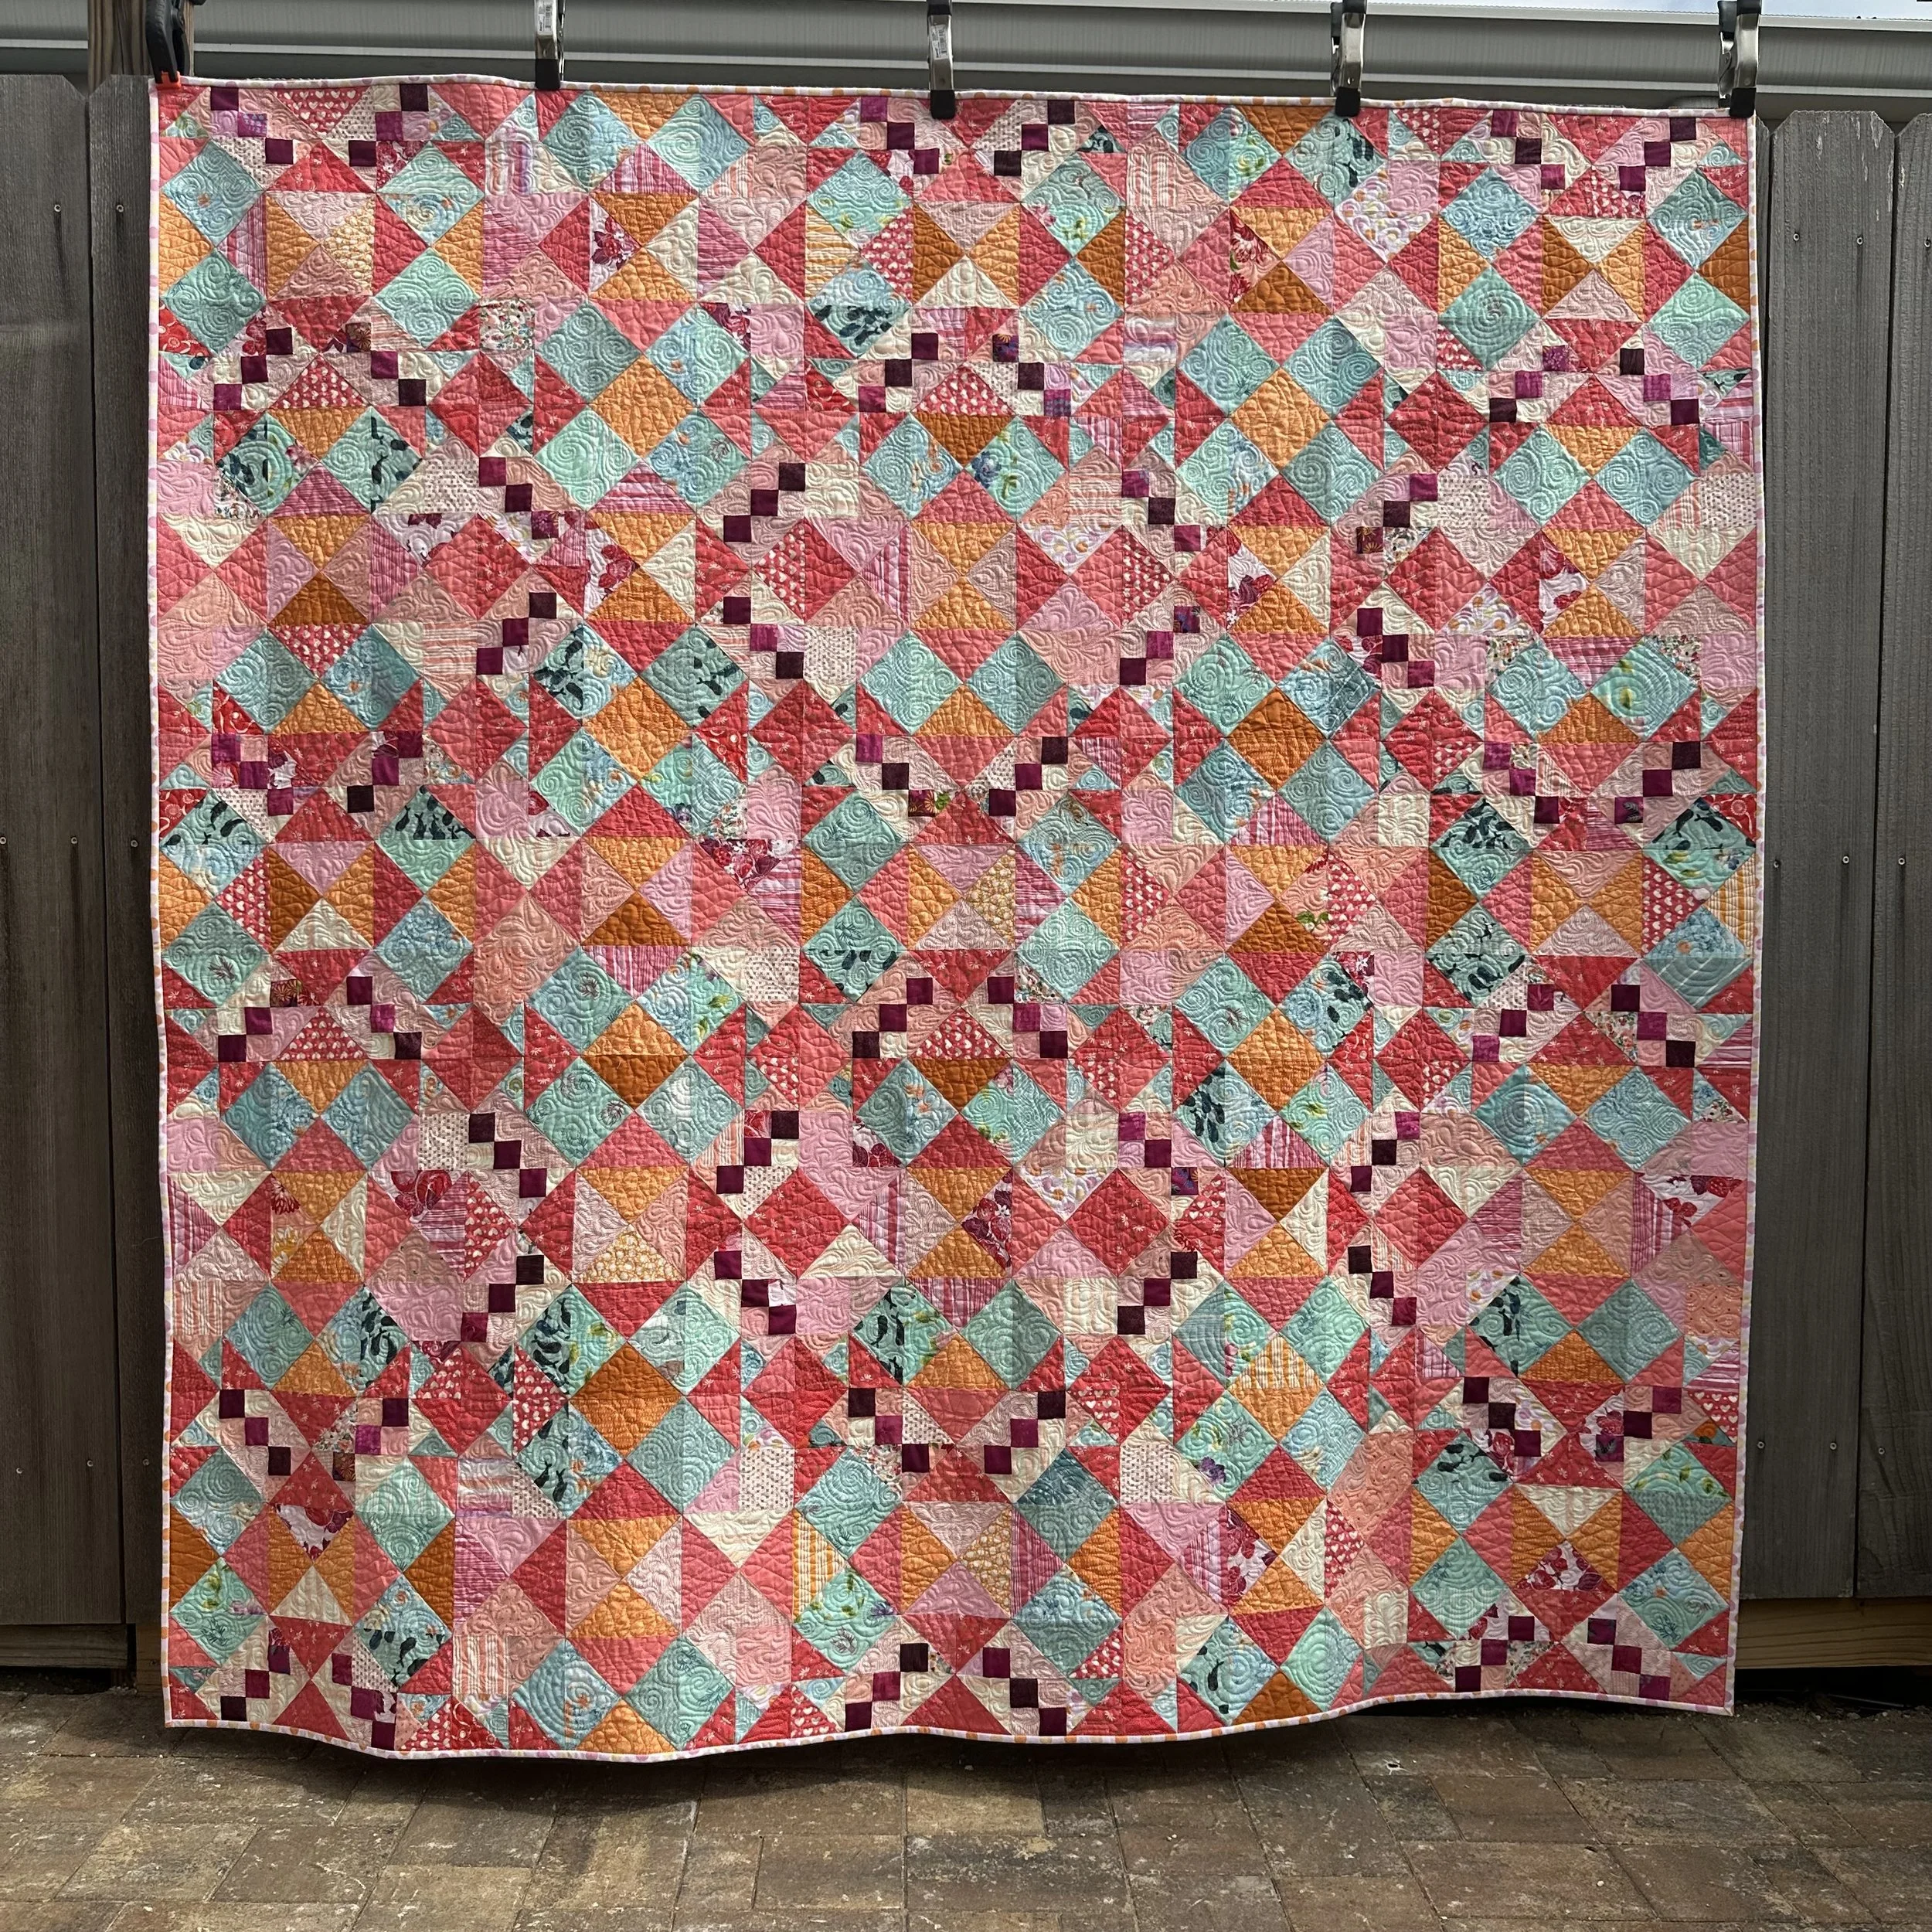
Scrappy Criss Cross Chain
An example of the big picture to using scraps is my Scrappy Criss Cross Chain quilt. I set a goal for myself this year to make at least one quilt made entirely* of scraps. (*When I say “entirely”, I mean the quilt top, but if I can manage the backing and/or binding, too, then all the better). This year, I participated in the Modern Quilt Guild’s inaugural (at least I hope there will be more) Sew-Along using Wendy Chow’s Criss Cross Chain quilt pattern, and I chose to make it entirely from my scrap bin. I can guarantee you that if my scrap bin was not organized in a way that I could find what I was looking for, I would not have completed my goal of making it scrappy. Because I had everything sorted the way I did, I was quickly able to get my scrap-based fabric pull together by doing the following:
1. Decide a color scheme,
2. Pull out the scrap-bags of those colors,
3. Assign each fabric in the pattern to a color based on the fabric requirements and the fullness of each scrap bag,
4. And get to cutting!
Scrap-bag colors used for Criss Cross Chain Quilt
I hope this inspires you to get to organizing! And again, Happy International Scrap Sorting Day!


